
Are you tired of endless group chats that are impossible to follow? Or perhaps you’re looking to create a dedicated online space for your community? Discord servers offer a fantastic solution for organized communication and community building. Whether you’re a group of friends, a gaming community, or a study group, a Discord server can revolutionize how you connect and interact.
This guide will walk you through everything you need to know to set up your own Discord server. We’ll cover what a Discord server is, why you might need one, and, most importantly, the step-by-step process to create and customize your server. Let’s dive in and create your online hub!
What Exactly is a Discord Server?
In simple terms, a Discord server is a virtual space where communities gather to communicate through text, voice, and video. Think of it as your online clubhouse. Unlike group chats that can quickly become chaotic, Discord servers offer structured communication through channels.
Imagine this: a Discord server is like having a dedicated venue for your group. Within this venue, you can have different rooms (channels) for various activities. One room might be for casual chat about daily life, while another is dedicated to planning game nights, and yet another for sharing study resources.
 Friends chatting in different rooms of a house, representing Discord channels
Discord servers bring together people from all over the internet, united by shared interests or goals. They provide a persistent space for conversations, file sharing, and community building, making it easy to stay connected and organized.
Ready to Start Your Own Server? Here’s How
Creating your own Discord server is a straightforward process. Follow these steps to get your server up and running in no time:
1. Download and Install Discord:
First, you’ll need the Discord application. You can download it for your computer or mobile device from the Discord download page. Alternatively, you can use Discord directly in your web browser by visiting Discord login page.
2. Create a Server:
Once you’re logged into Discord, look for the green “+” (Plus) button on the left-hand side of the application. Click this button to begin creating your server.
3. Choose a Server Template or Create Your Own:
Discord will ask you about the purpose of your server and offer templates to streamline the setup process. These templates provide pre-made channels based on common server types, such as “Gaming,” “Friends,” or “Community.”
For this guide, let’s select the “Friends” template as an example. However, feel free to choose the template that best suits your needs or start with a blank server if you prefer complete customization.
 Discord server creation process, step 1: choosing a template
Click on your chosen template or “Create My Own” to proceed.
4. Name Your Server and Add an Icon:
Now, it’s time to give your server a name! Choose something that reflects your community or purpose. Let’s name our example server “Study Hub” if it’s for a study group.
You can also upload a server icon to personalize your server’s appearance. Don’t worry, you can always change the server name and icon later if needed.
5. Server Creation Complete!
Congratulations! Your Discord server is now created and ready to be used. It comes with default text and voice channels based on the template you selected.
Inviting Friends to Your New Discord Home
With your server set up, the next crucial step is to invite your friends or community members to join. Discord makes this process easy:
1. Find the “Invite Friends” Button:
In the middle of your server’s channel list, you should see a prominent “Invite Friends” button. Click on it to access invitation options.
2. Generate an Invite Link or Invite Directly:
Discord provides two main ways to invite people:
- Invite Link: You can create a unique invite link that you can share via text, email, or any other platform. Anyone with this link can join your server.
- Direct Invites: Discord also allows you to directly invite your Discord friends from your friends list.
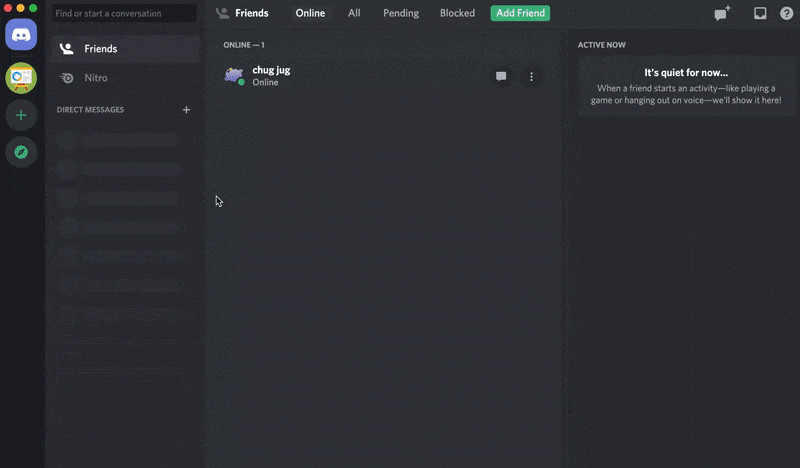
3. Accessing the Invite Menu via Dropdown:
If you don’t see the “Invite Friends” button, you can always access the invite options through the server’s dropdown menu. Click on your server’s name in the top-left corner to open the dropdown menu and select “Invite People.”
 Accessing the invite menu from the server dropdown
Share the invite link or send direct invites to get your community into your new server!
Understanding Text and Voice Channels
Discord servers are organized into channels, which are essentially different rooms for specific topics or types of communication. There are two main types of channels:
1. Text Channels:
Text channels are spaces for written communication. They function similarly to chat rooms or messaging apps. In text channels, you can:
- Send messages to other members.
- Share files, images, and links.
- Use @ mentions to notify specific members.
- Refer back to the chat history as every channel saves its conversation history.
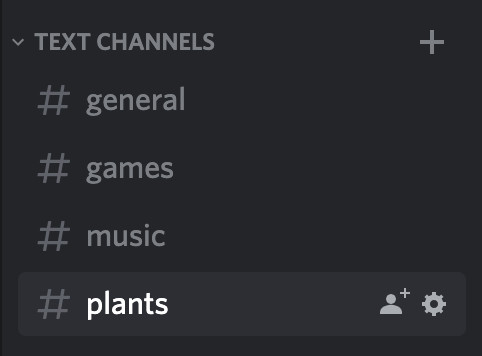
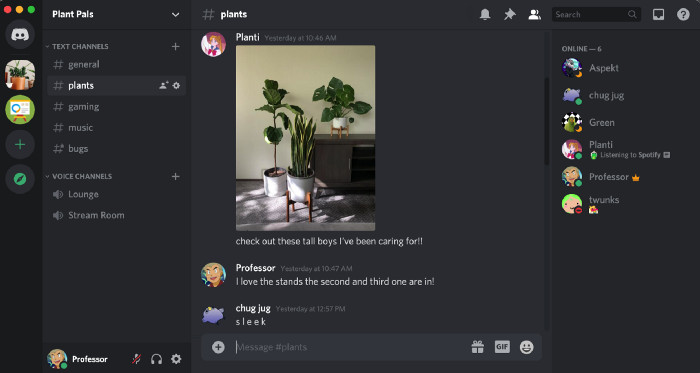
Each text channel has a name that indicates its purpose or topic. For example, a #general channel is often used for casual, off-topic conversation, while a #gaming-chat channel would be dedicated to gaming-related discussions.
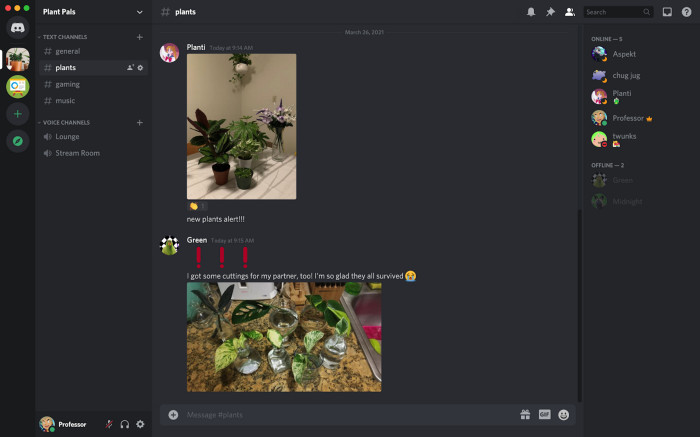 Example of text channels in a Discord server, showing different topics
Text channels provide structure to your server, preventing conversations from becoming disorganized and overwhelming.
2. Voice Channels:
Voice channels are a distinctive feature of Discord that enables real-time voice communication. Joining a voice channel is like entering a virtual room where you can talk to other members who are also in the channel. Key features of voice channels include:
- Voice Chat: Talk with other members using your microphone. No ringing or direct calls, just join and start talking.
- Video Chat: Share your video feed using your webcam for face-to-face interaction.
- Screen Sharing: Broadcast your screen to others in the voice channel, perfect for presentations, gaming, or collaborative work.
 People in a voice channel enjoying video and screen sharing
Discord voice channels can support a large number of participants, making them ideal for everything from casual hangouts to large community events. Up to 25 people can video chat simultaneously, and up to 50 can watch a screen share. Voice channels bring a dynamic and interactive element to your Discord server.
Customizing Your Server with New Channels
As your community grows and your needs evolve, you’ll likely want to add new channels to your server. Creating new channels is simple:
1. Access the “Create Channel” Menu:
Click on the server name in the top-left corner to open the dropdown menu. Select “Create Channel.” On mobile, swipe right to open the channel list, tap the server name, and choose “Create Channel.”
2. Choose Channel Type and Name:
A pop-up menu will appear, asking you to choose the channel type (Text or Voice Channel) and enter a name for the new channel.
3. Create Your New Channel:
Select the desired channel type, enter a descriptive name, and click “Create Channel.”
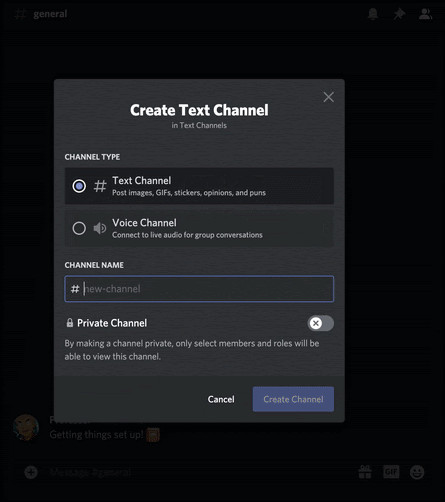 Creating a new text channel in Discord
Your new channel will now appear in your server’s channel list, ready for use.
Channel Strategy: How Many Channels are Enough?
When setting up your server, it’s important to think about channel organization. Starting with a smaller number of channels is generally recommended, especially when you’re just beginning. As your community’s activity and needs become clearer, you can always add more channels.
Avoid creating too many channels upfront, as this can make your server feel cluttered and overwhelming for new members. It’s better to start with essential channels and expand as needed.
 Example of a server with a well-organized and manageable number of channels
You can always add new channels as new topics or needs emerge. Discord servers are flexible and adaptable to your community’s growth.
You also have the option to delete channels that are no longer needed. However, be aware that deleting a channel is permanent, and all messages and content within it will be lost. Consider archiving or renaming unused channels instead of deleting them immediately.
Private Channels: Controlling Channel Access
In some cases, you might want to create channels that are only visible to specific members or groups within your server. Discord allows you to create private channels for this purpose.
1. Create a Private Channel:
When creating a new channel, you’ll see an option to make it a “Private channel.” Toggle this option to “on.”
2. Specify Channel Access:
After enabling the “Private channel” option, you can select which members or roles should have access to the channel. For smaller servers, you can simply select individual members. For larger servers, roles can be used to manage permissions more efficiently.
 Creating a private channel and selecting authorized members
3. Manage Channel Permissions:
If you need to adjust permissions for a private channel after it has been created, you can right-click on the channel name (or long-press on mobile), select “Edit Channel,” and navigate to the “Permissions” tab. Here, you can modify who has access to the channel.
Private channels are useful for moderation discussions, private team chats, or exclusive content for specific groups within your community.
Welcome to Your New Discord Community Hub!
Congratulations, you’ve successfully set up your own Discord server! Now you can start building your community, connecting with friends, and enjoying organized communication.
Discord servers offer endless possibilities for online interaction. Whether you’re hosting voice chats, sharing updates, or building a thriving community, your server is what you make it.
 A diverse group of people happily interacting in a vibrant online space, representing a Discord server
If you found this guide helpful, share it with others who might benefit from creating their own Discord server. For more advanced tips on community building, check out Discord’s guide on Best Practices for Starting a Great Community on Discord.
For further assistance and detailed information, Discord’s Help Center is a valuable resource. You can also reach out to Discord support on Twitter @discord for quick questions. Happy server building!