
Want to take your Minecraft experience to the next level? Creating your own Minecraft Java server in 2024 offers unparalleled freedom and customization. Imagine a world where you dictate the rules, invite only your closest friends, and explore unique mods and game modes together. Setting up your personal server might sound daunting, but this comprehensive guide will walk you through each step, making the process straightforward and rewarding. Forget generic public servers; it’s time to craft a tailored Minecraft universe just for you and your community.
Prerequisites: What You Need Before You Start
Before diving into server creation, ensure you have a few essentials in place. These foundational steps are crucial for a smooth setup and optimal server performance.
First and foremost, Java needs to be installed and up-to-date on your computer. Minecraft: Java Edition, as the name suggests, relies on Java to run. To check your current Java version, open Command Prompt (on Windows) and type java -version. If Java is outdated or not installed, head to the official Java website and download the latest version. Keeping Java current ensures compatibility and security for your server.
Next, you’ll need the Minecraft server software itself. This is a free download directly from the official Minecraft website. Navigate to the Minecraft download page and download the server.jar file for Minecraft: Java Edition. This .jar file is the core of your server, containing all the necessary components to run your Minecraft world.
 Minecraft server download page showing the link to download server.jar for Java Edition
(Image credit: Future) Alt text: Minecraft download page highlighting the server.jar download link for Java Edition, essential for creating a custom server in 2024.
Finally, organization is key. Create a dedicated folder on your computer specifically for your Minecraft server files. This keeps everything tidy and prevents clutter. Choose a location that’s easy to access, such as your Documents folder or a new folder directly on your C: drive. Name it something descriptive like “MinecraftServer” to easily locate it later.
Setting Up Your Minecraft Server – Step-by-Step
With the prerequisites in place, it’s time to bring your server to life. Follow these steps carefully to initialize your Minecraft server.
Initial Server Launch via Command Prompt
The most reliable way to start your Minecraft server is through the Command Prompt. This gives you direct control and visibility into the server’s operation.
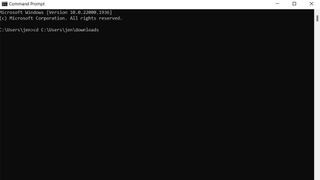
Open Command Prompt on your Windows machine. Then, navigate to the dedicated folder you created for your server files. Use the cd command followed by the folder path. For example, if your folder is in C:UsersYourNameMinecraftServer, type cd C:UsersYourNameMinecraftServer and press Enter. Replace “YourName” with your actual username and “MinecraftServer” with your folder name.
Once you’re in the correct directory within Command Prompt, initiate the server by typing the command: java -jar server.jar -nogui and press Enter. This command instructs Java to run the server.jar file. The -nogui part is optional but recommended for server performance, as it prevents a resource-intensive graphical user interface from launching initially.
 Command Prompt window showing the command to run the minecraft server jar file: java -jar server.jar -nogui
(Image credit: Future) Alt text: Command Prompt example showing the ‘java -jar server.jar -nogui’ command, used to launch a Minecraft Java server without the GUI for better performance.
Upon the first server launch, you’ll notice it doesn’t fully start. Instead, it generates several new files within your server folder. Among these is a crucial file named eula.txt. Open this file with a text editor like Notepad. Inside, you’ll find a line that reads eula=false. To proceed and agree to the Minecraft End User License Agreement, change this line to eula=true. Save and close the eula.txt file.
Relaunching the Server
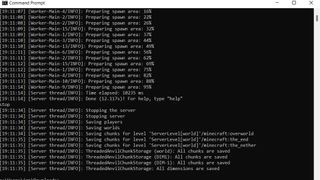
With the EULA agreement addressed, you can now properly launch your Minecraft server. Return to the Command Prompt window (still in your server folder directory) and re-enter the same command: java -jar server.jar.
This time, the server will fully initialize. You might briefly see a basic graphical user interface appear, displaying server information like memory usage and player count. This confirms your server is now running and ready for configuration.
 Minecraft server GUI showing basic server information like memory usage and player list after successful launch
(Image credit: Future) Alt text: Screenshot of the Minecraft server’s basic GUI, displaying server performance metrics and connected players after successful initialization.
Optimizing Server Startup with a Batch File
While launching the server via Command Prompt works, creating a batch file streamlines the process and offers more control over server settings at startup. A batch file is essentially a script that automates command execution.
For long-term server operation, a batch file is a more efficient and user-friendly solution. Here’s how to create one:
Right-click within your Minecraft server folder, hover over “New,” and select “Text Document.” Name the file something memorable like “StartServer.” Open this new text file using Notepad or any text editor.
Inside the text file, type the following command:
java -Xmx2048M -Xms2048M -jar server.jar nogui
pause
Let’s break down this command:
java: Invokes the Java runtime environment.-Xmx2048M: Sets the maximum RAM (Random Access Memory) the server can use to 2048MB (2GB). Adjust “2048M” as needed based on your computer’s RAM and server demands. Allocating sufficient RAM is vital for server performance, especially with multiple players or mods.-Xms2048M: Sets the initial RAM allocation to 2048MB. It’s generally recommended to set-Xmsand-Xmxto the same value to prevent the server from dynamically requesting more memory during runtime, which can cause lag.-jar server.jar: Specifies the executable server file.nogui: Again, this prevents the initial GUI from launching, conserving server resources.pause: This command keeps the Command Prompt window open after the server starts, allowing you to see any error messages or server logs directly in the window. This is helpful for troubleshooting.
 Text editor showing the content of a batch file for starting a Minecraft server, including memory allocation parameters
(Image credit: Future) Alt text: Example of a Minecraft server startup batch file in a text editor, demonstrating the command structure with Java memory settings and ‘nogui’ option.
After typing the command, save the file. Now, rename the file extension from .txt to .bat. Windows will display a warning about changing file extensions; click “Yes” to confirm.
To start your server, simply double-click the newly created .bat file (e.g., “StartServer.bat”). The server will launch via Command Prompt, utilizing the settings you defined in the batch file.
Configuring Your Minecraft Server: server.properties
The server.properties file, generated during the initial server launch, is your central control panel for customizing almost every aspect of your Minecraft server. Open this file with a text editor to fine-tune your server settings.
Here are some of the most important properties you can configure:
gamemode: Sets the default game mode. Options includesurvival,creative,adventure, andspectator.spawn-protection: Defines the radius (in blocks) around the spawn point where players cannot break blocks. Set to0to disable spawn protection entirely.allow-nether: Boolean (trueorfalse) to enable or disable access to the Nether dimension on your server.difficulty: Sets the game difficulty level:peaceful,easy,normal, orhard.pvp: Enables or disables Player versus Player combat (trueorfalse).max-players: Determines the maximum number of players allowed on the server simultaneously. Consider your server’s RAM and processing power when setting this value.level-seed: Allows you to specify a world seed for world generation. Leave blank for a randomly generated world.motd: Sets the “Message of the Day” that players see in their Minecraft server list before joining. Use this to display server rules, welcome messages, or any other information. Use color codes (e.g.,§afor green) for formatting.query-port: The port used for server querying. The default is25565. You generally don’t need to change this unless you have specific port conflicts.
 Minecraft server properties file opened in a text editor showing various configurable settings like gamemode and difficulty
(Image credit: Mojang/Microsoft) Alt text: Screenshot of the server.properties file, showcasing key configuration options for a Minecraft Java server, including gamemode, difficulty, and player limits.
After modifying any settings in server.properties, save the file and restart your server for the changes to take effect.
Port Forwarding for Online Access
If you want players outside your local network (i.e., friends connecting over the internet) to join your server, you need to set up port forwarding on your router. Port forwarding directs incoming network traffic on a specific port to your computer running the server.
Port forwarding procedures vary significantly depending on your router’s brand and model. Consult your router’s documentation or search online for specific instructions for your router. Websites like PortForward.com offer guides for numerous router models.
The default port for Minecraft servers is 25565. You’ll need to forward TCP port 25565 to your computer’s local IP address.
To find your computer’s local IP address, open Command Prompt and type ipconfig. Look for “IPv4 Address” under your active network adapter (usually “Ethernet adapter Ethernet” or “Wireless LAN adapter Wi-Fi”). This is your local IP.
 Command Prompt window showing the ipconfig command and highlighting the IPv4 Address, needed for port forwarding configuration
(Image credit: pixabay) Alt text: Command Prompt displaying the result of ‘ipconfig’ command, emphasizing the IPv4 Address which is crucial for setting up port forwarding on a router.
In your router’s port forwarding settings, you’ll typically need to enter:
- Port Range: 25565-25565 (or just 25565 for both external and internal ports if prompted separately)
- Protocol: TCP
- Internal IP Address/Destination IP: Your computer’s local IPv4 address (found using
ipconfig).
Security Warning: Sharing your public IP address allows others to connect to your home network. Only share it with trusted individuals. For enhanced security and ease of use, consider using dedicated Minecraft server hosting services, especially if you plan to host a public server with many players.
Joining Your Minecraft Server
Once your server is running and port forwarding is configured (if needed for external access), joining is straightforward.
Launch Minecraft: Java Edition and navigate to the “Multiplayer” menu. Click “Add Server.”
Enter a server name (anything you like) and in the “Server Address” field, enter your public IP address if you want friends outside your network to join. If players are on the same local network as you, they can use your local IP address instead. You can find your public IP address by searching “what is my IP” on Google.
Click “Done.” Your server should now appear in your server list. Select it and click “Join Server.”
 Minecraft multiplayer server list showing a custom server added and ready to join
(Image credit: Mojang/Microsoft) Alt text: Minecraft multiplayer server menu with a custom server entry, ready to be joined by players, showing the server name and address fields.
If you used the server GUI, you can verify your connection by checking the player list within the server window. Congratulations, you’ve successfully created and joined your own Minecraft Java server in 2024! Now you can customize your server further, invite your friends, and embark on countless adventures together in your personalized Minecraft world.