Craving rich, creamy homemade chocolate ice cream but don’t have an ice cream machine? This magic chocolate dream ice cream recipe is your answer! With just 10 minutes of prep time and no churning required, you can indulge in a delicious frozen treat. Freezing this no-churn ice cream in Single Serve Ice Cream Cups like mason jars or small freezer-safe bowls makes it incredibly convenient for individual portions, easy serving, and enjoying a perfect dessert anytime.
Step-by-Step Guide to Making Magic Chocolate Dream Ice Cream
Step 1: Gather Your Ingredients
Before you begin, assemble all the necessary ingredients. For this delightful no-churn chocolate ice cream, you will need: heavy cream, a pinch of salt, vanilla extract, sweetened condensed milk, instant coffee or espresso powder (for enhancing the chocolate flavor), and bittersweet chocolate.
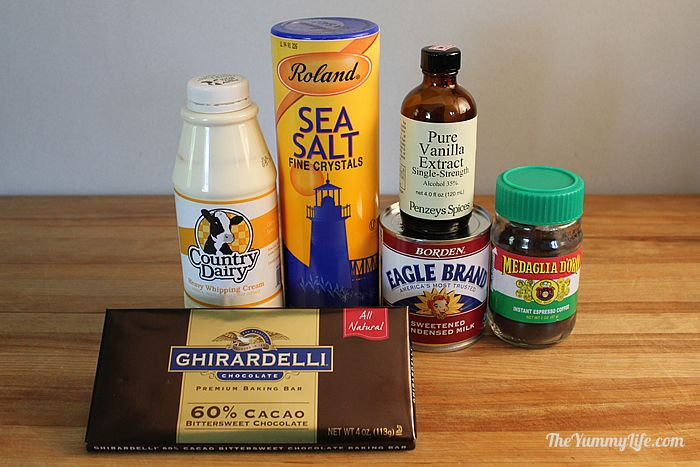 Ingredients for no-churn chocolate ice cream including heavy cream, chocolate, and sweetened condensed milk
For freezing your ice cream in individual portions, consider using single serve ice cream cups. Mason jars and Libbey bowls, especially those with lids, are excellent choices. These single serve ice cream cups are not only practical but also add a charming touch to your homemade dessert. Here are a few options for single serve ice cream cups:
Step 2: Prepare Parchment Paper for Freshness
If you plan to freeze your ice cream for more than a day, it’s recommended to cover each serving with parchment paper (or wax paper). This simple step helps maintain the surface freshness and prevents ice crystals from forming on your single serve ice cream cups. To do this, trace the rim of your chosen single serve ice cream cups onto parchment paper and cut out circles slightly larger than the rim.
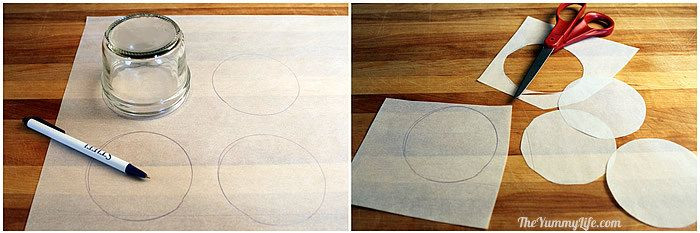 Parchment paper circles cut out to cover individual ice cream servings
Step 3: Dissolve Instant Coffee to Enhance Chocolate Flavor
In a small bowl, dissolve the instant coffee or espresso powder in a tablespoon of hot water. Stir well and set aside. Don’t worry, the ice cream won’t taste like coffee! The purpose of the coffee is to intensify and deepen the chocolate flavor, making your no-churn ice cream even more decadent.
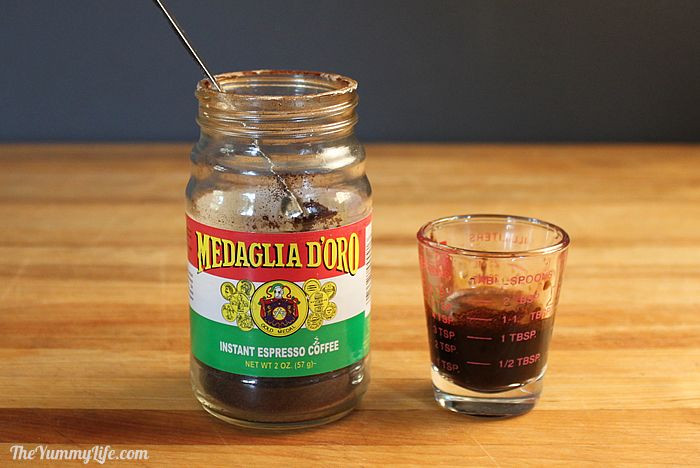 Dissolved instant coffee in a measuring glass to enhance chocolate ice cream flavor
Step 4: Finely Chop the Bittersweet Chocolate
Chop the bittersweet chocolate into small, fine pieces. This ensures it will melt quickly and evenly. Place the finely chopped chocolate in a large microwave-safe bowl.
Step 5: Combine Chocolate with Sweetened Condensed Milk and Flavorings
Add the sweetened condensed milk, vanilla extract, salt, and the dissolved instant coffee/espresso mixture to the bowl with the chopped chocolate. Make sure you only use half a cup of sweetened condensed milk, not the whole can!
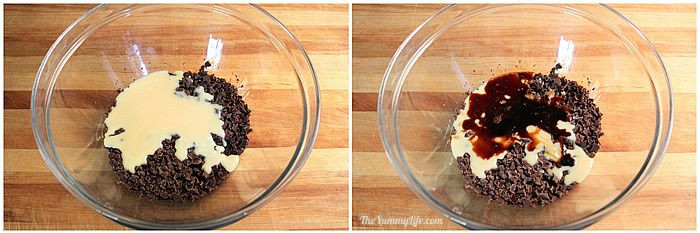 Sweetened condensed milk and other ingredients added to chopped chocolate in a bowl
Step 6: Melt the Chocolate Mixture
Microwave the mixture at full power for 10 seconds. Stop and stir thoroughly. Continue microwaving in 10-second intervals, stirring after each interval, until the chocolate is just melted and the mixture is smooth. Be careful not to overheat. Once melted, set the chocolate mixture aside to cool slightly while you prepare the whipped cream.
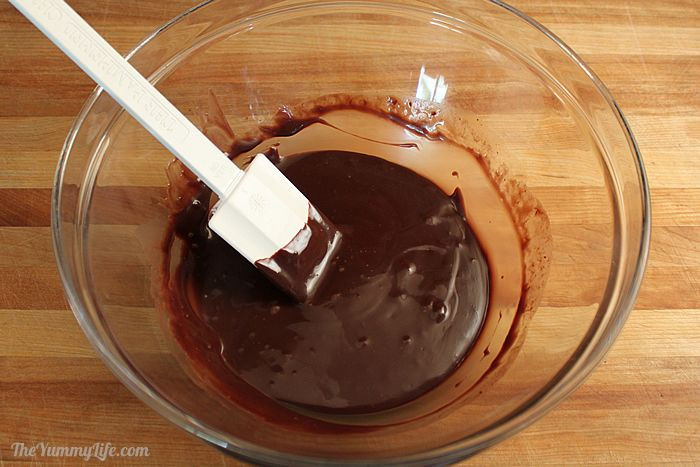 Melting chocolate mixture in a microwave-safe bowl for no-churn ice cream
Step 7: Whip the Heavy Cream to Soft Peaks
In a separate bowl, pour in the cold heavy cream. Using an electric mixer, whip the cream until soft peaks form. Soft peaks are achieved when you lift the beaters or a spoon from the whipped cream, and the peaks gently fold over at the top instead of standing straight up.
Step 8: Incorporate Whipped Cream into Chocolate Mixture – Part 1
Take about one-third of the whipped cream and add it to the slightly cooled chocolate mixture. Use a whisk to combine the two until they are completely incorporated. This lightens the chocolate mixture and makes it easier to fold in the remaining whipped cream.
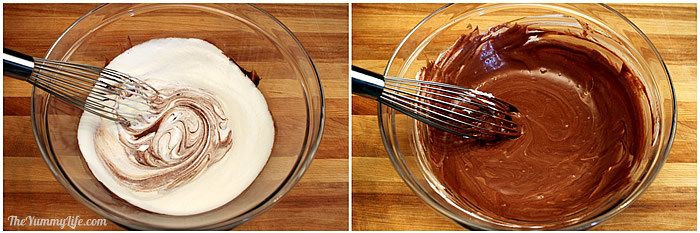 Whisking a portion of whipped cream into the melted chocolate mixture
Step 9: Gently Fold in Remaining Whipped Cream
Now, add the remaining whipped cream to the chocolate mixture. Switch from a whisk to a rubber spatula for this step. Gently fold the whipped cream into the chocolate base. Folding is crucial for maintaining a light and airy texture in your no-churn ice cream. Avoid overmixing; fold just until everything is combined and no streaks of whipped cream remain.
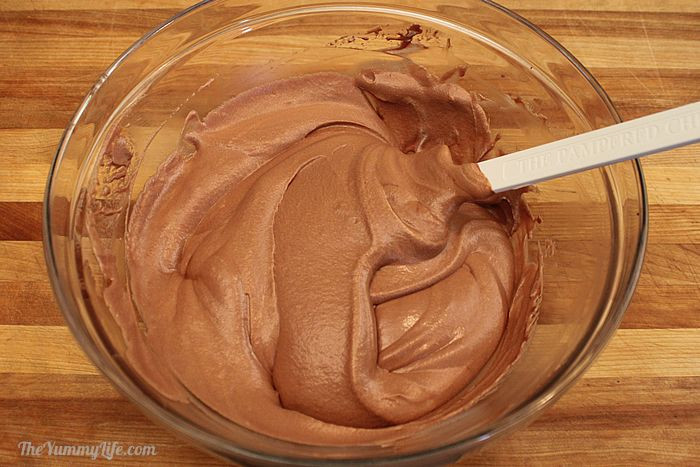 Folding remaining whipped cream into the chocolate mixture with a spatula
Step 10: Spoon into Single Serve Ice Cream Cups
Spoon the prepared ice cream mixture into your chosen single serve ice cream cups. This recipe batch should fill approximately three half-pint mason jars and two 6.5 oz Libbey bowls, or similar sized single serve ice cream cups.
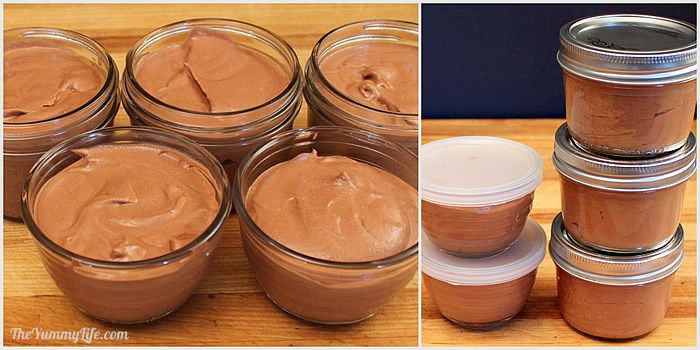 Spoon mixture into individual mason jars for single serve ice cream
Step 11: Freeze for at Least 6 Hours
Cover your single serve ice cream cups with lids or parchment paper circles and freeze for a minimum of 6 hours. For the best texture and flavor, allow the ice cream to freeze completely, which may take longer depending on your freezer and the size of your single serve ice cream cups. This ice cream can be stored in the freezer for up to 2 weeks.
Step 12: Cover with Parchment Paper for Longer Storage
If you are not planning to eat the ice cream on the same day it’s fully frozen, remove the single serve ice cream cups from the freezer briefly, place the parchment paper circles directly on the surface of the ice cream in each cup, and then return them to the freezer. This extra layer of protection helps prevent ice crystals and keeps the ice cream fresh for longer.
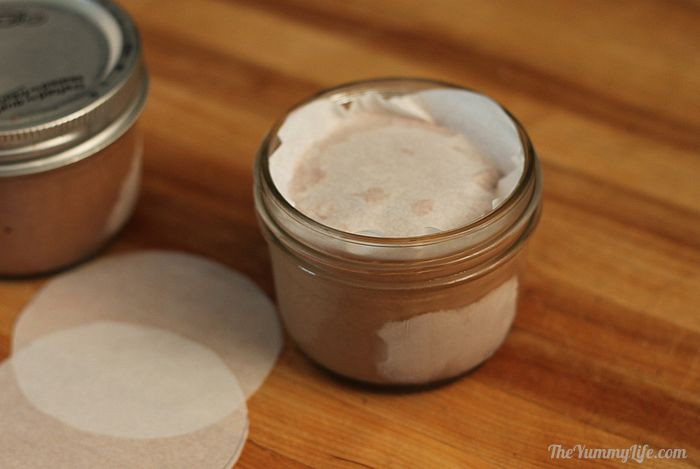 Parchment paper placed on top of frozen ice cream in individual containers for freshness
Enjoy the convenience of having individual servings of delicious homemade chocolate ice cream ready in your freezer. These single serve ice cream cups are perfect for a quick dessert fix or for portion control.
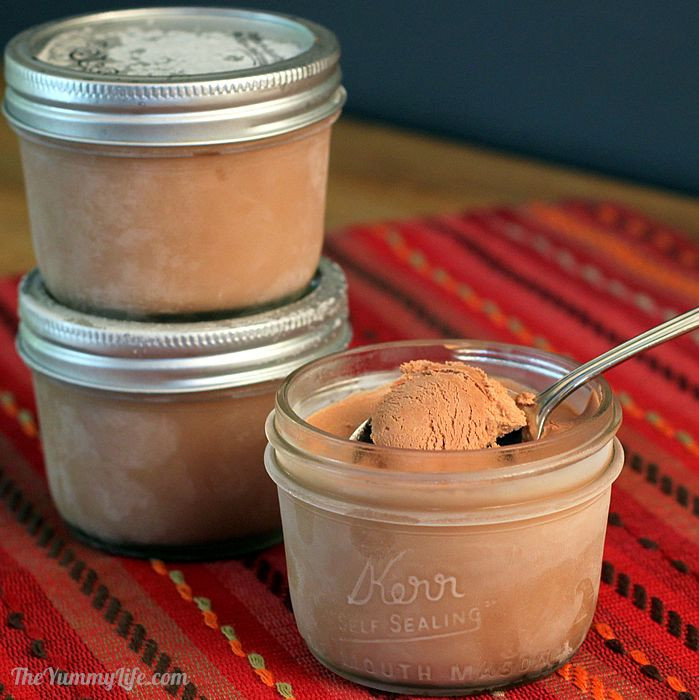 Individual servings of no-churn chocolate ice cream in mason jars ready to eat
Serving Suggestions for Your Single Serve Ice Cream Cups
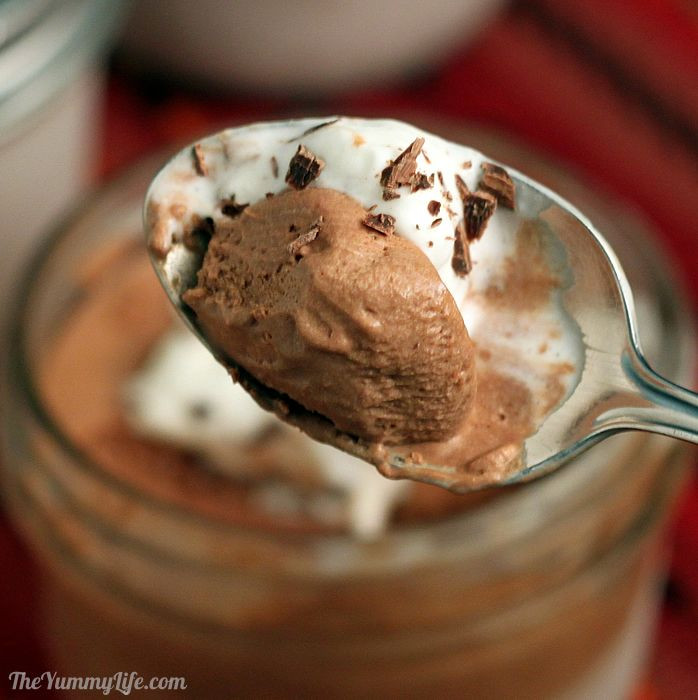
Get creative with toppings! Serve your no-churn chocolate ice cream straight from the single serve ice cream cups or elevate them into delightful sundaes. Add a dollop of whipped cream, chocolate shavings (easily made with a vegetable peeler and a chocolate bar), hot fudge or caramel sauce, chopped nuts, fresh fruit, or any of your favorite ice cream toppings.
This homemade no-churn chocolate ice cream boasts a light, creamy texture and an intensely rich chocolate flavor. It truly is a chocolate dream! Making delicious, creamy ice cream at home without a machine is pure magic, especially when enjoyed in perfectly portioned single serve ice cream cups.
 Close up of creamy no-churn chocolate ice cream in a glass bowl
Experience the magic of homemade ice cream and make it a yummy day!
 Zoomed in single serve of no-churn chocolate ice cream in a jar
- Monica
Craving vanilla? Try this Smooth and Creamy Vanilla Bean Ice Cream recipe.
Print Recipe Pin Recipe on Pinterest
Link to Recipe
Magic Chocolate Dream Ice Cream – No Ice Cream Machine Needed!
By Monica
Servings: Makes 1 quart
Ingredients
- 1 teaspoon instant coffee or espresso powder
- 1 tablespoon hot water
- 4 oz. bittersweet chocolate, finely chopped
- 1/2 cup canned sweetened condensed milk
- 1/2 teaspoon vanilla extract
- Pinch of salt
- 1-1/4 cups cold heavy cream
Directions
- In a small bowl, stir instant coffee/espresso and hot water until dissolved (approx. 5 minutes).
- In a large microwave-safe bowl, combine chocolate, sweetened condensed milk, vanilla, salt, and dissolved coffee mixture.
- Microwave at full power for 10 seconds, then stir. Repeat in 10-second intervals until melted (about 1 minute total). Let cool.
- In a separate bowl, whip heavy cream with an electric mixer until soft peaks form.
- Add 1/3 of whipped cream to the chocolate mixture and whisk until combined.
- Gently fold in the remaining whipped cream until just combined.
- Spoon into a large container or single serve ice cream cups.
- Cover and freeze for at least 6 hours and up to 2 weeks.
- Tip: For longer storage, cover the surface with parchment paper after freezing.
- Add toppings as desired.
Nutritional Information (per 1/2 cup serving): 162 calories, 10.2g fat, 6.7g sat. fat, 28mg cholesterol, 34mg sodium, 111mg potassium, 15.5g carbs, 14.2g sugars, 2.4g protein; Weight Watchers SmartPoints: 8 (based on Cook’s Country recipe).
Print Recipe Pin Recipe on Pinterest
You might also enjoy these mason jar recipes: