
Welcome back to the blog! Today, I’m thrilled to share a fantastic DIY project that’s both fun and functional: wood Party Serving Trays. If you’re looking to add a personal touch to your home entertaining, or simply want stylish and unique ways to serve appetizers, you’ve come to the right place. We’ll be creating beautiful wood party serving trays, and even a special Grinch-themed Christmas Eve tray for a touch of holiday whimsy.
Last year, I crafted a rustic wood table runner that I absolutely adore. This year, I wanted to expand on that rustic charm and create some custom serving pieces. These wood party serving trays are not only unexpected and a little different, which I love, but they’re also a wonderful way to present appetizers and treats for family and guests. Imagine serving your Thanksgiving or Christmas appetizers on these handcrafted trays!
To give them a unique and practical touch, we’ll be painting the tops with chalkboard paint. This allows you to label your delicious offerings directly on the tray! It’s important to note that chalkboard paint is not food safe, so you’ll need to use bowls or plates for serving food directly, as shown in the photos later in this post.
These DIY party serving trays are surprisingly easy to make and the results are just lovely. Below, you’ll find a complete step-by-step tutorial, and for those who prefer visual learning, I’ve also included a step-by-step video tutorial.
For those of you who are Grinch fans, the Grinch cut files for the Christmas Eve tray are available in my Etsy shop, and the versatile party tray cut files are available for free in my resource library.
If you’re enthusiastic about creating your own Grinch crafts and decor, you’re definitely in the right place!
Let’s dive into making these fantastic party serving trays!
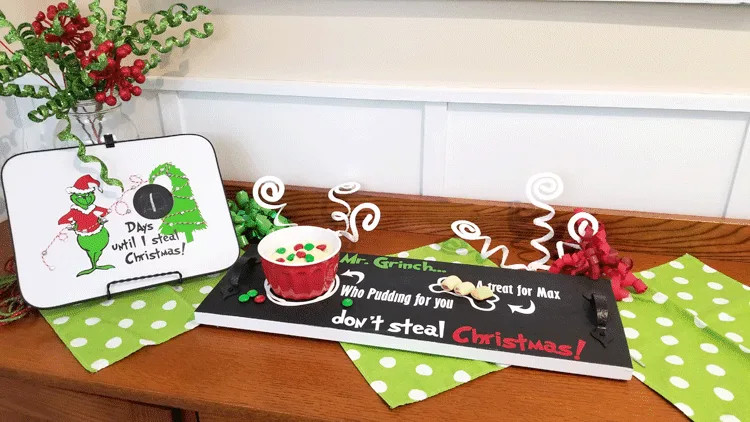
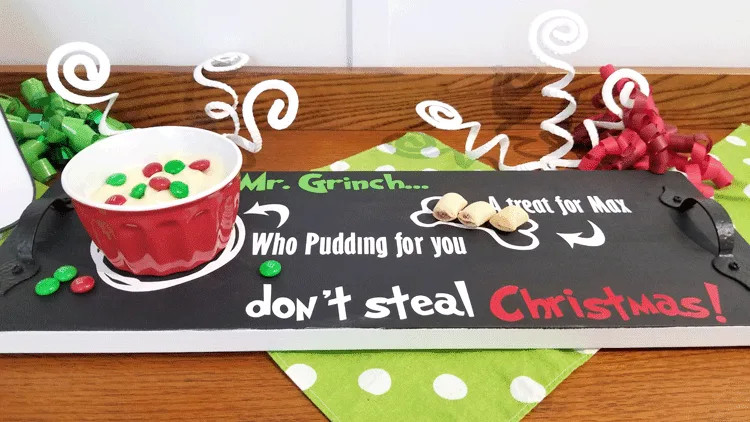
 Charming Grinch themed Christmas Eve wood serving tray, designed to playfully deter the Grinch from stealing Christmas with an offering of Who Pudding and a snack for Max.
Creating Your Own Wood Party Serving Trays: A Step-by-Step Guide
For a complete visual guide to making these wood trays, feel free to watch the video tutorial anytime. The video covers both the general buffet serving trays and the special Grinch tray, as the basic construction method is the same for both.
You’ll find a comprehensive, printable list of all the materials you’ll need towards the end of this post!
Step 1: Preparing the Wood Boards
To start, I used a long 1×8 inch wood board which was ideal for this project. From this single piece, I was able to cut three 24-inch sections.
My aim was to create two versatile appetizer trays suitable for any occasion. Thanksgiving and Christmas are the major holidays I typically host, and this year, with more guests invited, having extra serving options is especially helpful.
Appetizers are always a hit when you have a hungry crowd, and what better way to serve them than on a stylish and unique DIY tray?
After cutting the boards to size, the next crucial step is sanding. I used a palm sander to ensure a smooth surface.
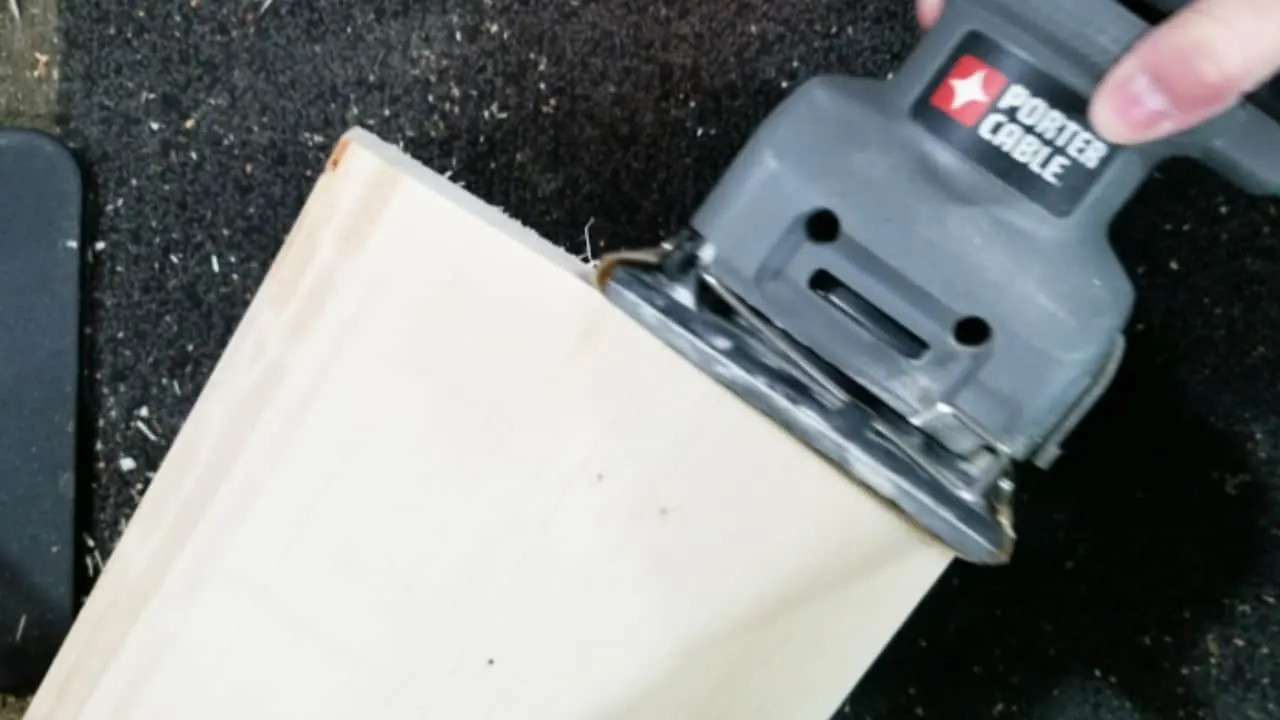 Close-up view of sanding wood pieces to prepare them for crafting wood party serving trays, using a palm sander for a smooth finish.
Smooth boards are essential for both painting and staining. If you don’t have a palm sander, renting one is an option, or perhaps borrowing one from a friend. If neither is feasible, regular sandpaper works just fine. For easier handling, staple a piece of sandpaper to a wood block – this makes sanding more comfortable and efficient.
Remember to sand not just the top surface, but also the sides and bottom of each wood piece to ensure a uniformly smooth finish.
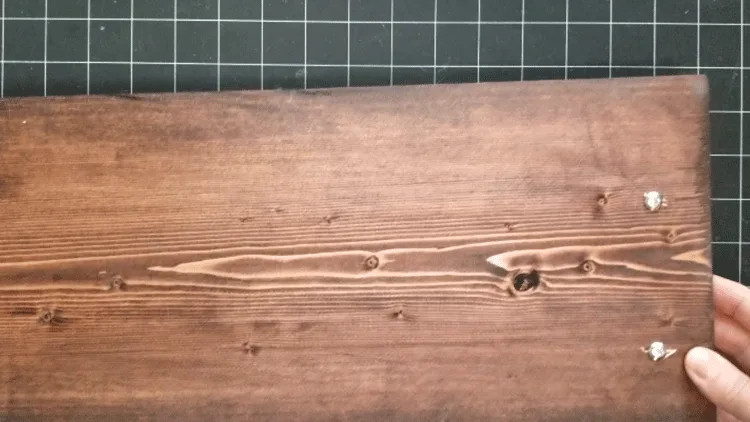
Next comes the paint and stain. I chose to stain two of the trays to highlight the natural wood grain and used white chalk paint for the Grinch tray to achieve a different aesthetic.
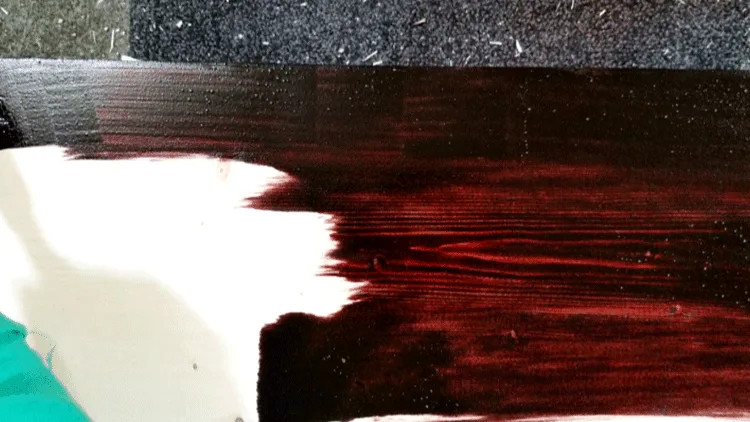 Applying wood stain to the sides of a wooden serving tray, enhancing the natural wood grain for a rustic look.
When applying stain, I prefer using a foam brush for even coverage. After brushing on the stain, wipe off the excess with a soft cloth to achieve the desired depth of color.
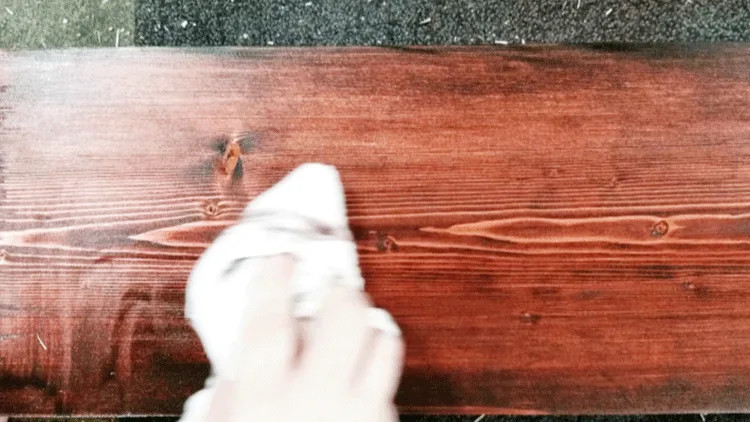 Wiping excess wood stain from a serving tray with a cloth, revealing the enhanced wood texture and grain.
For the Grinch tray, I applied two coats of white chalk paint to ensure full coverage and a vibrant base for the design.
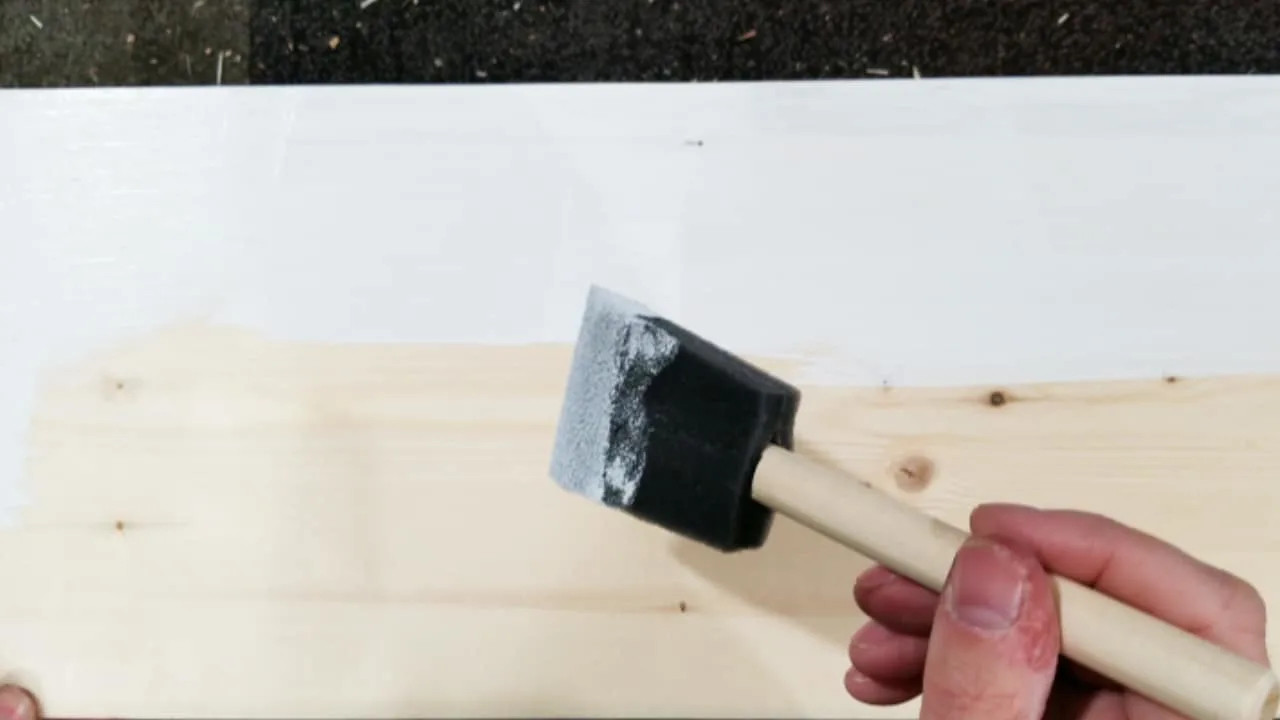 Brushing white chalk paint onto a sanded wood piece for a Grinch themed serving tray, building up layers for a solid color finish.
After painting and staining, allow the boards to dry completely. This is crucial before moving on to the next step.
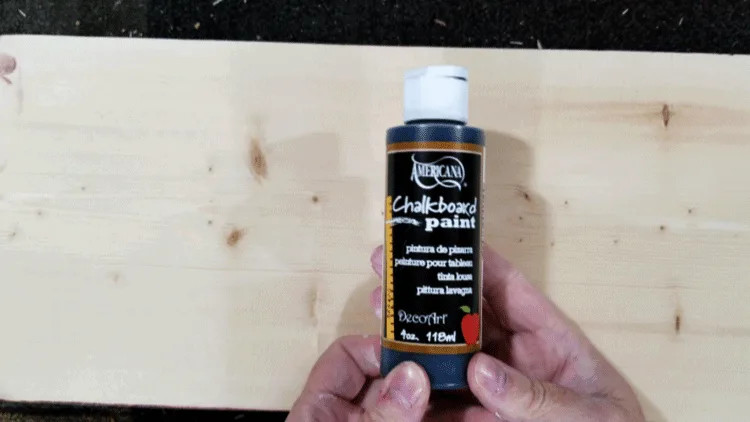
Step 2: Applying Chalkboard Paint
To give these party serving trays their unique chalkboard feature, I used chalkboard paint on the top surfaces of all three trays. The chalkboard surface is fantastic for writing the names of cheeses, appetizers, or even drink pairings directly on the tray, adding a fun and functional element.
Typically, only one coat of chalkboard paint is needed for good coverage.
 Applying chalkboard paint to the top of wood trays, creating a functional surface for labeling food items at parties.
Step 3: Cutting Out the Vinyl Designs
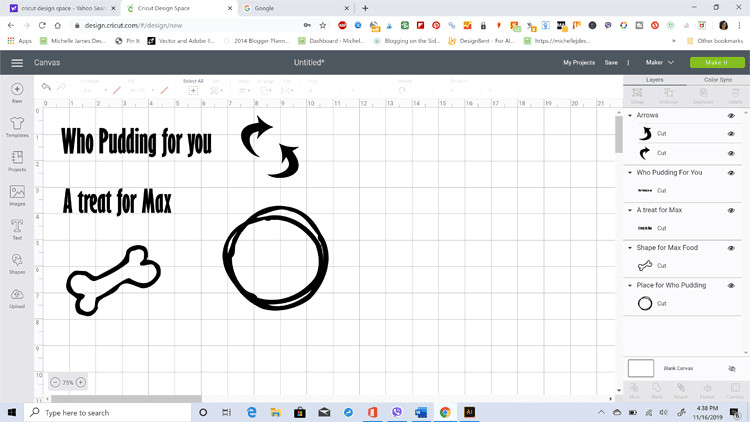
While the chalkboard paint is drying, this is the perfect time to prepare your vinyl designs. I used my Cricut Maker for cutting the designs, ensuring clean and precise lines.
You can find the free buffet tray designs in my resource library – a fantastic bonus for my readers! For the Grinch Christmas Eve tray design, those cut files are available for purchase in my Etsy store.
Here are screenshots from my Cricut Design Space showing the designs ready to be cut.
For these projects, I used StyleTechCraft vinyl. The white vinyl has a matte finish, while the red and green are glossy, providing a nice contrast and visual appeal.
 Screenshot of Cricut Design Space showing the Grinch Tray design layout before cutting, ready for vinyl crafting on a wood serving tray.
 Screenshot from Cricut Design Studio displaying the party tray design setup, prepared for cutting intricate vinyl details for custom serving trays.
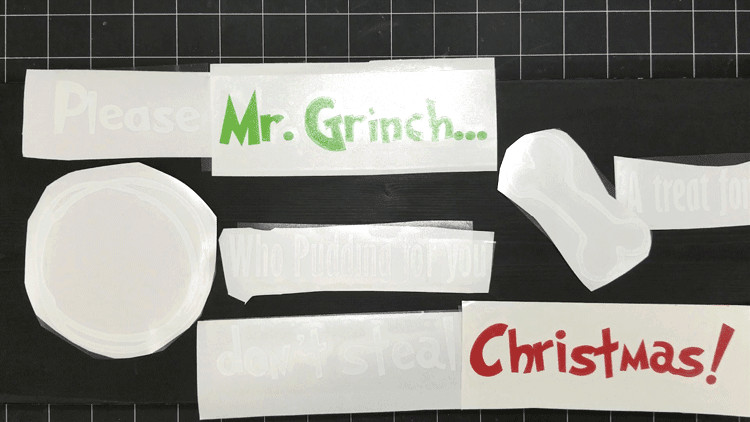
Once all the vinyl pieces are cut, apply transfer tape to each design. This will make it easy to transfer them onto the wood trays in the next step.
Step 4: Arranging Your Design Layout
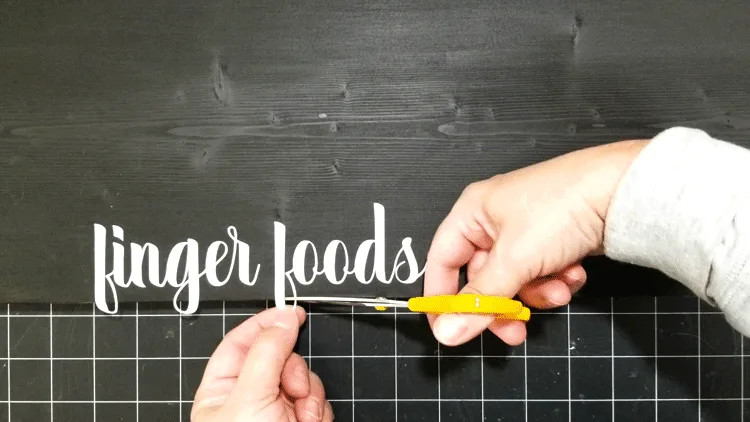
The wood party serving trays with simple text like “Finger Foods” and “Cheese Please” were straightforward in terms of design layout. I wanted the lettering to be positioned near the bottom edge of the tray for a specific look.
However, I encountered a slight challenge. Letters that extend below the baseline, such as ‘f’s and ‘p’s, made it tricky to place the words exactly where I initially envisioned them.
 Demonstrating the placement of vinyl letters 'Finger Foods' on a wood serving tray, planning the layout for optimal visual appeal.
In a bit of a creative rebellion, I decided to place the words exactly where they looked best to my eye and then trimmed off the descending parts of those letters that went over the edge.
 Detail of trimming the lower parts of vinyl letters on a serving tray, customizing the design for a perfect fit and unique style.
Some purists might disapprove, but that’s the beauty of DIY! You have the freedom to customize and do what you love. You could also size the words slightly smaller or choose a different placement altogether.
I personally love the “off the page bleed” effect, so this worked perfectly for my style.
The Grinch tray, with its more complex design, required a little more careful positioning to ensure all elements were balanced and visually appealing.
Get the Grinch SVG Cut file on Etsy
 Final design layout of cut vinyl on the Christmas Eve Grinch serving tray, showcasing the whimsical and festive arrangement before application.
This final layout is what I decided to go with for the Grinch tray.
Step 5: Applying the Vinyl to the Trays
Once I was happy with the layout for each tray, it was time to apply the vinyl designs.
If you don’t own a cutting machine, don’t worry! You could always use the chalkboard surface to hand-draw or trace your own Grinch-inspired design for a truly unique, hand-crafted touch.
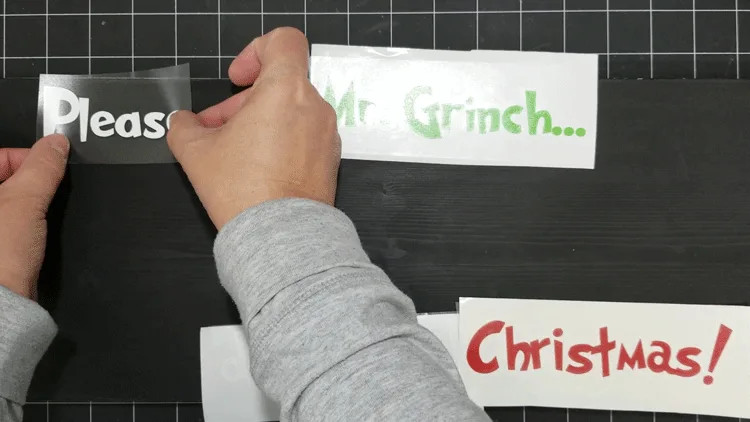 Removing transfer tape from vinyl letters applied to a wood serving tray, carefully revealing the adhered design.
 Peeling away transfer tape from vinyl lettering on a serving tray, ensuring clean adhesion of the design to the chalkboard surface.
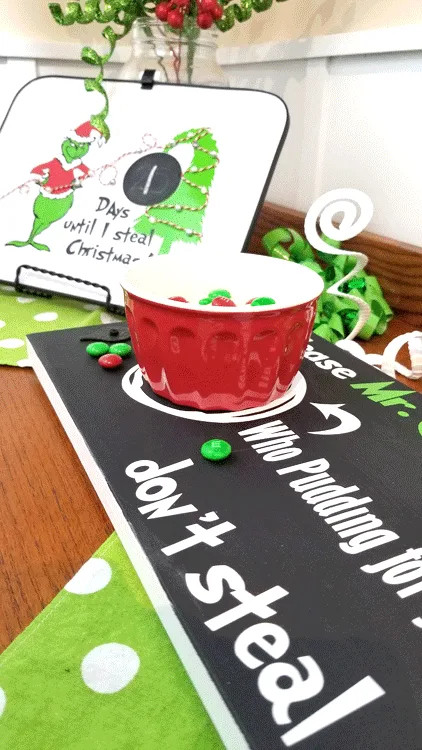
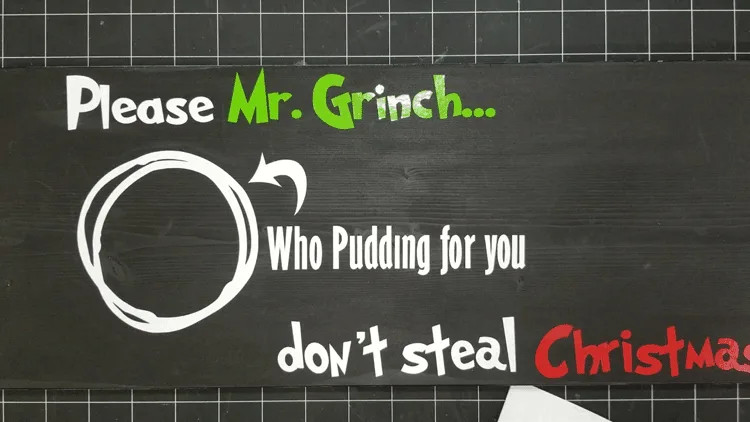 Close-up of vinyl text and a circular design on a wood tray, indicating the placement for 'Who Pudding' in a Grinch themed layout.
Step 6: Adding the Finishing Touches: Handles and Felt Pads
The final step to complete these wood party serving trays was adding the handles. My husband, Jeff, kindly helped with this part. He drilled pilot holes and then securely screwed the handles onto each tray.
The handles I used were a garage sale find! I later realized that some of them required screws to be inserted from the back, which wasn’t ideal initially, but we made it work.
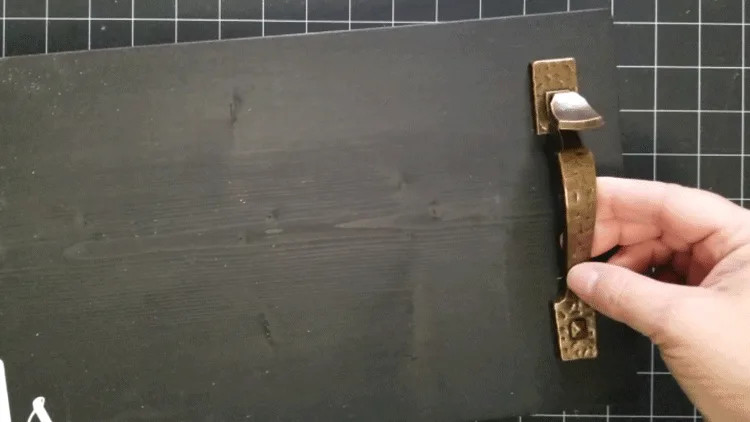 Top view of a wood serving tray showing attached handles, enhancing functionality and rustic charm.
 Underside of a wood tray revealing screws securing handles, with felt pads added to protect surfaces.
Since the screws protruded slightly on the bottom, I decided to add felt pads to the base of each wood tray. This turned out to be a brilliant idea, even if the screws hadn’t been an issue.
The felt pads slightly elevate the trays, which I found aesthetically pleasing, and, crucially, they protect any surface the trays are placed on from scratches.
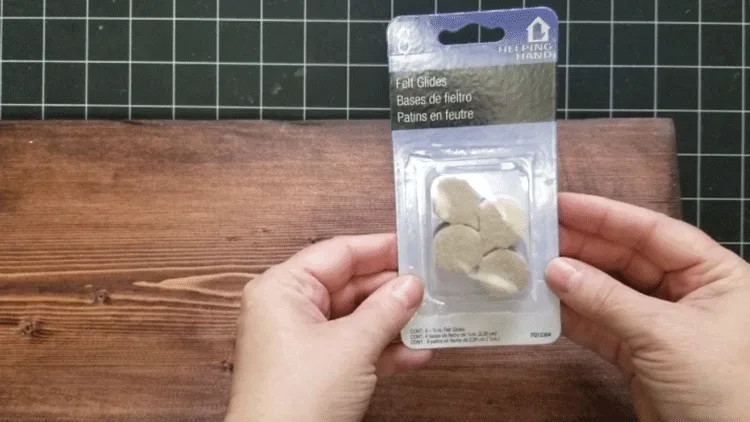 Package of felt pads ready to be applied to the bottom of wood serving trays, adding a protective layer.
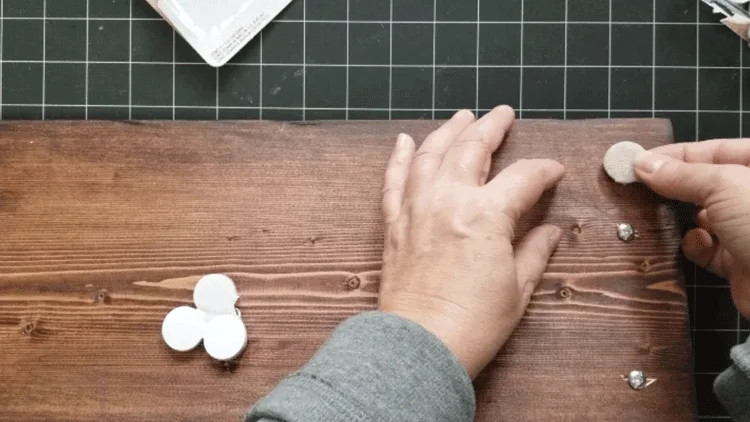 Applying felt pads to the base of wood trays, ensuring a scratch-free and stable base for serving.
Once you’ve completed this step… you’re completely finished! Congratulations!
I think they turned out incredibly charming and are just perfect for entertaining.
What are your thoughts? Let me know in the comments!
Materials Needed for Basic Wood Party Serving Trays:
This section contains affiliate links for your convenience. You can read my full disclosure here.
Materials
- Wood pieces – 1×8 boards cut into 24 inch lengths
- Wood Stain
- Chalkboard Paint
- Transfer Tape
- Handles
- Felt Pads
Tools
- Foam Brushes
- Cricut Machine (or similar cutting machine)
- Scissors
- Palm Sander or Sandpaper
- Drill (optional, for handles)
Instructions
- Cut the 1×8 boards into 24-inch lengths. Sand all surfaces until smooth.
- Stain the bottoms and sides of the boards. Let dry completely.
- Once the stain is dry, paint the top surface of each board with chalkboard paint. Allow to dry.
- Cut your chosen designs using a Cricut or Silhouette cutting machine.
- Use transfer tape to apply the vinyl designs to the chalkboard painted tops of the trays.
- Attach handles to the sides of each tray using screws.
- Apply felt pads to the bottom of each tray to protect surfaces.
Materials Needed for Grinch Christmas Eve Tray:
Materials
- Wood piece – 1×8 piece cut at 24 inches in length.
- White Paint
- Chalkboard Paint
- White Vinyl
- Green Glossy Vinyl
- Red Glossy Vinyl
- Transfer Tape
- Handles
- Felt Pads
- Grinch Christmas Eve Tray Cut File
Tools
- Foam Brushes
- Palm Sander or Sandpaper
- Cricut Cutting Machine (or similar cutting machine)
- Drill (optional, for handles)
Instructions
- Cut a 1×8 inch board to a 24-inch length. Sand the board smooth with a palm sander or sandpaper.
- Paint the bottom and sides of the board with white chalk paint. Two coats may be needed for full coverage.
- After the white paint dries, apply chalkboard paint to the top surface of the board. Let it dry.
- Cut the Grinch Christmas Eve SVG files using a Cricut or Silhouette cutting machine.
- Weed the vinyl designs and apply transfer tape.
- Arrange the design layout on the chalkboard surface of the tray.
- Remove the transfer tape to apply all the vinyl pieces to the tray.
- Drill pilot holes and screw the handles onto the top of the board, near each side.
- Affix felt pads to the bottom of the board for surface protection.
- On Christmas Eve, add some Who Pudding or your favorite snacks and dog treats for Max, hoping Mr. Grinch is deterred from stealing Christmas!
Enjoy Your New Party Serving Trays!
I’m so excited to use these trays for Thanksgiving and beyond! I’m sure these serving trays will be a big hit at any gathering.
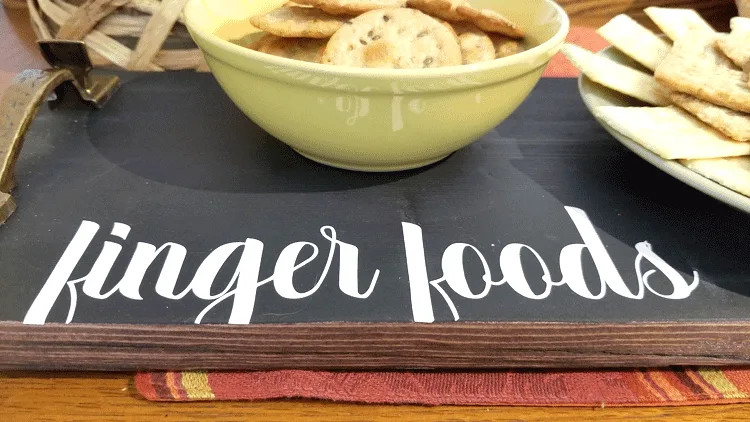 Close up of a wood party serving tray filled with finger foods, highlighting the chalkboard label and practical elegance.
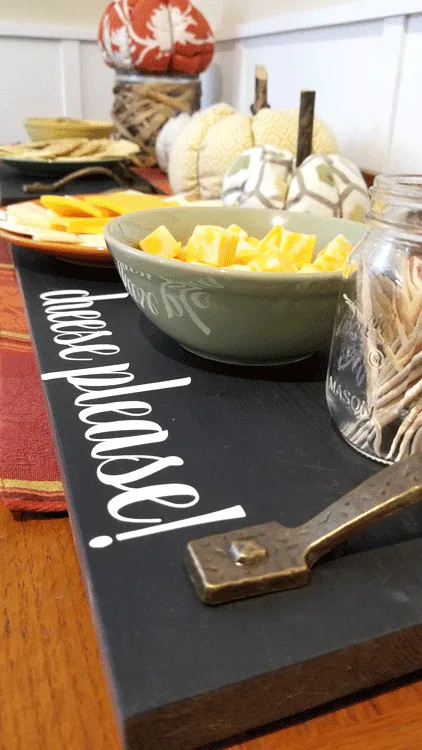
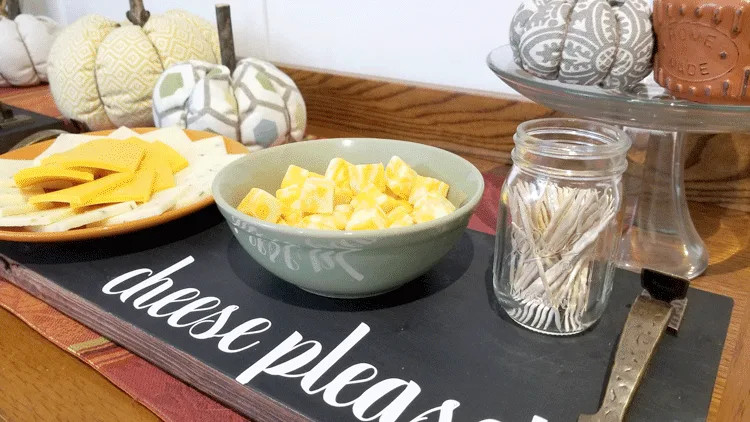 Detailed shot of a wood serving tray labeled 'Cheese Please' in chalk, filled with cheese cubes, demonstrating the chalkboard functionality and serving style.
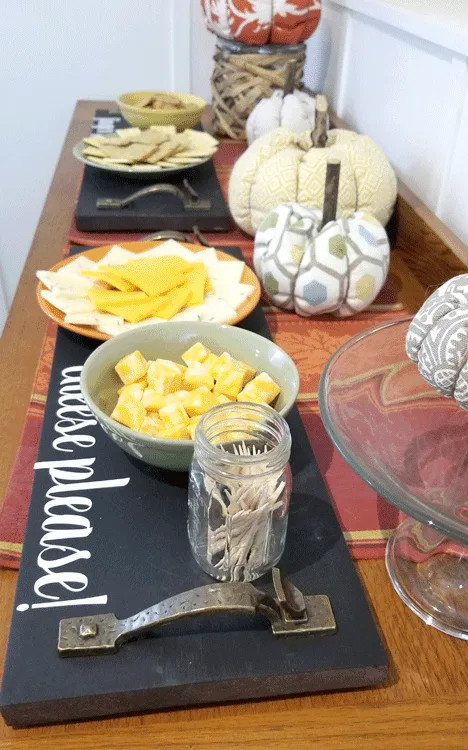 Full buffet table arrangement featuring wood party serving trays, showcasing a complete and stylish setup for entertaining guests.
 Close-up of a fully laden buffet table with wood serving trays, emphasizing the variety of appetizers and the trays' role in presentation.
Explore More DIY Home Decor Projects:
Wood Table Runner
Mini Mason Jar Party Favors
While we won’t have kids here this Christmas Eve, I’m planning to set out the Grinch tray or give it to Ian and Hailey for Harper. She’s still quite young at 7 months, so next year will be even more fun.
I absolutely love the Grinch design and am excited to use it more as she grows older. For now, it simply brings a smile to my face!
 Grinch themed Christmas Eve wood tray set on a buffet, ready to welcome the holiday spirit and perhaps deter a certain Grinch.
 Detailed view of the Grinch Tray, focusing on the vinyl lettering and design elements that bring the festive theme to life.
 Festive Grinchy themed wood serving tray, perfect for adding a playful and handmade touch to Christmas Eve celebrations.
More Grinch Inspired Fun:
Grinch Countdown To Christmas
Dollar Tree Grinch Printables
Thank you so much for visiting the blog today! Happy crafting!
Michelle
[
