
Nginx is a powerful and versatile open-source web server that excels in performance, stability, and ease of use. Renowned for efficiently handling high traffic loads, Nginx is a preferred choice for hosting everything from small personal blogs to large-scale enterprise applications. If you’re looking to deploy a web application or enhance your server’s capabilities, understanding how to Nginx Download Ubuntu Server is a crucial first step.
This guide provides an in-depth tutorial on installing Nginx on Ubuntu server, specifically focusing on Ubuntu 20.04. We will cover everything from the initial installation to essential configurations, ensuring you have a robust and well-managed web server environment. Whether you are a beginner or an experienced system administrator, this guide will walk you through each step to get Nginx up and running smoothly on your Ubuntu server.
Prerequisites
Before you begin, ensure you have the following:
- An Ubuntu 20.04 Server: A fresh installation of Ubuntu 20.04 server is recommended to avoid conflicts with existing configurations.
- User with Sudo Privileges: You should have a non-root user account configured with
sudoprivileges. This allows you to perform administrative tasks without directly using the root account, enhancing server security. If you haven’t set this up yet, refer to our guide on initial server setup for Ubuntu 20.04. - Optional: Domain Name: While not strictly necessary for installation, having a registered domain name will be beneficial when configuring server blocks and accessing your website publicly. If you plan to host a website, consider registering a domain name and pointing it to your server’s IP address.
Step 1 – Nginx Download and Installation on Ubuntu
Ubuntu’s repositories include Nginx packages, making the nginx download ubuntu server process straightforward using the apt package manager.
-
Update Package Index: First, update your server’s package index to ensure you have the latest package information. This step is crucial for accessing the most recent versions of Nginx and its dependencies.
sudo apt update -
Install Nginx: Once the package index is updated, install Nginx using the following command:
sudo apt install nginxThis command will download and install Nginx along with any necessary dependencies from Ubuntu’s official repositories. You will be prompted to confirm the installation; type
Yand pressEnterto proceed.
Alt text: Terminal showing the command ‘sudo apt install nginx’ being executed on Ubuntu server to download and install Nginx.
Step 2 – Adjusting the Firewall for Nginx
After successful nginx download ubuntu server and installation, you need to configure your firewall to allow access to Nginx. Ubuntu 20.04 typically uses ufw (Uncomplicated Firewall) as a firewall management tool. Nginx, upon installation, registers itself as an application with ufw, simplifying the firewall configuration process.
-
List UFW Application Profiles: To see the available
ufwapplication profiles, including those for Nginx, use the command:sudo ufw app listThis command will display a list of application profiles known to
ufw. You should see the following Nginx profiles:Output Available applications: Nginx Full Nginx HTTP Nginx HTTPS OpenSSH -
Choose the Appropriate Nginx Profile: Understand the different Nginx profiles:
- Nginx Full: Allows traffic on both port 80 (HTTP, unencrypted web traffic) and port 443 (HTTPS, encrypted web traffic).
- Nginx HTTP: Allows only port 80 (HTTP).
- Nginx HTTPS: Allows only port 443 (HTTPS).
For initial setup, especially if you do not have SSL/TLS certificates configured yet, enabling
Nginx HTTPis sufficient. For production environments where security is paramount, you would eventually useNginx FullorNginx HTTPSafter setting up SSL/TLS. -
Allow Nginx HTTP Traffic: To allow HTTP traffic through your firewall, enable the
Nginx HTTPprofile:sudo ufw allow 'Nginx HTTP' -
Verify Firewall Changes: Check the firewall status to confirm that the rule has been successfully applied:
sudo ufw statusThe output should indicate that HTTP traffic is now allowed:
Output
Status: active

To                         Action      From
--                         ------      ----
OpenSSH                    ALLOW       Anywhere
Nginx HTTP                 ALLOW       Anywhere
OpenSSH (v6)               ALLOW       Anywhere (v6)
Nginx HTTP (v6)            ALLOW       Anywhere (v6)
Alt text: Terminal output of ‘sudo ufw status’ command, displaying ‘Nginx HTTP ALLOW Anywhere’ indicating firewall rule for Nginx HTTP traffic.
Step 3 – Verify Nginx Web Server is Running
After completing the nginx download ubuntu server and firewall configurations, it’s important to verify that Nginx is running correctly. Ubuntu 20.04 automatically starts Nginx as a service upon installation.
-
Check Nginx Service Status: Use
systemd, the system and service manager, to check the status of the Nginx service:systemctl status nginxThis command will provide detailed information about the Nginx service. Look for the line that indicates the service status. If Nginx is running correctly, you should see output similar to this:
Output
● nginx.service - A high performance web server and a reverse proxy server
     Loaded: loaded (/lib/systemd/system/nginx.service; enabled; vendor preset: enabled)
     Active: active (running) since Fri 2020-04-20 16:08:19 UTC; 3 days ago
       Docs: man:nginx(8)
    Main PID: 2369 (nginx)
     Tasks: 2 (limit: 1153)
     Memory: 3.5M
     CGroup: /system.slice/nginx.service
             ├─2369 nginx: master process /usr/sbin/nginx -g daemon on; master_process on;
             └─2380 nginx: worker process
The
Active: active (running)line confirms that Nginx is successfully running on your Ubuntu server. -
Access Nginx Default Page: The most definitive way to test if Nginx is working is to access the default Nginx landing page through a web browser. To do this, you need your server’s public IP address.
-
Find Server IP Address: If you don’t know your server’s public IP address, you can use
curlto query a service likeicanhazip.com:curl -4 icanhazip.comThis command will return your server’s public IPv4 address.
-
Navigate to IP Address in Browser: Open your web browser and enter
http://your_server_ipin the address bar, replacingyour_server_ipwith the IP address you obtained.
If Nginx is correctly installed and running, you should see the default Nginx welcome page, indicating that your web server is operational.
-
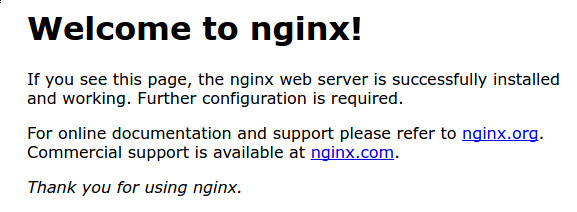 Default Nginx welcome page displayed in a web browser after successful installation
Step 4 – Managing the Nginx Service
Once you have completed the nginx download ubuntu server and installation, understanding how to manage the Nginx service is essential for server administration. systemd commands are used to manage Nginx.
-
Stop Nginx: To stop the Nginx web server, use:
sudo systemctl stop nginx -
Start Nginx: To start the Nginx web server when it is stopped, use:
sudo systemctl start nginx -
Restart Nginx: To restart the Nginx service, which is useful for applying configuration changes, use:
sudo systemctl restart nginx -
Reload Nginx: For minor configuration changes, you can reload Nginx without interrupting existing connections. This is more graceful than a full restart:
sudo systemctl reload nginx -
Disable Nginx at Boot: To prevent Nginx from starting automatically when the server boots, use:
sudo systemctl disable nginx -
Enable Nginx at Boot: To re-enable Nginx to start automatically at server boot, use:
sudo systemctl enable nginx
These commands are fundamental for managing your Nginx web server and ensuring it operates as required for your applications.
Step 5 – Setting Up Nginx Server Blocks (Virtual Hosts)
Server blocks in Nginx, similar to virtual hosts in Apache, allow you to host multiple websites on a single server. After the initial nginx download ubuntu server and setup, configuring server blocks is a key step for managing multiple domains.
We will set up a server block for a domain named your_domain (replace this with your actual domain name).
-
Create Directory for Your Domain: Create a directory structure for your domain within
/var/www. Use the-pflag to create parent directories if they don’t exist:sudo mkdir -p /var/www/your_domain/html -
Set Directory Ownership: Assign ownership of the directory to your current user using the
$USERenvironment variable:sudo chown -R $USER:$USER /var/www/your_domain/html -
Set Permissions (Optional but Recommended): Ensure the correct permissions are set for your web root directory. Generally,
755permissions are suitable for web directories:sudo chmod -R 755 /var/www/your_domain -
Create Sample
index.htmlPage: Create a basicindex.htmlfile in your domain’s directory to test the server block configuration:sudo nano /var/www/your_domain/html/index.htmlAdd the following sample HTML content to the file:
<!DOCTYPE html>
<html>
<head>
    <title>Welcome to your_domain!</title>
</head>
<body>
    <h1>Success! The your_domain server block is working!</h1>
</body>
</html>
Save and close the file.
-
Create Nginx Server Block Configuration File: Create a new server block configuration file for your domain in
/etc/nginx/sites-available/. Usenanoor your preferred text editor:sudo nano /etc/nginx/sites-available/your_domainPaste the following configuration into the file, adjusting the
rootandserver_namedirectives for your domain:server { listen 80; listen [::]:80; root /var/www/your_domain/html; index index.html index.htm index.nginx-debian.html; server_name your_domain www.your_domain; location / { try_files $uri $uri/ =404; } }Replace
your_domainwith your actual domain name. -
Enable the Server Block: Create a symbolic link from the configuration file in
sites-availabletosites-enabledto enable the server block:sudo ln -s /etc/nginx/sites-available/your_domain /etc/nginx/sites-enabled/ -
Uncomment
server_names_hash_bucket_size(Optional but Recommended): To avoid potential issues with server name hashing, it’s recommended to uncomment theserver_names_hash_bucket_sizedirective in/etc/nginx/nginx.conf. Open the file:sudo nano /etc/nginx/nginx.confFind the
server_names_hash_bucket_sizeline and remove the#symbol at the beginning of the line to uncomment it.http { ... server_names_hash_bucket_size 64; ... }Save and close the file.
-
Test Nginx Configuration: Before restarting Nginx, test for any configuration syntax errors:
sudo nginx -tIf the configuration is correct, you should see:
Output nginx: configuration file /etc/nginx/nginx.conf test is ok nginx: configuration successful -
Restart Nginx to Apply Changes: Restart Nginx to activate your new server block configuration:
sudo systemctl restart nginxNow, Nginx should serve your custom website when you access
http://your_domainin your browser. Ensure your domain’s DNS records are correctly pointing to your server’s IP address for the domain to resolve properly.
Alt text: Screenshot of a web browser displaying “Success! The your_domain server block is working!” indicating successful server block configuration in Nginx.
Step 6 – Key Nginx Files and Directories
Understanding the important file and directory locations is crucial for managing your nginx download ubuntu server installation effectively.
Content Directories
- /var/www/html: This is the default directory where Nginx serves web content for the default server block.
- /var/www/your_domain/html: (or similar custom domain directories) This is where web content for your specific domains is stored, as configured in your server blocks.
Server Configuration Directories
- /etc/nginx: The main Nginx configuration directory. All Nginx configuration files reside here.
- /etc/nginx/nginx.conf: The primary Nginx configuration file. Global settings for Nginx are configured here.
- /etc/nginx/sites-available: This directory stores server block configuration files. These files are not active unless linked to the
sites-enableddirectory. - /etc/nginx/sites-enabled: This directory contains symbolic links to the server block configuration files in
sites-availablethat are currently enabled. - /etc/nginx/snippets: This directory contains reusable configuration snippets that can be included in server block configurations, useful for security settings or common configurations.
Server Log Files
- /var/log/nginx/access.log: Records every request made to your Nginx web server. Useful for traffic analysis and debugging.
- /var/log/nginx/error.log: Logs any errors encountered by Nginx. Essential for troubleshooting server issues.
Conclusion
You have successfully completed the nginx download ubuntu server installation and basic configuration on your Ubuntu 20.04 server. You now have a functional Nginx web server, capable of hosting single or multiple websites.
From here, you can explore more advanced Nginx configurations, such as setting up HTTPS with SSL/TLS certificates for secure connections, optimizing Nginx performance, or integrating it with application servers for dynamic content.
To further enhance your server setup, consider exploring these next steps:
- Securing Nginx with Let’s Encrypt: Implement HTTPS for your domains using free SSL certificates from Let’s Encrypt to encrypt traffic and improve security.
- Setting up a LEMP stack: If you plan to host dynamic web applications, consider installing Linux, Nginx, MySQL, and PHP (LEMP stack) on your Ubuntu 20.04 server for a complete web development environment.
By mastering these foundational steps of nginx download ubuntu server and configuration, you are well-equipped to build and manage robust web applications and websites on your Ubuntu server.
Want a pre-configured Nginx server environment? Explore our one-click Nginx virtual machine for rapid deployment and focus on your application development. Check out Nginx VM
About the author(s)
Erin Glass
Senior Manager, DevEd
Category: Tutorial
Tags: [Ubuntu](/community/tags/ubuntu), [Nginx](/community/tags/nginx), [Ubuntu 20.04](/community/tags/ubuntu-20-04)