Tired of paying monthly fees for Minecraft Realms or dealing with the limitations of public servers? Hosting your own Minecraft Java server gives you complete control over your gaming experience, allowing you to customize the world, manage players, and enjoy uninterrupted gameplay with your friends. And guess what? You can achieve this using a Raspberry Pi, a low-cost, credit-card-sized computer!
This guide will walk you through the process of setting up your very own Minecraft Java server on a Raspberry Pi. It’s a fantastic project that’s not only budget-friendly but also a great way to learn about server administration and command-line interfaces. Let’s dive in!
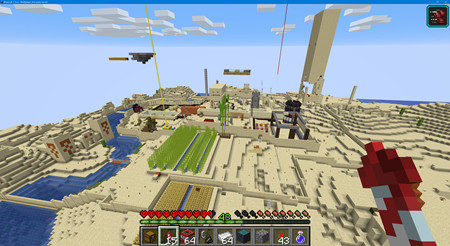 Setting up a Minecraft Java server on Raspberry Pi 4, showing the Raspberry Pi board and a screen with command-line interface for server setup
Step-by-Step Guide to Setting Up Your Minecraft Server
1. Prepare Your Raspberry Pi
First things first, you need to set up your Raspberry Pi. If you’re starting from scratch, NOOBS (New Out Of Box Software) is the recommended way to install the operating system as it’s user-friendly and straightforward.
For a smoother, headless setup (without needing a monitor, mouse, and keyboard initially), you can enable SSH before booting up your Pi for the first time. To do this, mount your Raspberry Pi’s SD card on your computer. In the boot directory, create a new empty file named “ssh” (no extension). This will enable SSH on boot, allowing you to access your Pi remotely.
Once you’ve booted up your Raspberry Pi, connect to it via SSH. On Windows, you can use the built-in SSH client. The default username is “pi,” and the password is “raspberry.” It’s highly recommended to change the default password for security reasons after your initial setup.
After connecting via SSH, update your Raspberry Pi’s system software to ensure you have the latest packages:
sudo apt update
sudo apt upgrade
Next, you need to install Java Development Kit (JDK), which is essential for running the Minecraft Java server:
sudo apt install default-jdk2. Install the Minecraft Java Server Software
While there are third-party Minecraft server options like Spigot, the easiest and most direct way to get your server running is by using the official server software provided by Minecraft.
Navigate to the official Minecraft server download page: https://www.minecraft.net/en-us/download/server.
On this page, you’ll find a link to download the latest minecraft_server.jar file. The version number in the filename might vary depending on the current version of Minecraft.
On your Raspberry Pi’s terminal, use the wget command followed by the copied download link to download the server.jar file. First, create a dedicated directory for your Minecraft server:
cd ~
mkdir MinecraftServer
cd MinecraftServer
Now, download the server.jar file. Right-click on the download link on the Minecraft server download page and copy the link address. Then, in your Raspberry Pi terminal, paste the link after wget:
wget [pasted link here]For example:
wget https://launcher.mojang.com/v1/objects/your_version_hash/server.jarOnce the download is complete, you need to run the server for the first time to generate the necessary configuration files. Use the following command:
java -Xmx2500M -Xms2500M -jar server.jar noguiThis command starts the Java server with 2500MB allocated as both the initial and maximum heap size. The nogui argument specifies that the server should run in command-line mode without the graphical user interface, which is suitable for a Raspberry Pi server.
Running this command for the first time will generate a eula.txt file and stop because you haven’t accepted the Minecraft End User License Agreement (EULA).
3. Accept the Minecraft EULA
Open the eula.txt file using a text editor like pico:
pico eula.txtInside the file, you will see a line eula=false. Change it to eula=true to accept the Minecraft EULA:
eula=truePress Ctrl+X, then Y to save the changes and exit pico.
Now, run the server command again:
java -Xmx2500M -Xms2500M -jar server.jar noguiThe Minecraft Java server should now start running. You’ll see server logs and initialization messages in the terminal.
4. Connect to Your Minecraft Server
Once the server is running, you need to find your Raspberry Pi’s IP address or hostname so your friends can connect. In the Raspberry Pi terminal, use the command:
ifconfigor
hostname -IThis will display your Raspberry Pi’s IP address. Alternatively, you can use the hostname if you have configured it.
Launch your Minecraft Java Edition game client. Click “Multiplayer,” then “Add Server.” Enter a server name and in the “Server Address” field, input your Raspberry Pi’s IP address or hostname. Click “Done.”
You should now see your server in the server list. Select it and click “Join Server” to start playing on your own hosted Minecraft world!
 Minecraft Java server running successfully on Raspberry Pi 4, displayed in a terminal window with server logs and information
Addressing Performance Issues
For most standard Minecraft worlds, a Raspberry Pi 4 with 4GB of RAM should perform adequately. However, if you experience performance issues, especially with very large or complex worlds with many entities, you might encounter lag or server timeouts.
Here are a few potential solutions to improve performance:
-
Overclocking (with caution): If your Raspberry Pi 4 has adequate cooling (like a fan), you can gently overclock it to increase its processing speed. Edit the
/boot/config.txtfile and add the following lines (research Raspberry Pi overclocking safety guidelines before doing this):over_voltage=3 arm_freq=1850 -
Disable Internal Watchdog: In the
server.propertiesfile (generated when you first ran the server), you can disable the Minecraft server’s internal watchdog for ticks by settingmax-tick-timeto-1. This might prevent server crashes due to tick timeouts, but it’s generally recommended to address the underlying performance issues instead. -
Reduce Entities: Excessive entities (like too many animals or mobs) can significantly impact server performance. In-game commands like
/kill @e[type=minecraft:iron_golem]can be used to reduce the number of specific entities if needed.
Conclusion
Setting up a Minecraft Java server on a Raspberry Pi is a rewarding project. It’s a cost-effective way to enjoy Minecraft with friends, offering more control and customization than renting a Realm. Beyond the fun, it’s also an excellent learning experience in server management, Linux command-line, and problem-solving. So, grab your Raspberry Pi, follow this guide, and get ready to create your ultimate Minecraft world!