The Raspberry Pi Zero, a marvel of miniature computing, often sparks the imagination for creative projects. When I first encountered this tiny single-board computer, running a Minecraft server on it immediately came to mind. Admittedly, the specifications – a modest 512MB of RAM and a 1 GHz processor – seemed daunting for a task as resource-intensive as hosting a game server. Initial online searches echoed this skepticism, with many dismissing the Pi Zero’s capabilities for Minecraft. However, the challenge of pushing this little device to its limits was too intriguing to ignore.
Despite the limitations, the Raspberry Pi Zero is surprisingly versatile. With careful configuration and optimization, it can indeed host a functional Minecraft server, albeit with certain considerations. This guide will walk you through the process of setting up a Minecraft server on your Raspberry Pi Zero, focusing on a game mode that’s well-suited for its capabilities: Skyblock.
Why Choose a Raspberry Pi Zero for a Minecraft Server?
While not as powerful as dedicated server hardware, the Raspberry Pi Zero offers several compelling advantages for hosting a small-scale Minecraft server, particularly for personal use or with a few friends:
- Low Cost: The Raspberry Pi Zero is incredibly affordable, making it an accessible entry point into server hosting without significant financial investment.
- Energy Efficiency: Compared to desktop computers or dedicated servers, the Pi Zero consumes minimal power, leading to lower operating costs and environmental impact.
- Compact Size: Its small footprint allows for discreet placement and easy integration into various setups.
- Educational Value: Setting up a server on a Raspberry Pi is a fantastic learning experience, providing hands-on knowledge of Linux, networking, and server administration.
However, it’s crucial to acknowledge the constraints. The limited RAM and processing power mean the server’s performance will be modest. Expect to host a small number of players (ideally 2-5) and potentially experience some lag, especially during intense gameplay moments. For larger player counts or resource-heavy game modes, a more powerful server solution would be necessary.
Selecting the Right Minecraft Server Type: Skyblock for Optimal Performance
Given the Raspberry Pi Zero’s hardware limitations, choosing the right type of Minecraft server is paramount. Running a standard, expansive survival world can quickly overwhelm the system. Therefore, we’ll focus on Skyblock, a game mode that inherently minimizes resource demands.
In Skyblock, players begin on a small, isolated island with limited resources and must strategically expand and thrive. This mode is ideal for low-powered servers because:
- Reduced World Generation: Skyblock eliminates the need to render vast, complex terrains, significantly reducing the load on the server.
- Fewer Entities: Typically, Skyblock environments have fewer naturally spawning mobs and entities compared to standard worlds, further easing the processing burden.
- Focus on Resource Management: The gameplay emphasizes resourcefulness and creativity within confined spaces, rather than exploration and large-scale building, which are more demanding on server resources.
While a custom Skyblock world could be created, using a plugin like ASkyBlock offers added functionality and convenience, particularly for multiplayer setups. ASkyBlock allows each player to easily create their own island, fostering individual progression and controlled interaction within the server environment.
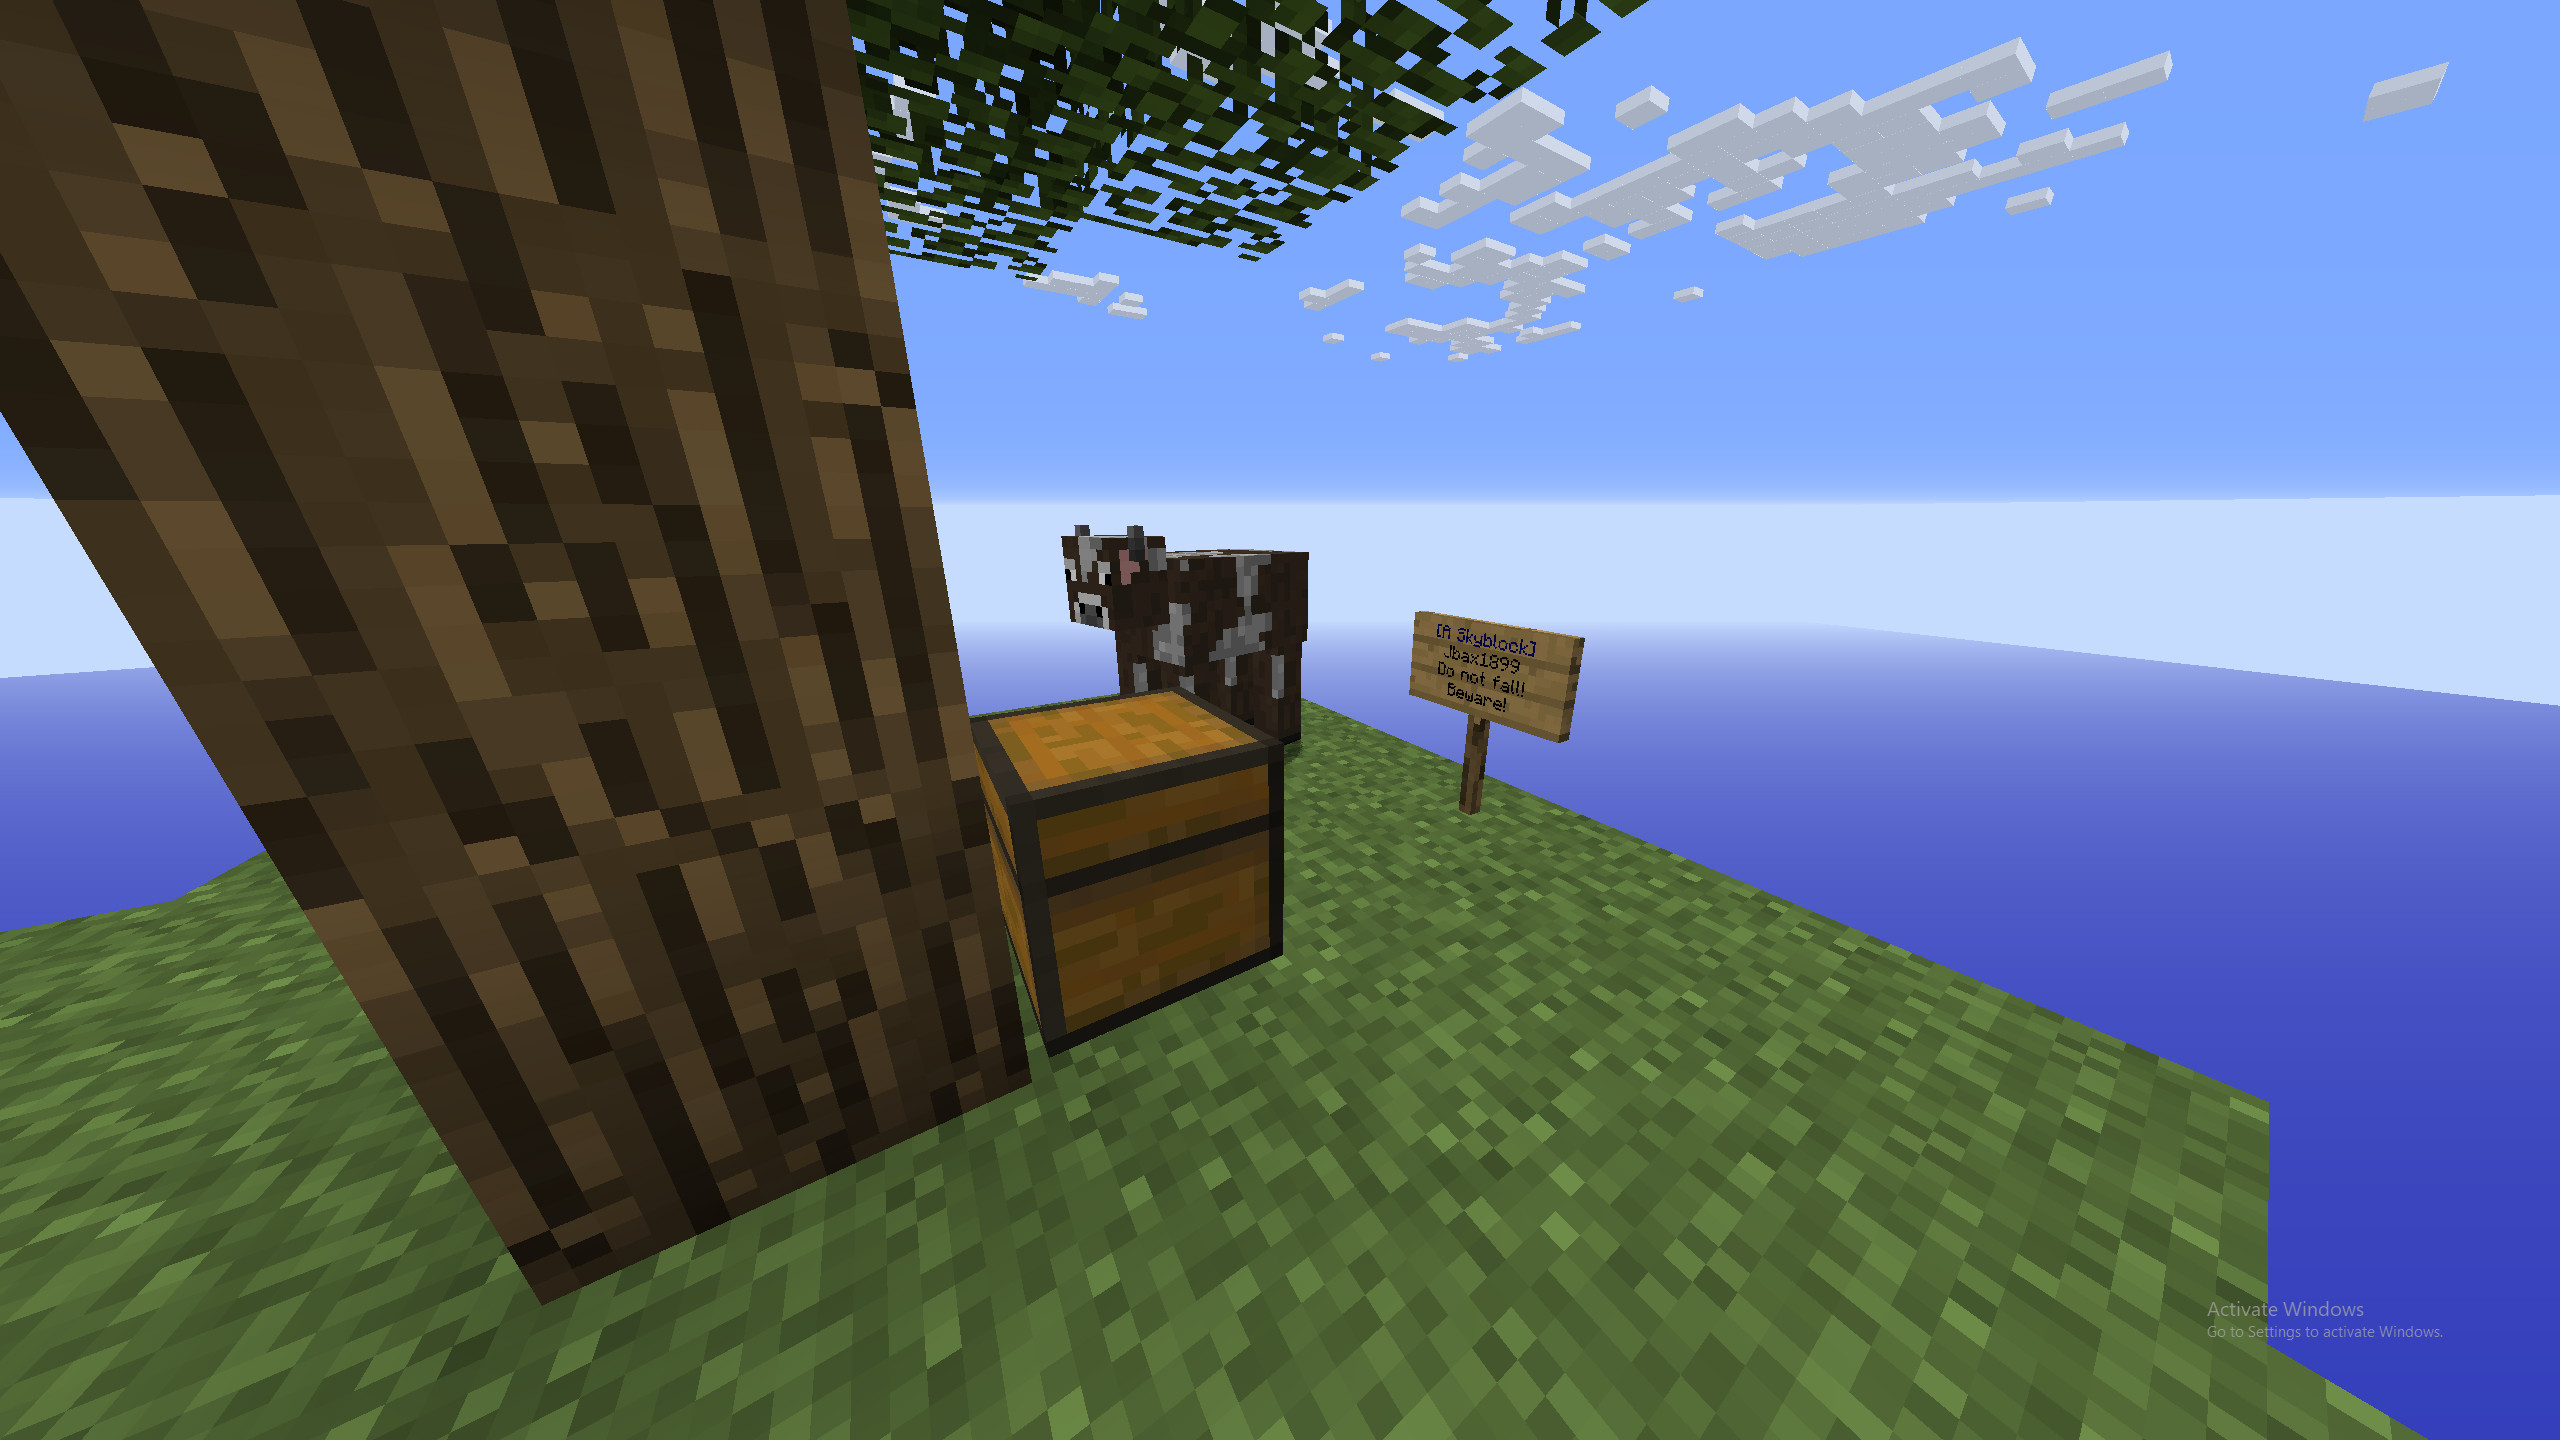 A new Skyblock island
Step-by-Step Guide to Setting Up Your Raspberry Pi Zero Minecraft Server
Let’s dive into the practical steps to get your Minecraft server up and running on your Raspberry Pi Zero.
Prerequisites: Hardware and Software
Before you begin, gather the following components:
- Raspberry Pi Zero (or Zero W): The heart of your server. The Zero W with built-in Wi-Fi is convenient, but for a more stable connection, using Ethernet is recommended.
- Micro-SD Card (at least 16GB): To install the operating system and server files. A faster SD card can improve performance.
- 5V, 1A (1000mA) USB Power Adapter and Micro-USB Cable: To power your Raspberry Pi. Ensure the adapter provides sufficient amperage for stable operation.
- Micro-USB to Ethernet Adapter (Optional but Recommended): For a wired network connection, enhancing stability and reducing latency compared to Wi-Fi on the Zero W. Look for a basic, inexpensive adapter as bandwidth requirements for a small server are minimal.
- Ethernet Cable (if using Ethernet adapter): To connect your Pi to your router.
- Computer with Internet Access: To download necessary software and remotely access the Raspberry Pi.
1. Install Raspbian OS on Your Raspberry Pi Zero
The first step is to install Raspberry Pi OS (formerly Raspbian), the official operating system, onto your SD card.
-
Download Raspberry Pi Imager: Visit the official Raspberry Pi website (https://www.raspberrypi.org/software/) and download the Raspberry Pi Imager tool for your computer’s operating system.
-
Choose Raspberry Pi OS: Insert your Micro-SD card into your computer. Launch the Raspberry Pi Imager. Click “Choose OS” and select “Raspberry Pi OS (other)” then choose “Raspberry Pi OS Lite (32-bit)”. The Lite version is recommended as it’s a minimal OS without a desktop environment, saving valuable resources.
-
Select SD Card: Click “Choose Storage” and select your Micro-SD card.
-
Write the Image: Click “Write” to flash the OS image to your SD card. This process will erase all data on the SD card.
-
Enable SSH (and Wi-Fi if needed – Headless Setup): For headless operation (without a monitor, keyboard, and mouse), you’ll need to enable SSH to remotely access your Pi. After the image is written but before ejecting the SD card, re-insert it. In the boot partition, create an empty file named
ssh(no extension). To configure Wi-Fi (for Zero W), also create a file namedwpa_supplicant.confand add your Wi-Fi credentials:ctrl_interface=DIR=/var/run/wpa_supplicant GROUP=netdev update_config=1 country=US # Replace with your country code network={ ssid="YOUR_WIFI_SSID" # Replace with your Wi-Fi network name psk="YOUR_WIFI_PASSWORD" # Replace with your Wi-Fi password }Replace
US,YOUR_WIFI_SSID, andYOUR_WIFI_PASSWORDwith your appropriate details. -
Boot the Raspberry Pi: Eject the SD card and insert it into your Raspberry Pi Zero. Connect the Ethernet adapter (if using), and then connect the power cable. The Pi will boot up.
2. Enable SSH and Connect to Your Raspberry Pi
SSH (Secure Shell) allows you to remotely access your Raspberry Pi from your computer.
- Find Your Raspberry Pi’s IP Address: If you are using Ethernet, you can usually find your Pi’s IP address in your router’s administration panel (look for connected devices). If using Wi-Fi and you set up
wpa_supplicant.conf, you can also find it in your router settings. Alternatively, you can use network scanning tools on your computer. - Connect via SSH: On your computer, use an SSH client like PuTTY (for Windows, available at: https://www.chiark.greenend.org.uk/~sgtatham/putty/) or the built-in terminal on macOS/Linux (
ssh pi@YOUR_PI_IP_ADDRESS). ReplaceYOUR_PI_IP_ADDRESSwith the IP address you found. The default username ispiand the default password israspberry. It is highly recommended to change the default password after your first login using thepasswdcommand.
3. Install Java and Screen on Your Raspberry Pi
Minecraft server software requires Java. We will also install screen to keep the server running even after you close the SSH session.
- Update Package Lists: In your SSH terminal, run:
sudo apt update - Install Java: Install OpenJDK 8 (compatible with Minecraft 1.12.2, which we’ll use for optimal performance on Pi Zero):
sudo apt install openjdk-8-jre-headless - Install Screen:
sudo apt install screen
4. Set Up the Minecraft Server Software
We’ll use PaperMC, a highly optimized fork of Spigot, which itself is a modified version of CraftBukkit. PaperMC offers significant performance improvements, crucial for running on the Raspberry Pi Zero. We’ll use version 1.12.2 as it strikes a good balance between features and performance for low-end hardware.
-
Create a Server Directory: In your SSH terminal, create a directory for your server and navigate into it:
mkdir minecraft-server cd minecraft-server -
Download PaperMC 1.12.2: Use
wgetto download PaperMC 1.12.2 directly to your Raspberry Pi:wget https://papermc.io/api/v2/projects/paper/versions/1.12.2/builds/latest/downloads/paper-1.12.2-latest.jar -O paper.jar -
Create a Startup Script (start.sh): Create a text file named
start.shusing a text editor likenano:nano start.shPaste the following script into the file:
#!/bin/bash
java -Xms256M -Xmx400M -jar paper.jar nogui
This script starts the Paper server with an initial memory allocation of 256MB and a maximum of 400MB, suitable for the Pi Zero’s 512MB RAM. The
noguioption runs the server in command-line mode, saving resources. -
Make the Script Executable:
chmod +x start.sh -
Run the Server for the First Time:
./start.shThe server will start, generate configuration files, and then stop because you haven’t accepted the Minecraft End User License Agreement (EULA).
-
Accept the EULA: Open the
eula.txtfile usingnano eula.txtand changeeula=falsetoeula=true. Save and exit (Ctrl+X,Y,Enter).
5. Configure Server Settings for Raspberry Pi Zero
Optimizing the server configuration is vital for smooth operation on the Raspberry Pi Zero.
-
Edit
server.properties: Open theserver.propertiesfile usingnano server.properties. Adjust the following settings:view-distance=3: Reduce the view distance to minimize the number of chunks the server needs to process. A value of 3 is sufficient for Skyblock.max-players=5: Limit the maximum player slots to 5 or fewer to prevent overloading the server.spawn-animals=false,spawn-npcs=false,spawn-monsters=false: Disable unnecessary spawns to reduce entity processing. If you want monsters for a Skyblock challenge, you can enablespawn-monsters=true, but monitor performance closely.online-mode=trueoronline-mode=false: Set totruefor premium Minecraft accounts,falsefor offline mode (cracked clients – use with caution).- Review other settings based on optimization guides, such as the one mentioned in the original article (https://www.spigotmc.org/threads/guide-server-optimization%E2%9A%A1.283181/). Focus on “Medium” and “High” impact optimizations.
-
Optimize
paper.yml: PaperMC has its own configuration file,paper.yml. Explore options to further optimize performance, referring to PaperMC’s documentation and optimization guides online.
6. Install and Configure ASkyBlock Plugin
- Download ASkyBlock: Download the ASkyBlock plugin from SpigotMC (https://www.spigotmc.org/resources/askyblock.1220/). You will need a SpigotMC account.
- Place Plugin in
pluginsFolder: In your SSH terminal, create apluginsfolder in yourminecraft-serverdirectory if it doesn’t exist (mkdir plugins). UseWinSCP(or similar SFTP client) to transfer the downloaded ASkyBlock.jarfile from your computer to thepluginsfolder on your Raspberry Pi. - Restart the Server: Run
./start.shagain to load the ASkyBlock plugin. - Configure ASkyBlock (Optional): ASkyBlock has extensive configuration options. Explore the
plugins/ASkyBlock/config.ymlfile to customize island settings, challenges, and more.
7. Start Your Minecraft Server and Play!
- Start the Server in a Screen Session: To keep the server running even after you close your SSH session, start it within a
screensession:screen -S minecraft-server ./start.shThe server will start. You can detach from the screen session by pressing
Ctrl+AthenD. To re-attach, usescreen -r minecraft-server. - Find Your Server IP Address: Determine your Raspberry Pi’s IP address again (as in Step 2.1). This is the IP address your friends will use to connect.
- Port Forwarding (If Necessary for External Access): If you want players outside your local network to join, you need to configure port forwarding on your router.
- Access your router’s settings (usually by typing
192.168.1.1or192.168.0.1in your browser). - Find the port forwarding section (may be under “Advanced Settings”, “NAT”, or similar).
- Create a new port forwarding rule:
- Service/Application Name: Minecraft Server (or similar)
- Port Range: 25565 (Minecraft’s default port)
- Local IP Address: Your Raspberry Pi’s IP address
- Local Port: 25565
- Protocol: TCP/UDP or Both
- Consult your router’s manual or online guides for specific instructions as router interfaces vary.
- Access your router’s settings (usually by typing
- Connect to Your Server: Launch Minecraft on your computer. Click “Multiplayer,” then “Add Server.” Enter a server name and your Raspberry Pi’s public IP address (you can find your public IP by searching “what is my ip” on Google). If players are on your local network, they can use your Pi’s local IP address.
- Create Your Skyblock Island: Once connected, type
/islandin the chat to create your personal Skyblock island with ASkyBlock.
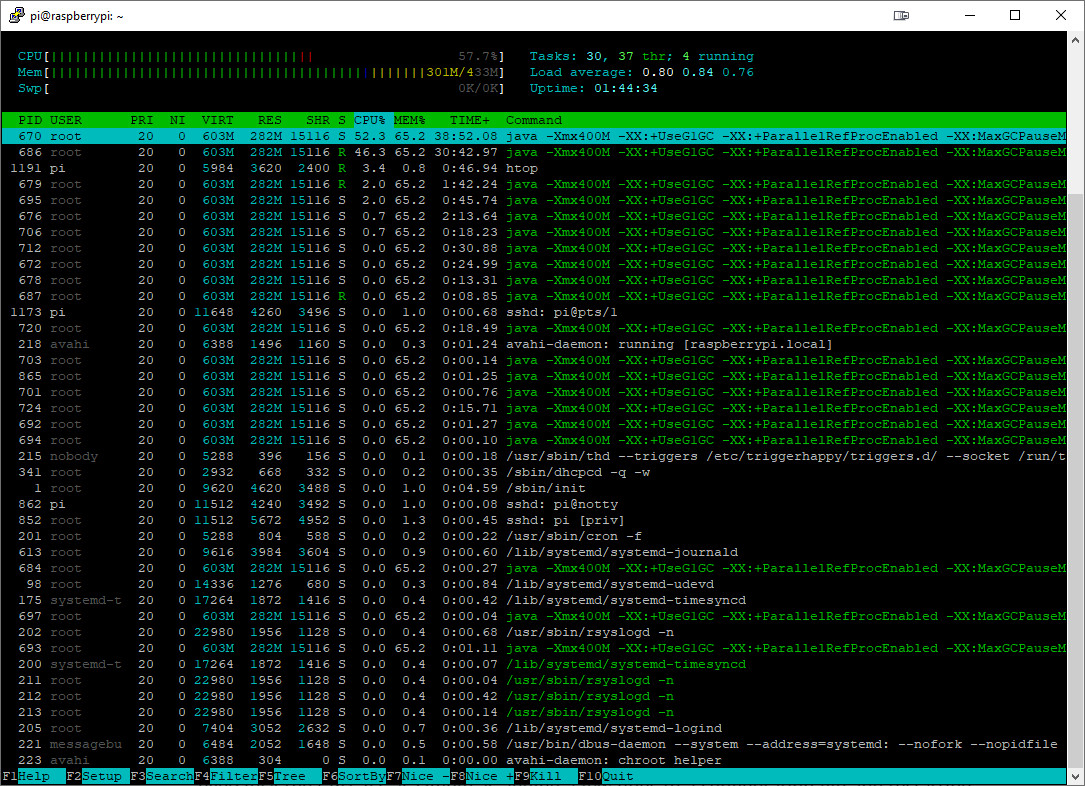 performance monitoring with htop
Further Optimization and Monitoring
To ensure the best possible performance, consider these additional optimization steps:
- Overclocking (with Caution): Overclocking the Raspberry Pi Zero can provide a slight performance boost. However, proceed with caution as it can potentially lead to instability or damage if not done correctly. Research reliable overclocking guides specifically for the Pi Zero (like the one mentioned in the original article: https://www.raspberrypi.org/forums/viewtopic.php?t=249071) and monitor temperatures.
- Monitor Server Performance: Use the
toporhtopcommand in your SSH terminal to monitor CPU and memory usage. This helps identify bottlenecks and adjust settings accordingly.htopis more user-friendly and can be installed withsudo apt install htop. - Regular Restarts: Schedule regular server restarts (e.g., daily or every few days) to clear memory leaks and maintain optimal performance. You can use
cronto automate server restarts. - Lightweight Plugins: If you decide to add more plugins, choose lightweight options that don’t significantly impact performance.
Troubleshooting Common Issues
- OutOfMemoryError: If you encounter
java.lang.OutOfMemoryErrorduring server startup, it indicates insufficient RAM allocated. Try reducing the-Xmxvalue in yourstart.shscript slightly, or further optimize server settings to reduce memory usage. Sometimes simply restarting the server might resolve temporary memory issues. - Lag and Performance Issues: If the server is lagging, especially with multiple players, revisit your server configuration. Reduce
view-distance, disable unnecessary features, and monitor resource usage. Consider limiting player count further. Ensure your Raspberry Pi has adequate cooling if overclocked. - Server Crashing: Unexpected crashes can occur due to various reasons. Check the server logs (
logs/latest.log) for error messages to diagnose the issue. Ensure your power supply is stable and provides sufficient power.
Conclusion: A Tiny Server with Big Potential
 Honestly, it’s not too bad. You won’t be able to have tens of players at a time but the server can definitely handle at least a few people. With just myself on the server it runs near flawlessly. The server sat at around 70% CPU usage most of the time. If you are hitting the CPU cap too often and need a greater boost you can go back to the configuration files and tighten the settings up even more.
Setting up a Minecraft server on a Raspberry Pi Zero is indeed achievable, particularly when focusing on a lightweight game mode like Skyblock. While it won’t rival the performance of dedicated server hardware, it provides a surprisingly capable platform for small-scale multiplayer experiences, personal use, or learning purposes. The low cost, energy efficiency, and compact size of the Pi Zero, combined with the educational journey of server setup and optimization, make this project a rewarding endeavor for tech enthusiasts and Minecraft players alike.
Don’t expect to host a bustling community of dozens of players, but for a small group of friends or personal exploration, a Raspberry Pi Zero Minecraft server can be a fun and functional solution. Experiment with different configurations, explore further optimizations, and you might be surprised at what this tiny computer can handle.
Stay tuned for future projects exploring server hosting on even more unconventional hardware, such as old smartphones!
Thanks for reading and happy server building!