Setting up a Virtual Network Computing (VNC) server on Ubuntu allows you to remotely access your server’s graphical desktop. This is particularly useful for tasks that are more easily managed with a graphical user interface (GUI), such as file management, software installation, or running applications. This guide provides a detailed walkthrough on how to install and configure a VNC server on Ubuntu, ensuring a secure and efficient remote desktop experience. We will focus on using TightVNC and the lightweight Xfce desktop environment, known for their performance and stability, even on slower network connections.
Prerequisites
Before you begin, ensure you have the following:
- An Ubuntu server, ideally version 20.04 or later.
- SSH access to your server.
- A user account with sudo privileges.
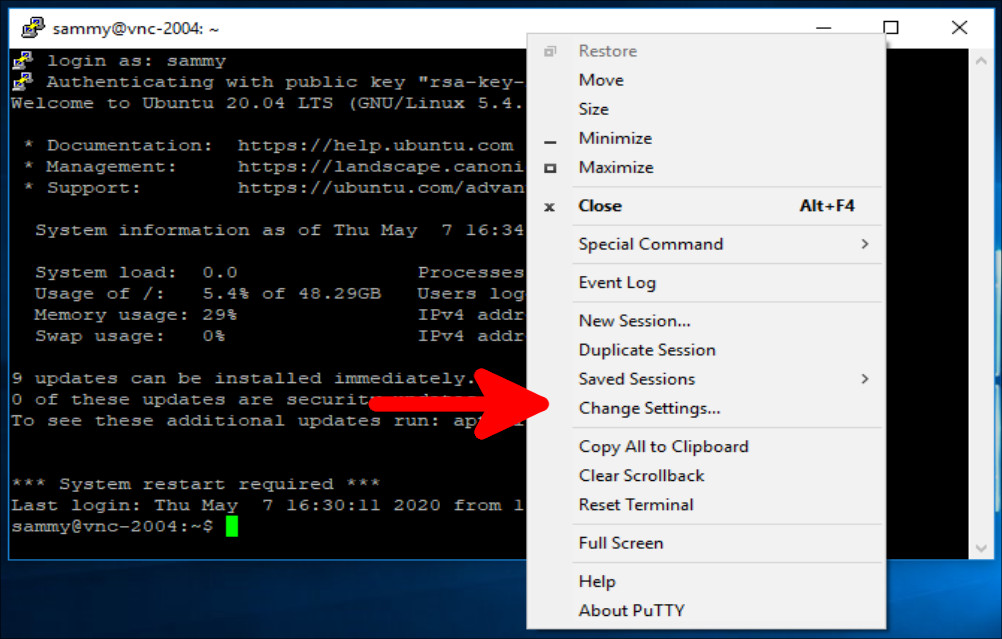
Let’s proceed with the installation and configuration of your VNC server.
Step 1 — Installing the Desktop Environment and VNC Server on Ubuntu
Ubuntu servers, by default, do not include a graphical desktop environment. To use VNC, which relies on a GUI, we first need to install one, along with the VNC server software itself.
For this tutorial, we will install Xfce, a lightweight yet feature-rich desktop environment, and TightVNC, a fast and reliable VNC server. This combination is ideal for remote server access, providing a smooth experience without consuming excessive server resources.
First, update your server’s package lists to ensure you have the latest versions:
sudo apt updateNext, install the Xfce desktop environment and the xfce4-goodies package, which includes useful enhancements for the desktop:
sudo apt install xfce4 xfce4-goodiesDuring the installation, you might be asked to select a default display manager. For VNC server purposes, the choice of display manager is not critical as we will be directly accessing the Xfce session via VNC. You can select either lightdm or gdm3 and press ENTER to continue.
 Display manager selection during Xfce installation
Once the desktop environment is installed, proceed to install the TightVNC server:
sudo apt install tightvncserverAfter installation, initialize the VNC server by running the vncserver command. This will set up your VNC password, create necessary configuration files, and start a VNC server instance:
vncserverYou will be prompted to set a password to access your VNC desktop. This password must be between six and eight characters.
Output
You will require a password to access your desktops.

Password:
Verify:
You’ll also be asked if you want to create a view-only password. This is optional and useful if you need to share your screen without granting control. For this guide, we’ll skip the view-only password.
Output
Would you like to enter a view-only password (y/n)? n
xauth: file /home/your_user/.Xauthority does not exist
New 'X' desktop is your_hostname:1

Creating default startup script /home/your_user/.vnc/xstartup
Starting applications specified in /home/your_user/.vnc/xstartup
Log file is /home/your_user/.vnc/your_hostname:1.log
The output indicates that the VNC server has started an instance on display port :1, which corresponds to port 5901. VNC uses display ports to manage multiple server instances, with :2 using port 5902, and so on.
You can change your VNC password at any time using the vncpasswd command.
Now that the VNC server is installed and running, we need to configure it to launch the Xfce desktop environment when accessed.
Step 2 — Configuring the VNC Server to Use Xfce
The default VNC server configuration might not launch the Xfce desktop environment. To ensure you get an Xfce desktop session when connecting via VNC, you need to modify the VNC startup script.
First, stop the currently running VNC server instance on port :1:
vncserver -kill :1You should see output confirming the process is being killed, including its process ID (PID):
Output
Killing Xtightvnc process ID 12345
Before making changes, back up the original xstartup file. This allows you to revert to the default settings if needed.
mv ~/.vnc/xstartup ~/.vnc/xstartup.bakCreate a new xstartup file using a text editor like nano:
nano ~/.vnc/xstartupAdd the following lines to this new file:
#!/bin/bash
xrdb $HOME/.Xresources
startxfce4 &
This script starts by specifying the Bash interpreter (#!/bin/bash). The xrdb $HOME/.Xresources command loads user-specific X resources, which manage settings like terminal colors and font preferences. startxfce4 & initiates the Xfce desktop environment. The & runs the command in the background, allowing the startup script to complete.
Save and close the file (in nano, press CTRL+X, then Y, and ENTER).
Make the xstartup file executable so that the VNC server can run it:
chmod +x ~/.vnc/xstartupRestart the VNC server with the -localhost option. This important security measure restricts VNC to only accept connections originating from the server itself. We will later use SSH tunneling to securely connect from your local machine.
vncserver -localhostYou will see a similar output as before, indicating the VNC server has started.
Output
New 'X' desktop is your_hostname:1
Starting applications specified in /home/your_user/.vnc/xstartup
Log file is /home/your_user/.vnc/your_hostname:1.log
With the VNC server configured to use Xfce and restricted to local connections, the next step is to establish a secure connection from your local machine.
Step 3 — Securely Connecting to the VNC Desktop via SSH Tunneling
VNC connections are not encrypted by default, making them vulnerable to security risks. To protect your VNC session, we will use SSH tunneling to create a secure channel for your VNC connection. SSH tunneling encrypts all traffic between your local machine and the server, ensuring your VNC session is secure.
On your local computer, open a terminal and establish an SSH tunnel to your Ubuntu server using the following command:
ssh -L 59000:localhost:5901 -C -N -l your_user your_server_ipLet’s break down this command:
-L 59000:localhost:5901: This option forwards local port59000tolocalhost:5901on the server. Port59000on your local machine will act as the entry point for your VNC client, and all traffic to this port will be tunneled to port5901on your server, where the VNC server is listening. You can choose a different local port if59000is in use.-C: Enables compression, which can improve performance, especially on slower networks.-N: Prevents execution of remote commands. We only need the port forwarding, not a shell session.-l your_user: Specifies the username for your server login. Replaceyour_userwith your actual Ubuntu username.your_server_ip: Replaceyour_server_ipwith the IP address of your Ubuntu server.
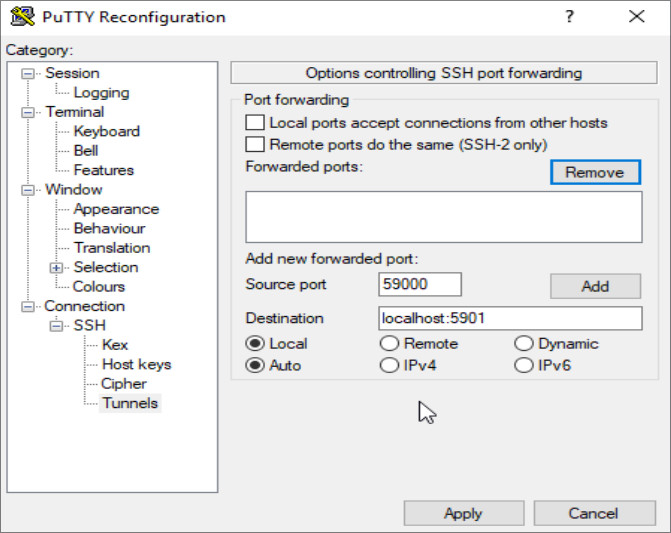 PuTTY SSH Tunnel Configuration for VNC
If you are using PuTTY on Windows, you can configure SSH tunneling by navigating to Connection > SSH > Tunnels. Enter 59000 as the “Source port” and localhost:5901 as the “Destination”. Select “Local” and click “Add”. Then, open your SSH session to the server as usual.
With the SSH tunnel established, you can now use a VNC client to connect to localhost:59000. Enter the VNC password you set up in Step 1 when prompted.
Once connected, you should see the Xfce desktop environment.
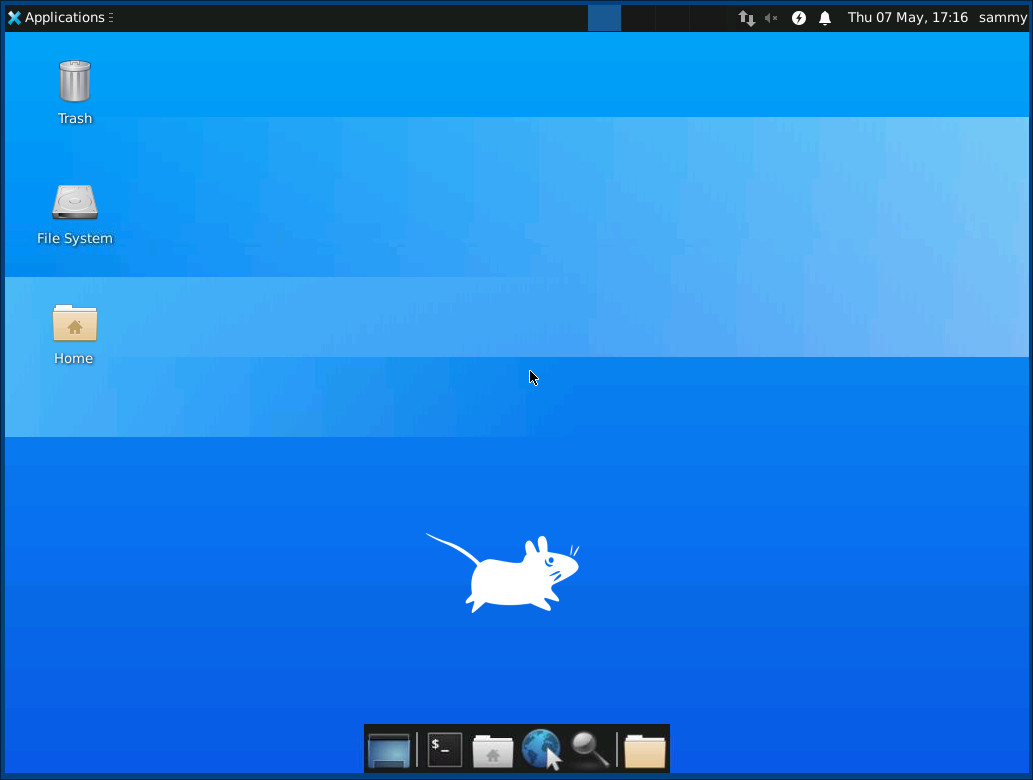 Xfce Desktop Environment via VNC on Ubuntu 20.04
You can now interact with your server’s graphical interface, manage files, and run applications as if you were physically in front of the server.
To disconnect, simply close your VNC client and terminate the SSH tunnel (by pressing CTRL+C in the terminal where you initiated the SSH tunnel).
For easier management and automatic startup, let’s configure VNC to run as a systemd service.
Step 4 — Setting Up VNC Server as a Systemd Service
Configuring VNC server as a systemd service allows you to manage it like any other system service: start, stop, restart, and enable automatic startup on boot.
Create a new systemd unit file for VNC server at /etc/systemd/system/[email protected]:
sudo nano /etc/systemd/system/[email protected]The @ symbol in the filename allows us to use a display port number as an argument to the service. Add the following configuration to the file, replacing your_user with your actual username in the User, Group, WorkingDirectory, and PIDFile lines:
[Unit]
Description=Start TightVNC server at startup
After=syslog.target network.target

[Service]
Type=forking
User=your_user
Group=your_user
WorkingDirectory=/home/your_user
PIDFile=/home/your_user/.vnc/%H:%i.pid
ExecStartPre=-/usr/bin/vncserver -kill :%i > /dev/null 2>&1
ExecStart=/usr/bin/vncserver -depth 24 -geometry 1280x800 -localhost :%i
ExecStop=/usr/bin/vncserver -kill :%i

[Install]
WantedBy=multi-user.target
Key points in this configuration:
UserandGroup: Specify the user and group to run the VNC server under. Use your non-root username here.WorkingDirectory: Sets the working directory to the user’s home directory.PIDFile: Specifies the location of the PID file.ExecStartPre: Kills any existing VNC server instance on the specified display port before starting a new one.ExecStart: Starts the VNC server with options for color depth (-depth 24) and resolution (-geometry 1280x800). You can adjust the geometry to your preferred resolution.-localhostensures VNC only listens on the loopback interface.ExecStop: Defines the command to stop the VNC server.
Save and close the file.
Inform systemd about the new service file:
sudo systemctl daemon-reloadEnable the VNC service to start on boot. We’ll enable it for display :1:
sudo systemctl enable [email protected]Stop any running VNC server instances:
vncserver -kill :1Finally, start the VNC service using systemd:
sudo systemctl start [email protected]Verify that the service is running without errors:
sudo systemctl status [email protected]If the service started successfully, you should see output indicating it is active and running.
Output
● [email protected] - Start TightVNC server at startup
     Loaded: loaded (/etc/systemd/system/[email protected]; enabled; vendor preset: enabled)
     Active: active (running) since Fri 2023-10-27 10:00:00 UTC; 5s ago
    Process: 12345 ExecStartPre=/usr/bin/vncserver -kill :1 > /dev/null 2>&1 (code=exited, status=0/SUCCESS)
    Process: 12346 ExecStart=/usr/bin/vncserver -depth 24 -geometry 1280x800 -localhost :1 (code=exited, status=0/SUCCESS)
   Main PID: 12347 (Xtightvnc)
      Tasks: 1 (limit: 1137)
     Memory: 1.2M
        CPU: 49ms
     CGroup: /system.slice/system-vncserver.slice/[email protected]
             └─12347 /usr/bin/Xtightvnc :1 -desktop X -alwaysshared -localhost -depth 24 -geometry 1280x800 -rfbport 5901 -dpi 96
Now your VNC server is set up as a systemd service, ensuring it starts automatically on server reboot and can be easily managed using systemctl commands.
To connect, re-establish your SSH tunnel as described in Step 3 and connect your VNC client to localhost:59000.
Conclusion
You have successfully installed and configured a VNC server on your Ubuntu system, secured with SSH tunneling, and set up as a systemd service. This setup provides a secure and persistent remote graphical access to your Ubuntu server, enhancing your ability to manage and operate your server with ease. Whether you need to manage files, install software with a GUI, or run graphical applications remotely, VNC server on Ubuntu offers a flexible and user-friendly solution.
By using TightVNC and Xfce, you’ve opted for a lightweight and efficient combination, ensuring smooth performance even under less-than-ideal network conditions. Remember to always use SSH tunneling to secure your VNC connections and protect your server from unauthorized access.