Are you tired of endless group chats that are impossible to follow? Do you wish there was a better way to organize conversations with your friends, community, or gaming group? You’re not alone. Many people are looking for a more structured and engaging online space, and that’s where Discord servers come in.
Discord servers offer a fantastic solution for organizing online communities. Whether you want a dedicated space for your gaming buddies, a study group, a fan community, or just a place for your friends to hang out, Discord provides the tools you need to create a vibrant and organized digital home.
This guide will walk you through everything you need to know to set up your own Discord server, from the very basics to inviting your friends and customizing your space. Let’s dive in and discover how to create your perfect Discord server!
Understanding Discord Servers: Your Digital Hangout
So, what exactly is a Discord server? In simple terms, a Discord server is your own private space on the Discord platform, designed for communities and groups to communicate. Think of it as your personal online clubhouse.
Imagine inviting all your friends to your home. Some might gather in the living room to chat about movies, while others head to the kitchen to discuss cooking. In a Discord server, “rooms” are called channels. You can have different channels for different topics, keeping conversations organized and easy to follow.
 Friends chatting in a Discord server, illustrating different channels for various topics.
Discord servers bring people together from all over the world, allowing them to connect and chat about shared interests, build friendships, and create communities, all within a structured and user-friendly environment.
Getting Started: Creating Your Discord Server
Ready to build your own digital hangout? Here’s how to set up your Discord server step-by-step:
1. Download and Open Discord:
First, if you haven’t already, download the Discord app. You can find it for your computer or mobile device at discord.com/download. Alternatively, you can use Discord directly in your web browser by going to discord.com/login.
2. Create a Server:
Once you’re logged in, look to the left-hand side of the Discord app. You’ll see a green “+” (Plus) button. Click this button to start creating your server.
3. Choose a Server Template or Create Your Own:
Discord will ask you what kind of server you want to create. You can choose from pre-made templates based on different communities like “Gaming,” “Friends,” “Study Group,” or “Creators.” These templates provide you with a set of starter channels tailored to the chosen community type.
For this guide, we’ll use the “Friends” template as an example, but feel free to explore the others or start from scratch with “Create My Own.”
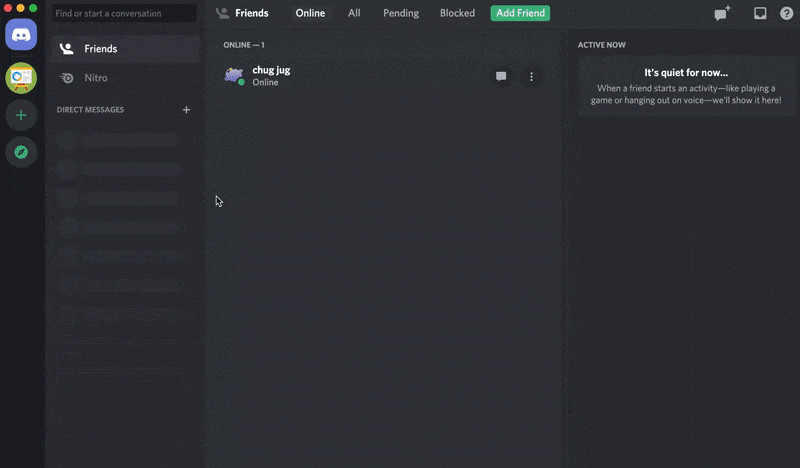 Animated GIF demonstrating how to create a Discord server by clicking the plus button and choosing a template.
Click your chosen template to proceed.
4. Name Your Server and Add a Server Icon:
Next, you’ll need to give your server a name. Choose something relevant to your community or purpose. Let’s name our example server “Plant Enthusiasts” – perfect for a group of friends passionate about houseplants!
You can also upload a server icon to personalize your space. Don’t worry, you can change the server name and icon at any time later.
5. Your Server is Ready!
Congratulations! You’ve just created your Discord server. It’s now a blank canvas ready for you to customize and invite your friends.
Inviting Friends to Your New Discord Home
Now that your server is set up, it’s time to invite your friends to join the fun!
1. The “Invite Your Friends” Button:
You should see a prominent “Invite Your Friends” button in the middle of your server window. Click it to open the invite options.
2. Invite Directly or Share an Invite Link:
You’ll have two main options for inviting people:
- Invite Directly: Discord will show you a list of your Discord friends. You can select friends directly from this list to send them invites.
- Share an Invite Link: You can create a unique invite link that you can copy and share via text, email, or any other platform.
Alternative Invite Method:
If you don’t see the “Invite Your Friends” button, or want to invite people later, you can always access the invite options through the server’s drop-down menu.
- Click the Server Name: Look at the top-left corner of your Discord window and click on your server’s name. This will open the server drop-down menu.
- Select “Invite People”: In the drop-down menu, choose “Invite People“. This will open the same invite window as the “Invite Your Friends” button.
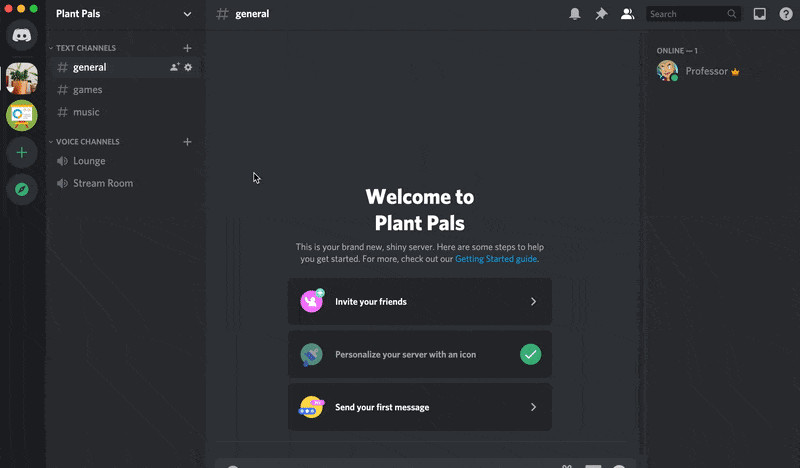 Animated GIF showing how to invite friends to a Discord server using the server drop-down menu.
Once you’ve sent out invites, your friends will be able to join your server and start chatting!
Text Channels and Voice Channels: The Heart of Your Server
Inside your new server, you’ll notice sections labeled “Text Channels” and “Voice Channels“. These are the core communication spaces within your server.
Text Channels:
Text channels are like chat rooms dedicated to specific topics. This is where you and your friends can type messages, share images, files, links, and react with emojis.
- Channel Names: Each text channel has a name that indicates its topic. For example, a “#general” channel is often used for general chat, while a “#gaming-chat” channel would be for game-related discussions. In our “Plant Enthusiasts” server, we might have a “#plant-care-tips” channel.
- Mentions: You can directly notify someone in the server by typing “@” followed by their username (e.g., “@username”). They will receive a notification.
- Organized Conversations: Text channels keep conversations focused and prevent topics from getting mixed up, unlike long, single group chats.
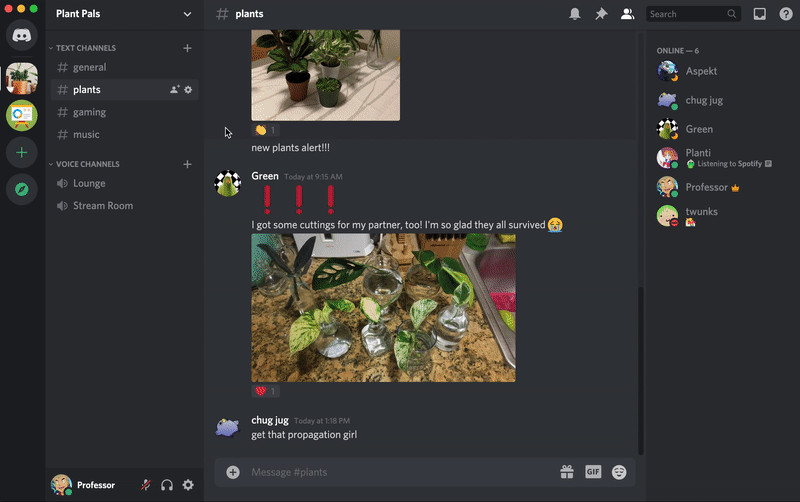
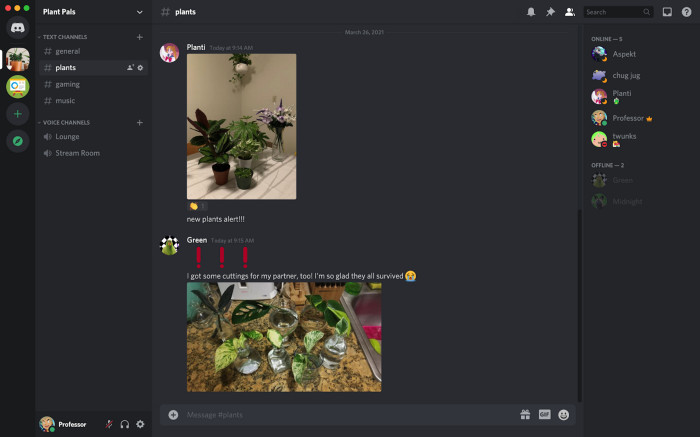 Screenshot of Discord text channels, showing examples like #general and #plant-talk with message examples.
Voice Channels:
Voice channels are where Discord truly shines. They allow for real-time voice communication, making it feel like you’re hanging out with your friends in person.
- Join and Talk: Simply click on a voice channel to join. There’s no ringing or calling required. It’s like walking into a room and joining the conversation.
- Video and Screen Sharing: Voice channels also support video chat and screen sharing. You can turn on your webcam to video call with friends or share your screen to show gameplay, presentations, or anything else on your computer.
- Large Group Calls: Discord voice channels can handle a large number of participants. You can have unlimited people in a voice call, up to 25 people in a video chat, and up to 50 viewers for screen sharing.
Customizing Your Server: Adding and Managing Channels
As your community grows and your needs evolve, you’ll likely want to add or remove channels to keep your server organized.
Creating New Channels:
- Server Drop-Down Menu: Click on your server’s name in the top-left corner to open the drop-down menu.
- Select “Create Channel”: Choose “Create Channel” from the menu.
- Choose Channel Type: Select whether you want to create a “Text Channel” or a “Voice Channel”.
- Name Your Channel: Enter a name for your new channel. For our “Plant Enthusiasts” server, let’s create a text channel called “#plant-identification”.
- Create Channel: Click “Create Channel“.
Your new channel will now appear in the Text Channels or Voice Channels list, ready for use.
How Many Channels Should You Have?
When starting out, it’s best to keep the number of channels manageable. Too many channels can be overwhelming, especially for new members.
- Start Small: Begin with a few essential channels and see how your community uses them.
- Expand as Needed: You can always add more channels later as your server grows and new topics emerge.
- Avoid Over-Segmentation: Don’t create channels for every single sub-topic. Sometimes, broader channels are better to encourage more interaction. For example, instead of channels like “#fern-care”, “#succulent-tips”, and “#orchid-advice”, a single “#plant-care-questions” channel might be more effective initially.
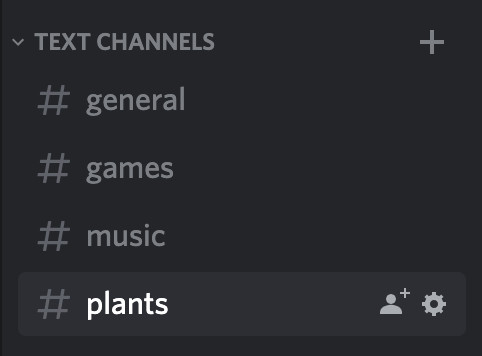 Image illustrating a server with a good balance of channels, not too many or too few.
Deleting Channels:
You can also delete channels you no longer need. However, be careful: deleting a channel is permanent, and all messages and content within it will be lost forever.
To delete a channel:
- Right-Click Channel: Right-click on the channel you want to delete (or long-press on mobile).
- Edit Channel: Select “Edit Channel“.
- Delete Channel: In the Channel Settings, scroll down and click “Delete Channel“.
- Confirm Deletion: Discord will ask you to confirm the deletion. Click “Delete Channel” again to permanently remove it.
Private Channels: Creating Exclusive Spaces
Sometimes you might want channels that are only visible to specific members. Discord allows you to create Private Channels for this purpose.
Creating a Private Channel:
- Start Channel Creation: Follow the steps to create a new channel (Server Drop-Down Menu > Create Channel).
- Toggle “Private Channel”: When creating the channel, you’ll see an option to make it a “Private Channel“. Toggle this option to “on”.
- Select Members: After toggling “Private Channel” on, Discord will prompt you to select the members or roles who should have access to this channel.
- Create Channel: Click “Create Channel“.
 Animated GIF showing how to create a private channel and select specific members to access it.
Private channels are indicated by a lock icon next to their name. Only the members you’ve added will be able to see and access these channels.
Managing Private Channel Access:
To add or remove members from a private channel after it’s created:
- Edit Channel: Right-click on the private channel (or long-press on mobile) and select “Edit Channel“.
- Permissions: Go to the “Permissions” tab in the Channel Settings.
- Adjust Access: Here, you can add or remove members and roles to control who can access the private channel.
Welcome to Your Discord Server!
You’ve now successfully set up your own Discord server! It’s time to explore, customize, and enjoy your new digital space with your friends and community.
Use text channels to share messages and resources, hop into voice channels for live conversations and virtual hangouts, and personalize your server to reflect your community’s unique identity.
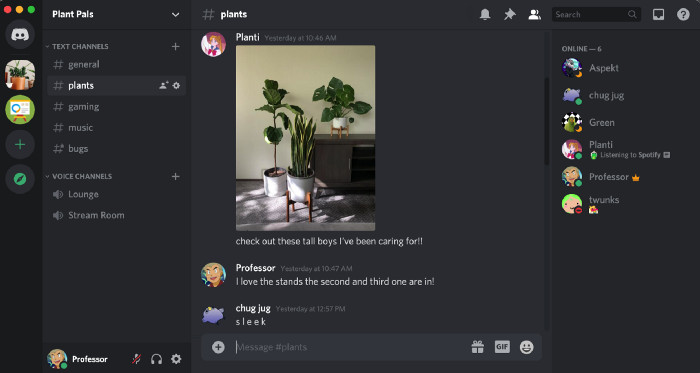 Image of happy Discord users enjoying their server, highlighting the fun and community aspect.
Discord servers are incredibly versatile and can be adapted to fit all sorts of communities and purposes. So go ahead, invite your friends, start chatting, and build your amazing Discord community today!
If you found this guide helpful, share it with others who might be looking to create their own Discord server. For more advanced tips on growing your community, check out Discord’s guide on Best Practices for Starting a Great Community on Discord. And for further assistance, Discord’s Help Center and Twitter support @discord are always available.

