Craving the smooth, creamy delight of soft serve ice cream but don’t want to head to the store? You’re in luck! Making soft serve ice cream at home is surprisingly simple, and you don’t need any fancy equipment. This easy method, sometimes known as “ice cream in a bag,” is not only a fun activity, especially for kids, but also a fast way to satisfy your sweet tooth. Legend has it that this ingenious technique originated in the United States in the early 20th century, with a documented mention as far back as 1907 in Popular Mechanics magazine. Whether the story is true or not, the magic of turning simple ingredients into delicious soft serve with just a bit of shaking is undeniable.
This recipe will guide you through creating a classic vanilla soft serve, perfect on its own or as a base for your favorite toppings and mix-ins. Get ready to enjoy a homemade treat that’s ready in just about 5 minutes!
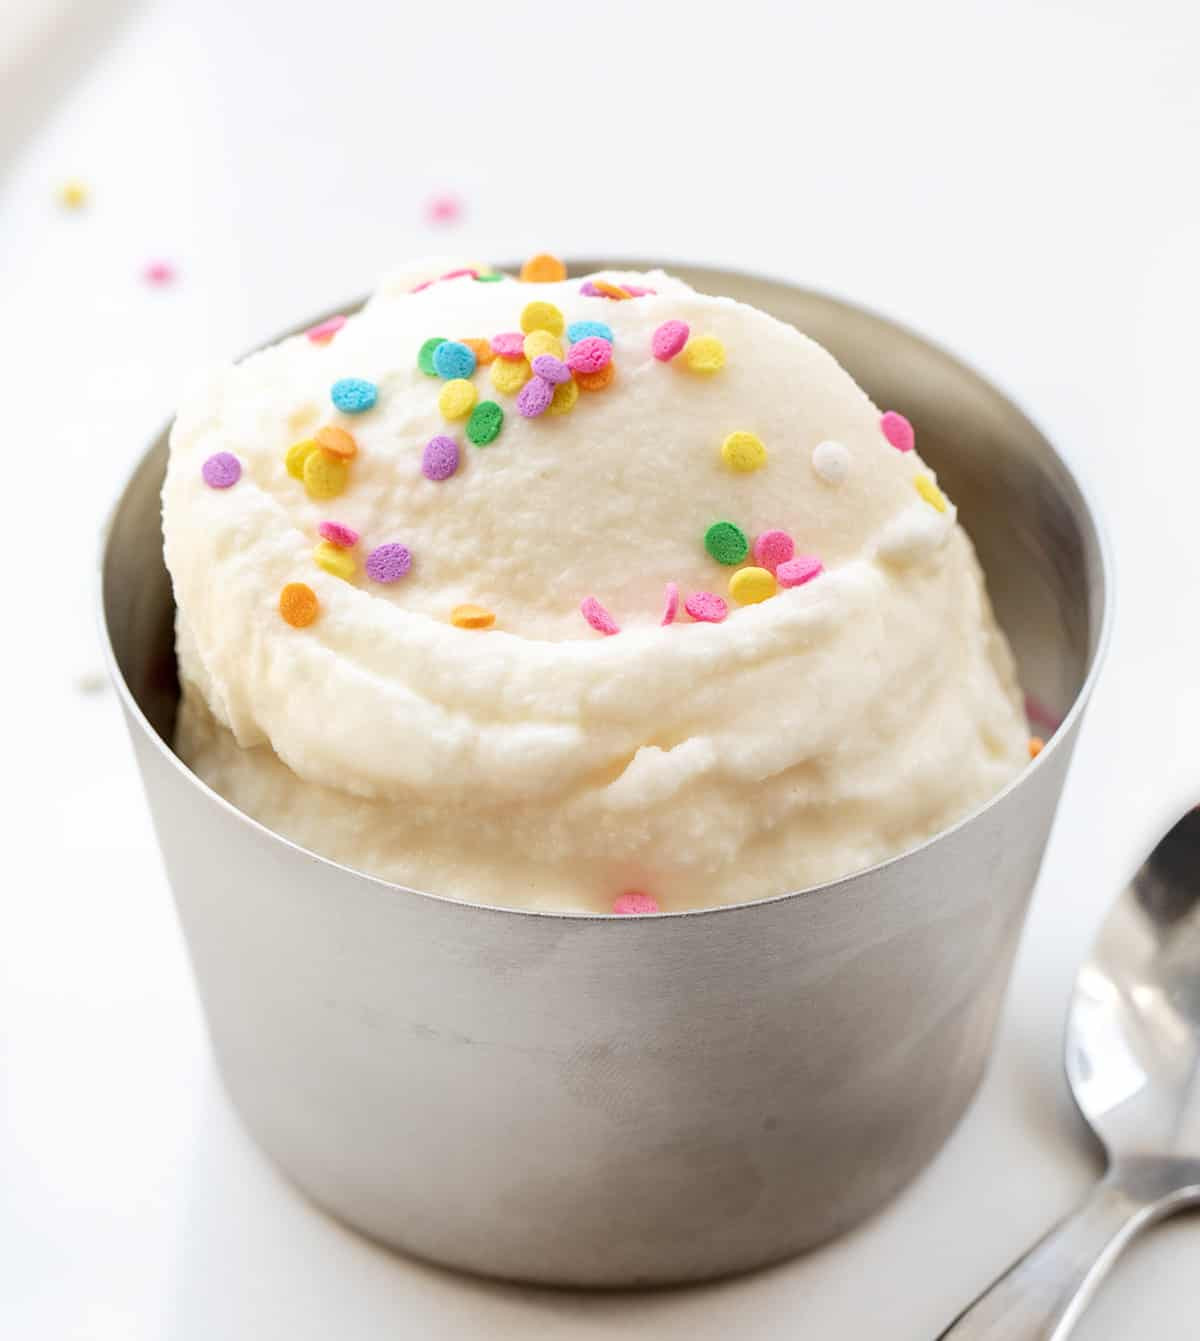 Metal Bowl with Scoops of Soft Serve Ice Cream in It with Sprinkles and a Spoon on a White Counter.
Essential Ingredients for Homemade Soft Serve
The key to creamy, dreamy soft serve lies in the quality and type of ingredients you use. Here’s a breakdown of what you’ll need and why each component is important:
- Heavy Cream: This is your foundation for richness and that signature soft serve texture. Heavy cream, also labeled as heavy whipping cream, boasts a high-fat content, which is crucial for creating a luxurious, smooth ice cream. The fat prevents ice crystals from forming large and gives the ice cream its characteristic creamy mouthfeel. For a less rich option, you could consider half-and-half or whole milk, but be aware that the final consistency will be less thick and creamy.
- Whole Milk: Continuing with the theme of richness, whole milk is preferred over lower-fat milk options. The fat content in whole milk contributes to a creamier and more flavorful soft serve. Skim or 1% milk will result in a thinner, icier texture.
- Granulated Sugar: Sugar does more than just sweeten your ice cream. It also plays a role in the texture. Granulated sugar dissolves easily and evenly in the liquid mixture, ensuring a consistent sweetness throughout.
- Vanilla Extract: Pure vanilla extract provides that classic, warm vanilla flavor that is synonymous with soft serve. Don’t skimp on quality here – a good vanilla extract makes a noticeable difference.
- Salt (for the ice bath): Salt is a surprising but essential ingredient in this method. It’s not for flavoring the ice cream itself but for lowering the freezing point of ice. By adding salt to ice, you create a super-cold environment that allows the cream mixture to freeze quickly and evenly, resulting in soft serve instead of hard ice cream. Kosher salt is recommended for its readily available nature and effectiveness. You can also use other salts like Himalayan pink salt or Maldon sea salt. If using rock salt or Himalayan pink salt, you will need to double the quantity compared to kosher salt. Maldon sea salt can be used in the same quantity as kosher salt.
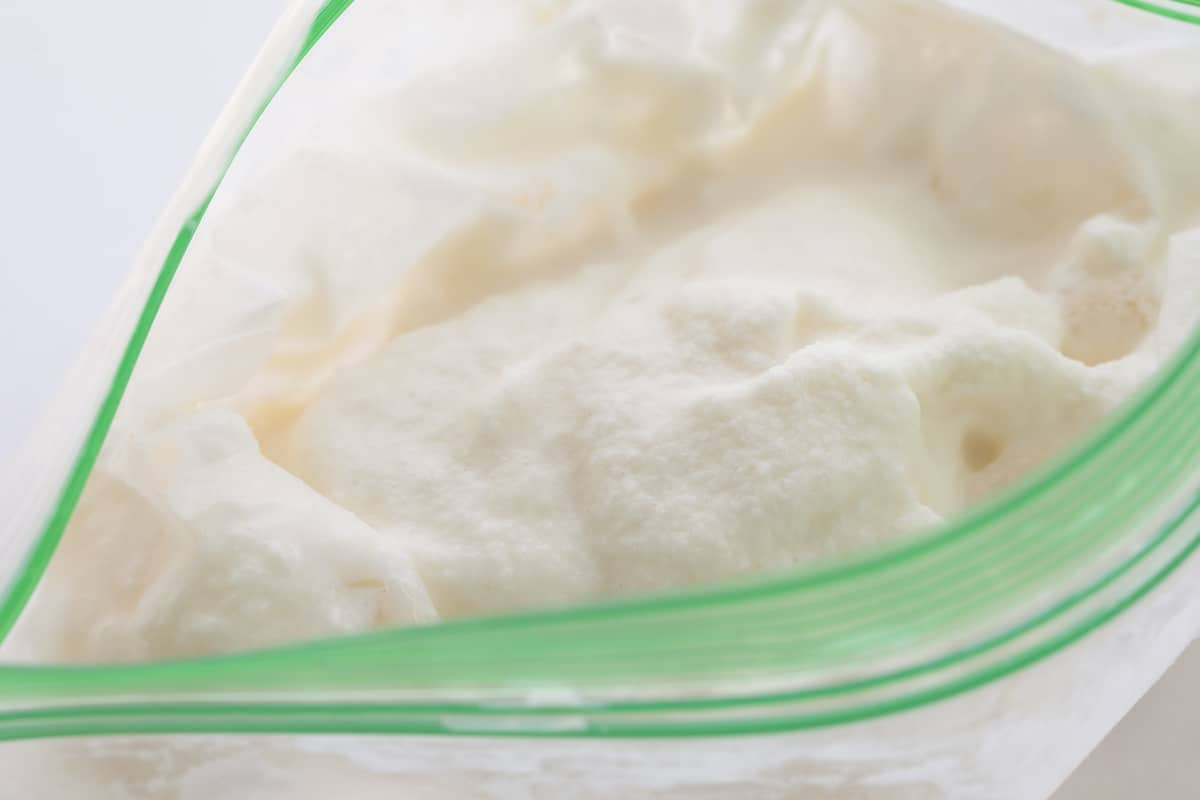 Close up of Soft Serve Ice Cream in a Plastic Bag After Shaking it in a Salt and Ice Bag.
Step-by-Step Guide: Making Soft Serve Ice Cream in a Bag
Now, let’s get to the fun part – making your own soft serve! Follow these simple steps:
-
Combine the Ice Cream Ingredients: In a quart-sized resealable plastic bag, pour in the heavy cream, whole milk, and vanilla extract.
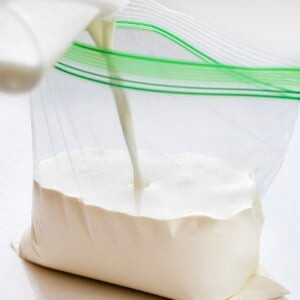 Adding Milk and Heavy Cream to a Plastic Bag to Make Soft Serve Ice Cream.
 -
Add Sugar and Dissolve: Add the granulated sugar to the bag. Seal the bag tightly, ensuring it’s completely closed to prevent leaks. Gently shake the bag for a minute or two until the sugar is fully dissolved into the liquid mixture. This step is important for ensuring a smooth texture.
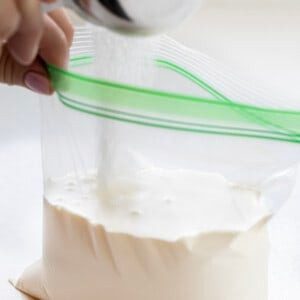 Adding Sugar to a Bag Filled with Heavy Cream to Make Soft Serve Ice Cream.
 -
Prepare the Ice Bath: In a gallon-sized resealable plastic bag, add the ice and salt. The larger bag will house the smaller bag with the cream mixture, creating the ice bath.
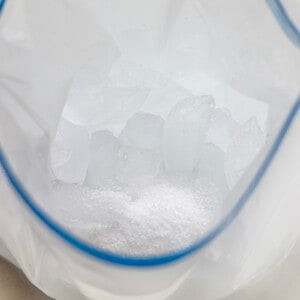 Ice and Salt in a Bag before Adding the Cream Mixture Bag to Make Soft Serve Ice Cream.
 -
Shake and Freeze: Place the smaller bag containing the cream mixture inside the larger bag of ice and salt. Seal the larger bag tightly. Now, the arm workout begins! Shake the bag vigorously for about 5-7 minutes. For comfort, you might want to wear gloves to protect your hands from the cold or wrap the bag in a towel. The constant shaking and the salt-ice mixture will rapidly lower the temperature of the cream mixture, causing it to freeze into soft serve.
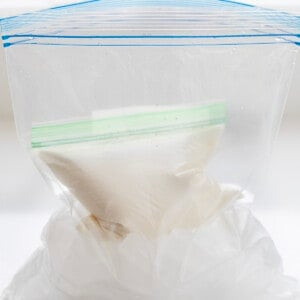 Cream Mixture in a Bag Inside a Bag of Ice and Salt to Make Soft Serve Ice Cream.
 -
Check Consistency and Serve: After shaking for 5-7 minutes, carefully remove the ice cream bag from the ice bag. Check the consistency of your soft serve. It should be soft and scoopable. If you prefer a slightly firmer texture, you can shake it for another minute or two.
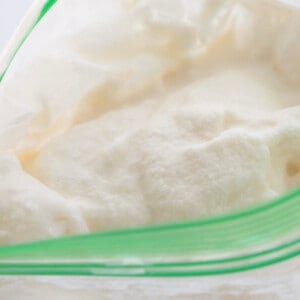 Close up of Soft Serve Ice Cream in a Plastic Bag After Shaking it in a Salt and Ice Bag.
 -
Enjoy Immediately: Soft serve is best enjoyed right away! Scoop it into bowls or cones and add your favorite toppings.
Tips for Perfect Homemade Soft Serve
- Keep it Cold: The key to soft serve is rapid freezing. Make sure you have plenty of ice and use enough salt to create a very cold environment.
- Shake Vigorously: Consistent and vigorous shaking is essential for preventing large ice crystals and achieving a smooth texture.
- Don’t Overfill the Bag: Make sure not to overfill the cream mixture bag, as it needs space to move around and freeze effectively.
- Double Bag for Security: To prevent any leaks, you might consider double-bagging both the cream mixture bag and the ice/salt bag.
Customize Your Soft Serve: Mix-ins and Variations
One of the best parts about homemade soft serve is the ability to customize it!
- Mix-ins: Before you start shaking the bag in the ice bath, you can add mix-ins directly to the cream mixture. Consider adding chocolate chips, mini candies, crushed cookies, chopped nuts, or fruit pieces.
- Flavor Variations: While vanilla is classic, you can easily experiment with other flavors. Try adding a teaspoon of other extracts like almond, peppermint, or lemon. For chocolate soft serve, add a tablespoon of cocoa powder to the mixture.
- Toppings Galore: Once your vanilla soft serve is ready, the topping possibilities are endless! Drizzle with chocolate syrup, caramel sauce, sprinkle with nuts, fresh fruit, whipped cream, or sprinkles.
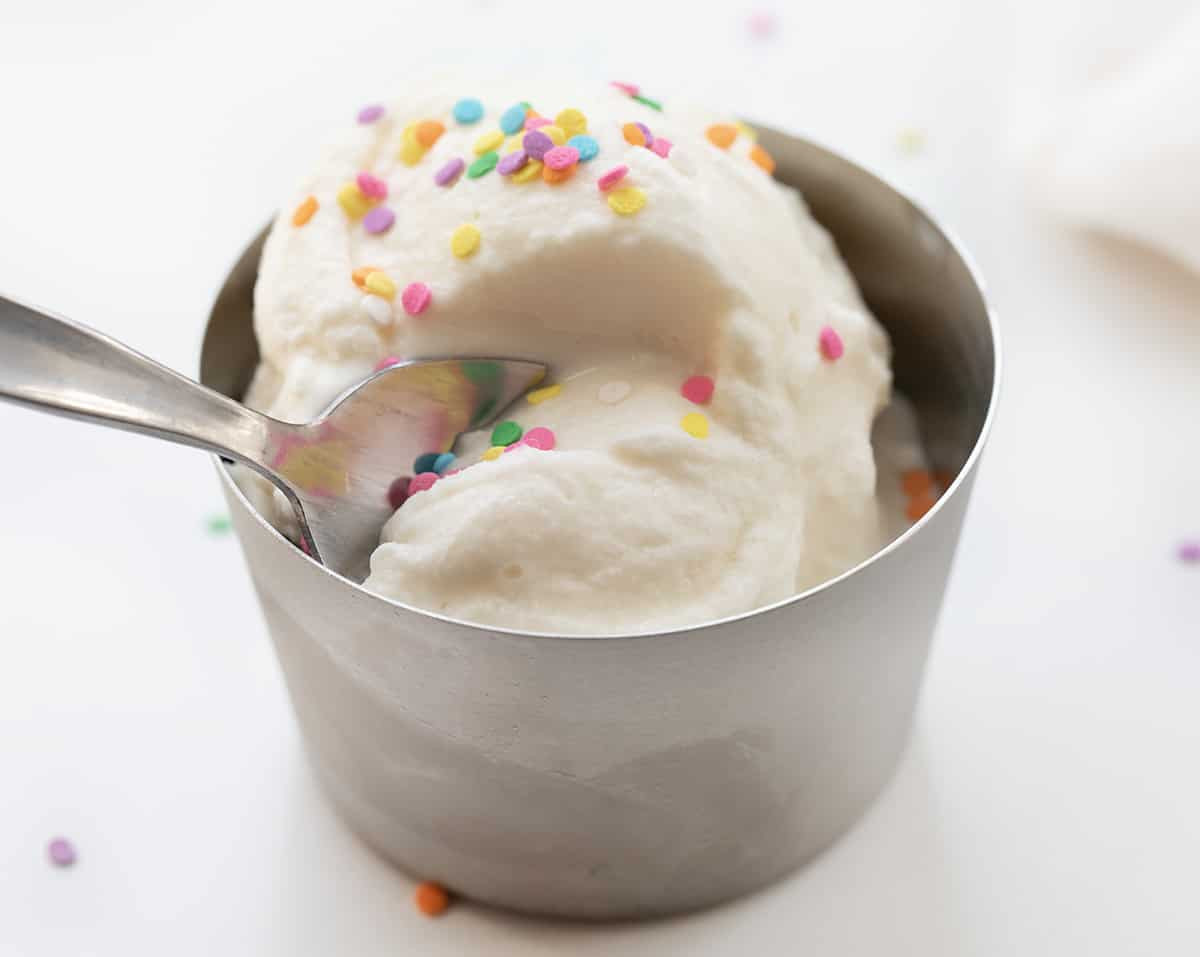 Spoon Taking a Bite out of a Metal Dish with Soft Serve Ice Cream.
Storing Leftover Soft Serve (If There Is Any!)
This recipe makes about one cup of soft serve, perfect for a single serving or a small treat. It’s really meant to be enjoyed immediately at its softest and creamiest. However, if you do have leftovers, you can store them in a freezer-safe container in the freezer. Keep in mind that it will harden in the freezer and lose some of its soft serve texture. When you’re ready to enjoy it, let it thaw for a bit to soften before scooping.
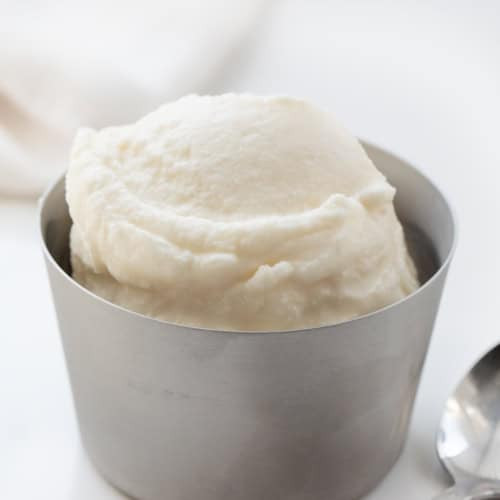 Scoop of Soft Serve Ice Cream in a Metal Bowl on a White Counter with Spoon Nearby.
Why This Homemade Soft Serve Recipe Works
This “ice cream in a bag” method is a fantastic way to make soft serve at home because:
- It’s Fast: You can go from ingredients to dessert in under 10 minutes.
- No Special Equipment Needed: You don’t need an ice cream maker or any specialized tools. Just bags, ice, and salt!
- It’s Fun and Educational: It’s a great activity to do with kids, teaching them a bit about science (freezing point depression) while making a tasty treat.
- Customizable: Easily adaptable to different flavors and mix-ins to suit everyone’s preferences.
So, next time you’re craving soft serve, skip the store run and try this quick and easy homemade version. You’ll be amazed at how simple and delicious it is!