Creating your own Minecraft server opens up a world of customization, control, and fun with friends. While traditionally, powerful desktop computers or rented servers were the go-to options, the humble Raspberry Pi Zero presents an intriguing, budget-friendly alternative. Yes, you heard it right – the credit-card-sized computer can actually host a Minecraft server!
Initially, the idea of running a server on such a low-spec device might seem far-fetched. Concerns about the Raspberry Pi Zero’s limited 512MB of RAM and 1GHz single-core processor are valid. Many online discussions quickly dismiss it as inadequate. However, with strategic choices and careful optimization, it’s indeed possible to get a functional Minecraft server up and running on your Raspberry Pi Zero.
This guide will walk you through the process of setting up a Minecraft server on your Raspberry Pi Zero. We’ll focus on a lightweight yet engaging game mode, Skyblock, to ensure a smoother experience given the hardware constraints. Let’s dive in and transform your tiny Pi into a portal for block-building adventures!
Choosing the Right Game Plan: Skyblock for Raspberry Pi Zero
Given the Raspberry Pi Zero’s limitations, we need to be smart about the type of Minecraft experience we aim for. Running a massive survival world with dozens of players and complex structures is simply not realistic. Therefore, we’ll strategically focus on Skyblock.
Skyblock is a game mode where players start on a small, isolated island with minimal resources. The challenge lies in creatively expanding your island, generating resources, and completing objectives with limited space and materials. This mode is ideal for the Pi Zero because:
- Reduced Load: Skyblock inherently minimizes the server’s workload. There are fewer entities to render, fewer chunks to load simultaneously, and typically less complex world generation compared to standard survival.
- Focused Gameplay: The gameplay is concentrated on individual islands, reducing the need for the server to manage vast, dynamically changing landscapes.
- Plugin Support: We can leverage plugins like ASkyBlock (or its successors like BentoBox or SuperiorSkyblock2) to streamline island management, player interactions, and Skyblock-specific features. Using a plugin simplifies setup and provides a robust framework compared to manually creating a custom world.
While other lightweight modes exist, Skyblock offers a good balance of engaging gameplay and server performance on limited hardware. It allows for multiplayer interaction and progression without overwhelming the Raspberry Pi Zero.
Gathering Your Hardware and Preparing the Raspberry Pi Zero
Before we delve into software, let’s assemble the necessary hardware. Here’s what you’ll need to get started:
- Raspberry Pi Zero (or Zero W): The heart of our server. The Zero W with built-in Wi-Fi is convenient, but for server stability, a wired Ethernet connection via adapter is preferable.
- Micro-SD Card (at least 16GB, Class 10 or higher): To install the operating system and server files. A larger card provides more breathing room.
- 5V, 1000mA (1A) USB Power Adapter: Provides sufficient power for the Pi Zero and its peripherals.
- Micro-USB Cable: To connect the power adapter to the Raspberry Pi Zero.
- Micro-USB to Ethernet Adapter: For a stable wired internet connection. While Wi-Fi on the Zero W is an option, Ethernet offers significantly better reliability and lower latency for a server. Consider a reputable brand for better performance.
- Ethernet Cable: To connect the Ethernet adapter to your router.
Once you have all the components, follow these steps to prepare your Raspberry Pi Zero:
-
Install Raspbian OS: Download the latest version of Raspberry Pi OS Lite (64-bit) from the official Raspberry Pi website. The Lite version is crucial as it’s a minimal OS without a graphical desktop environment, conserving valuable resources. Use Raspberry Pi Imager or Etcher to flash the OS image onto your micro-SD card.
-
Enable SSH: Before booting up the Pi for the first time, enable SSH for remote access. This allows you to control the Pi from your computer without needing a monitor, keyboard, and mouse connected directly to the Pi. Create an empty file named
ssh(no extension) in the root directory of thebootpartition on your SD card. -
Connect and Boot: Insert the micro-SD card into the Raspberry Pi Zero. Connect the Ethernet adapter, Ethernet cable, and power supply. The Pi should boot up automatically.
-
Find the Pi’s IP Address: You need to find the IP address assigned to your Raspberry Pi by your router. You can usually find this in your router’s admin interface or by using a network scanning tool on your computer.
-
Access via SSH: Use an SSH client like PuTTY (for Windows) or the built-in terminal (macOS/Linux) to connect to your Raspberry Pi. Use the default username
piand passwordraspberry. It’s highly recommended to change the default password immediately for security reasons using thepasswdcommand after logging in.
ssh pi@your_pi_ip_address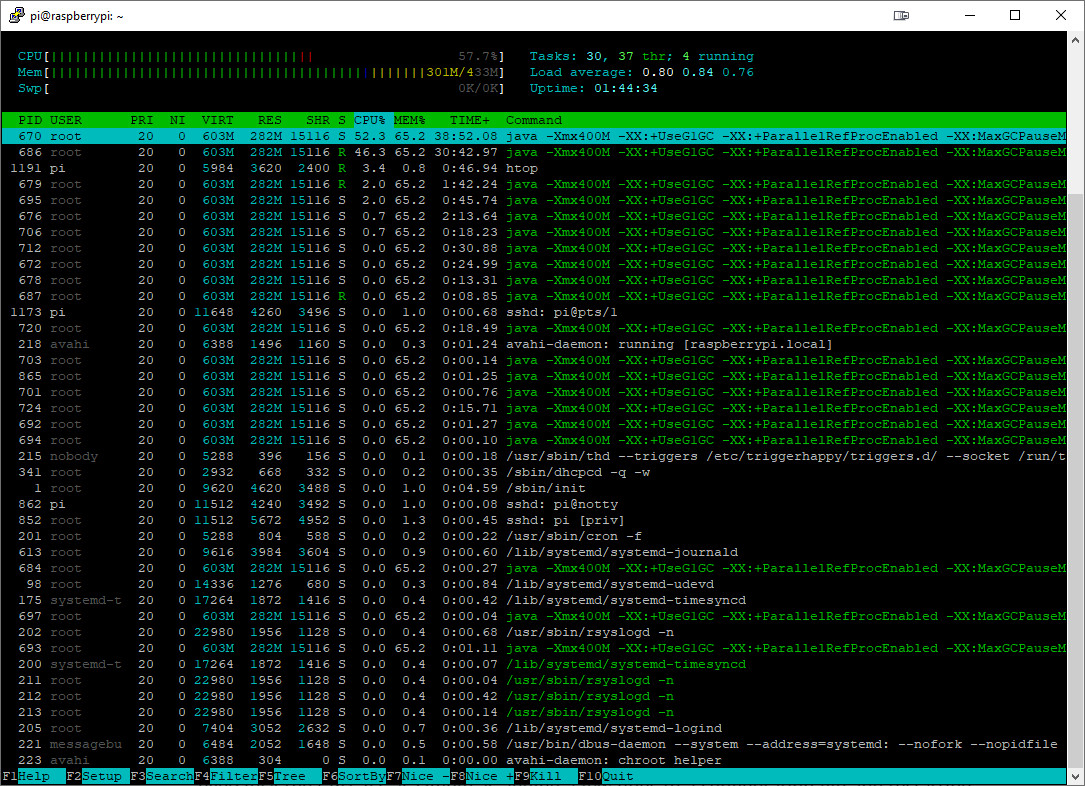 Accessing Raspberry Pi via SSH using PuTTY
- Update the System: Once logged in, update the package lists and upgrade installed packages to the latest versions:
sudo apt update
sudo apt upgrade -y
This ensures you have the most recent software, which is essential for stability and security.
Setting Up the Minecraft Server Software (PaperMC)
For our Minecraft server, we’ll use PaperMC. PaperMC is a highly optimized fork of Spigot, which itself is a modified version of CraftBukkit. PaperMC provides significant performance improvements over vanilla Minecraft servers, making it a much better choice for resource-constrained environments like the Raspberry Pi Zero.
While the original article mentions using BuildTools, Spigot, and then PaperMC, the process has become simpler. We can directly download PaperMC. Here are the steps:
-
Download PaperMC: Visit the official PaperMC downloads page. Find the latest stable version of Paper for your desired Minecraft version (e.g., 1.18.2, 1.19.4, etc.). For better compatibility with older plugins and potentially slightly lower resource usage, consider slightly older but still stable versions like 1.12.2 or 1.16.5. Download the
paper-*.jarfile. -
Create Server Directory: On your Raspberry Pi, create a dedicated directory for your Minecraft server. For example:
mkdir minecraft-server
cd minecraft-server-
Upload PaperMC JAR: Use an SCP client like WinSCP (Windows) or
scpcommand (macOS/Linux) to transfer the downloadedpaper-*.jarfile to theminecraft-serverdirectory on your Raspberry Pi. -
Create Startup Script (start.sh): Create a script to easily start your server. Use a text editor like
nano:
nano start.shPaste the following script into start.sh:
#!/bin/bash
java -Xms256M -Xmx400M -jar paper-*.jar nogui
-Xms256M -Xmx400M: These parameters set the initial and maximum memory allocation for the Java Virtual Machine (JVM). We’re limiting it to 400MB maximum, which is crucial given the Pi Zero’s 512MB RAM. You might need to adjust these values based on your server’s performance.- *`-jar paper-.jar
**: This specifies the PaperMC JAR file to execute.paper-*.jar` uses a wildcard to automatically select the JAR file you uploaded. nogui: Runs the server in “nogui” mode, which is essential for a headless server environment like Raspberry Pi, saving resources by not loading a graphical user interface.
- Make the Script Executable: Give the
start.shscript execute permissions:
chmod +x start.sh- Run the Server for the First Time: Execute the startup script:
./start.shThe first time you run the server, it will generate configuration files and then stop because you need to accept the Minecraft End User License Agreement (EULA).
-
Accept the EULA: Open the
eula.txtfile in theminecraft-serverdirectory usingnano eula.txt. Changeeula=falsetoeula=trueto accept the EULA. Save and close the file (Ctrl+X, Y, Enter). -
Run the Server Again: Start the server again:
./start.shThe server should now start up completely. It might take a few minutes for the initial world generation and server loading to complete. You can monitor the server console output in your SSH session.
Optimizing Your Minecraft Server for Raspberry Pi Zero
To ensure your Minecraft server runs as smoothly as possible on the Raspberry Pi Zero, optimization is key. Here are several crucial configurations and strategies:
-
Server Configuration Files (server.properties, paper.yml, spigot.yml):
-
server.properties:view-distance=3: Drastically reduce the view distance. While limiting, it significantly reduces the server load, especially on the Pi Zero. For Skyblock, a low view distance is less impactful than in a large exploration-focused world.max-players=2-5: Limit the maximum number of players. Realistically, a Raspberry Pi Zero can handle a very small number of concurrent players. Start with 2-3 and cautiously increase if performance allows.spawn-animals=false,spawn-monsters=false: Disable or reduce mob spawning to minimize entity processing. In Skyblock, mob spawning is often controlled by island generators or challenges, so disabling default spawning can improve performance without significantly impacting gameplay.online-mode=trueoronline-mode=false:online-mode=true(default) requires players to have a legitimate Minecraft account.online-mode=falseallows anyone to join without authentication, which is generally discouraged for security reasons unless it’s a private server for trusted friends.motd: Customize your server’s “Message of the Day” displayed in the Minecraft server list.
-
paper.ymlandspigot.yml: These files, generated by PaperMC and Spigot, offer more advanced optimization options. Consult online guides like the Spigot Server Optimization Guide for detailed settings. Focus on sections with “Medium” to “High” performance impact. Key areas include:- Entity tracking range: Reduce ranges for various entity types.
- Chunk sending and loading: Optimize chunk management.
- Disable unnecessary features: Like statistics, advancements, or certain world features that are less critical for a Skyblock server.
-
-
JVM Arguments: We already set initial and maximum memory in
start.sh. You can explore other JVM arguments for potential performance gains, but be cautious and research their effects. The-Xmsand-Xmxsettings are the most critical for memory management. -
Plugins: While plugins add features, they also consume resources. Start with essential plugins only.
- ASkyBlock (or BentoBox/SuperiorSkyblock2): For Skyblock functionality.
- EssentialsX (or similar): Provides basic server commands and utilities.
- LuckPerms (or similar): For permission management (useful if you plan to expand later).
- Performance Monitoring Plugins (optional, for advanced users): Plugins like Spark can help identify performance bottlenecks, but add a slight overhead themselves.
-
Overclocking (Optional, Use with Caution): Overclocking the Raspberry Pi Zero can provide a slight performance boost. However, it also increases heat generation and could potentially lead to instability or hardware damage if not done carefully. Proceed at your own risk and research thoroughly.
-
Edit
config.txt: Open/boot/config.txtusingsudo nano /boot/config.txt. -
Add Overclocking Settings: Add the following lines at the end of the file:
over_voltage=2 arm_freq=1100over_voltage=2: Slightly increases voltage.arm_freq=1100: Increases CPU frequency to 1.1 GHz (from 1 GHz). You can experiment with slightly higher values, but monitor temperature and stability.
-
Reboot:
sudo reboot -
Benchmark (Optional): You can use
sysbenchas shown in the original article to benchmark before and after overclocking to gauge the performance increase.sudo apt install sysbench sysbench --test=cpu --cpu-max-prime=2000 runCompare the “total time” results before and after overclocking.
-
Performance monitoring with htop on Raspberry Pi Zero Minecraft Server
-
Operating System Optimization: We already used Raspberry Pi OS Lite. Further optimizations include:
- Minimize Background Processes: Ensure no unnecessary applications or services are running on the Raspberry Pi.
- Disable Desktop Environment (if accidentally installed): If you mistakenly installed the full Raspberry Pi OS with a desktop, disable the desktop environment to free up resources.
Starting and Accessing Your Minecraft Server
-
Start the Server: In your SSH session, navigate to the
minecraft-serverdirectory and run the startup script:./start.shKeep the SSH session open to monitor the server console.
-
Get Your Public IP Address: To allow friends outside your local network to join, you need your public IP address. You can find this by searching “what is my ip” on Google or using websites like https://www.whatismyipaddress.com/.
-
Port Forwarding (If Needed for External Access): If you want players outside your home network to connect, you need to configure port forwarding on your router. This directs incoming connections on port 25565 (default Minecraft port) to your Raspberry Pi’s local IP address.
- Access Router Settings: Open your web browser and enter your router’s IP address (usually something like
192.168.1.1or192.168.0.1). Find the port forwarding or NAT settings. - Create Port Forwarding Rule:
- Service/Application Name: Minecraft Server (or any descriptive name)
- Port Range: 25565 (or your custom server port if you changed it in
server.properties) - Local IP Address: The local IP address of your Raspberry Pi (the one you used for SSH).
- Protocol: TCP/UDP or Both
Refer to your router’s manual or online guides for specific instructions as router interfaces vary. Minecraft Wiki’s guide on setting up a server also provides general port forwarding information.
- Access Router Settings: Open your web browser and enter your router’s IP address (usually something like
-
Connect to Your Server:
- Direct Connection (LAN): If you and your friends are on the same local network, connect to
your_raspberry_pi_local_ip:25565. - External Connection (WAN): If players are outside your network, they connect to
your_public_ip_address:25565. If you have a domain name, you can associate it with your public IP for easier access, as described in resources like Namecheap’s guide on linking a domain to a Minecraft server.
- Direct Connection (LAN): If you and your friends are on the same local network, connect to
-
Troubleshooting “OutOfMemoryError”: If you encounter
OutOfMemoryErroron startup, try running thestart.shscript again. Sometimes, the initial server startup can be memory-intensive. If it persists, slightly reduce the-Xmxvalue instart.sh(e.g.,-Xmx384M).
Conclusion: Minecraft on a Tiny Computer – A Fun Experiment
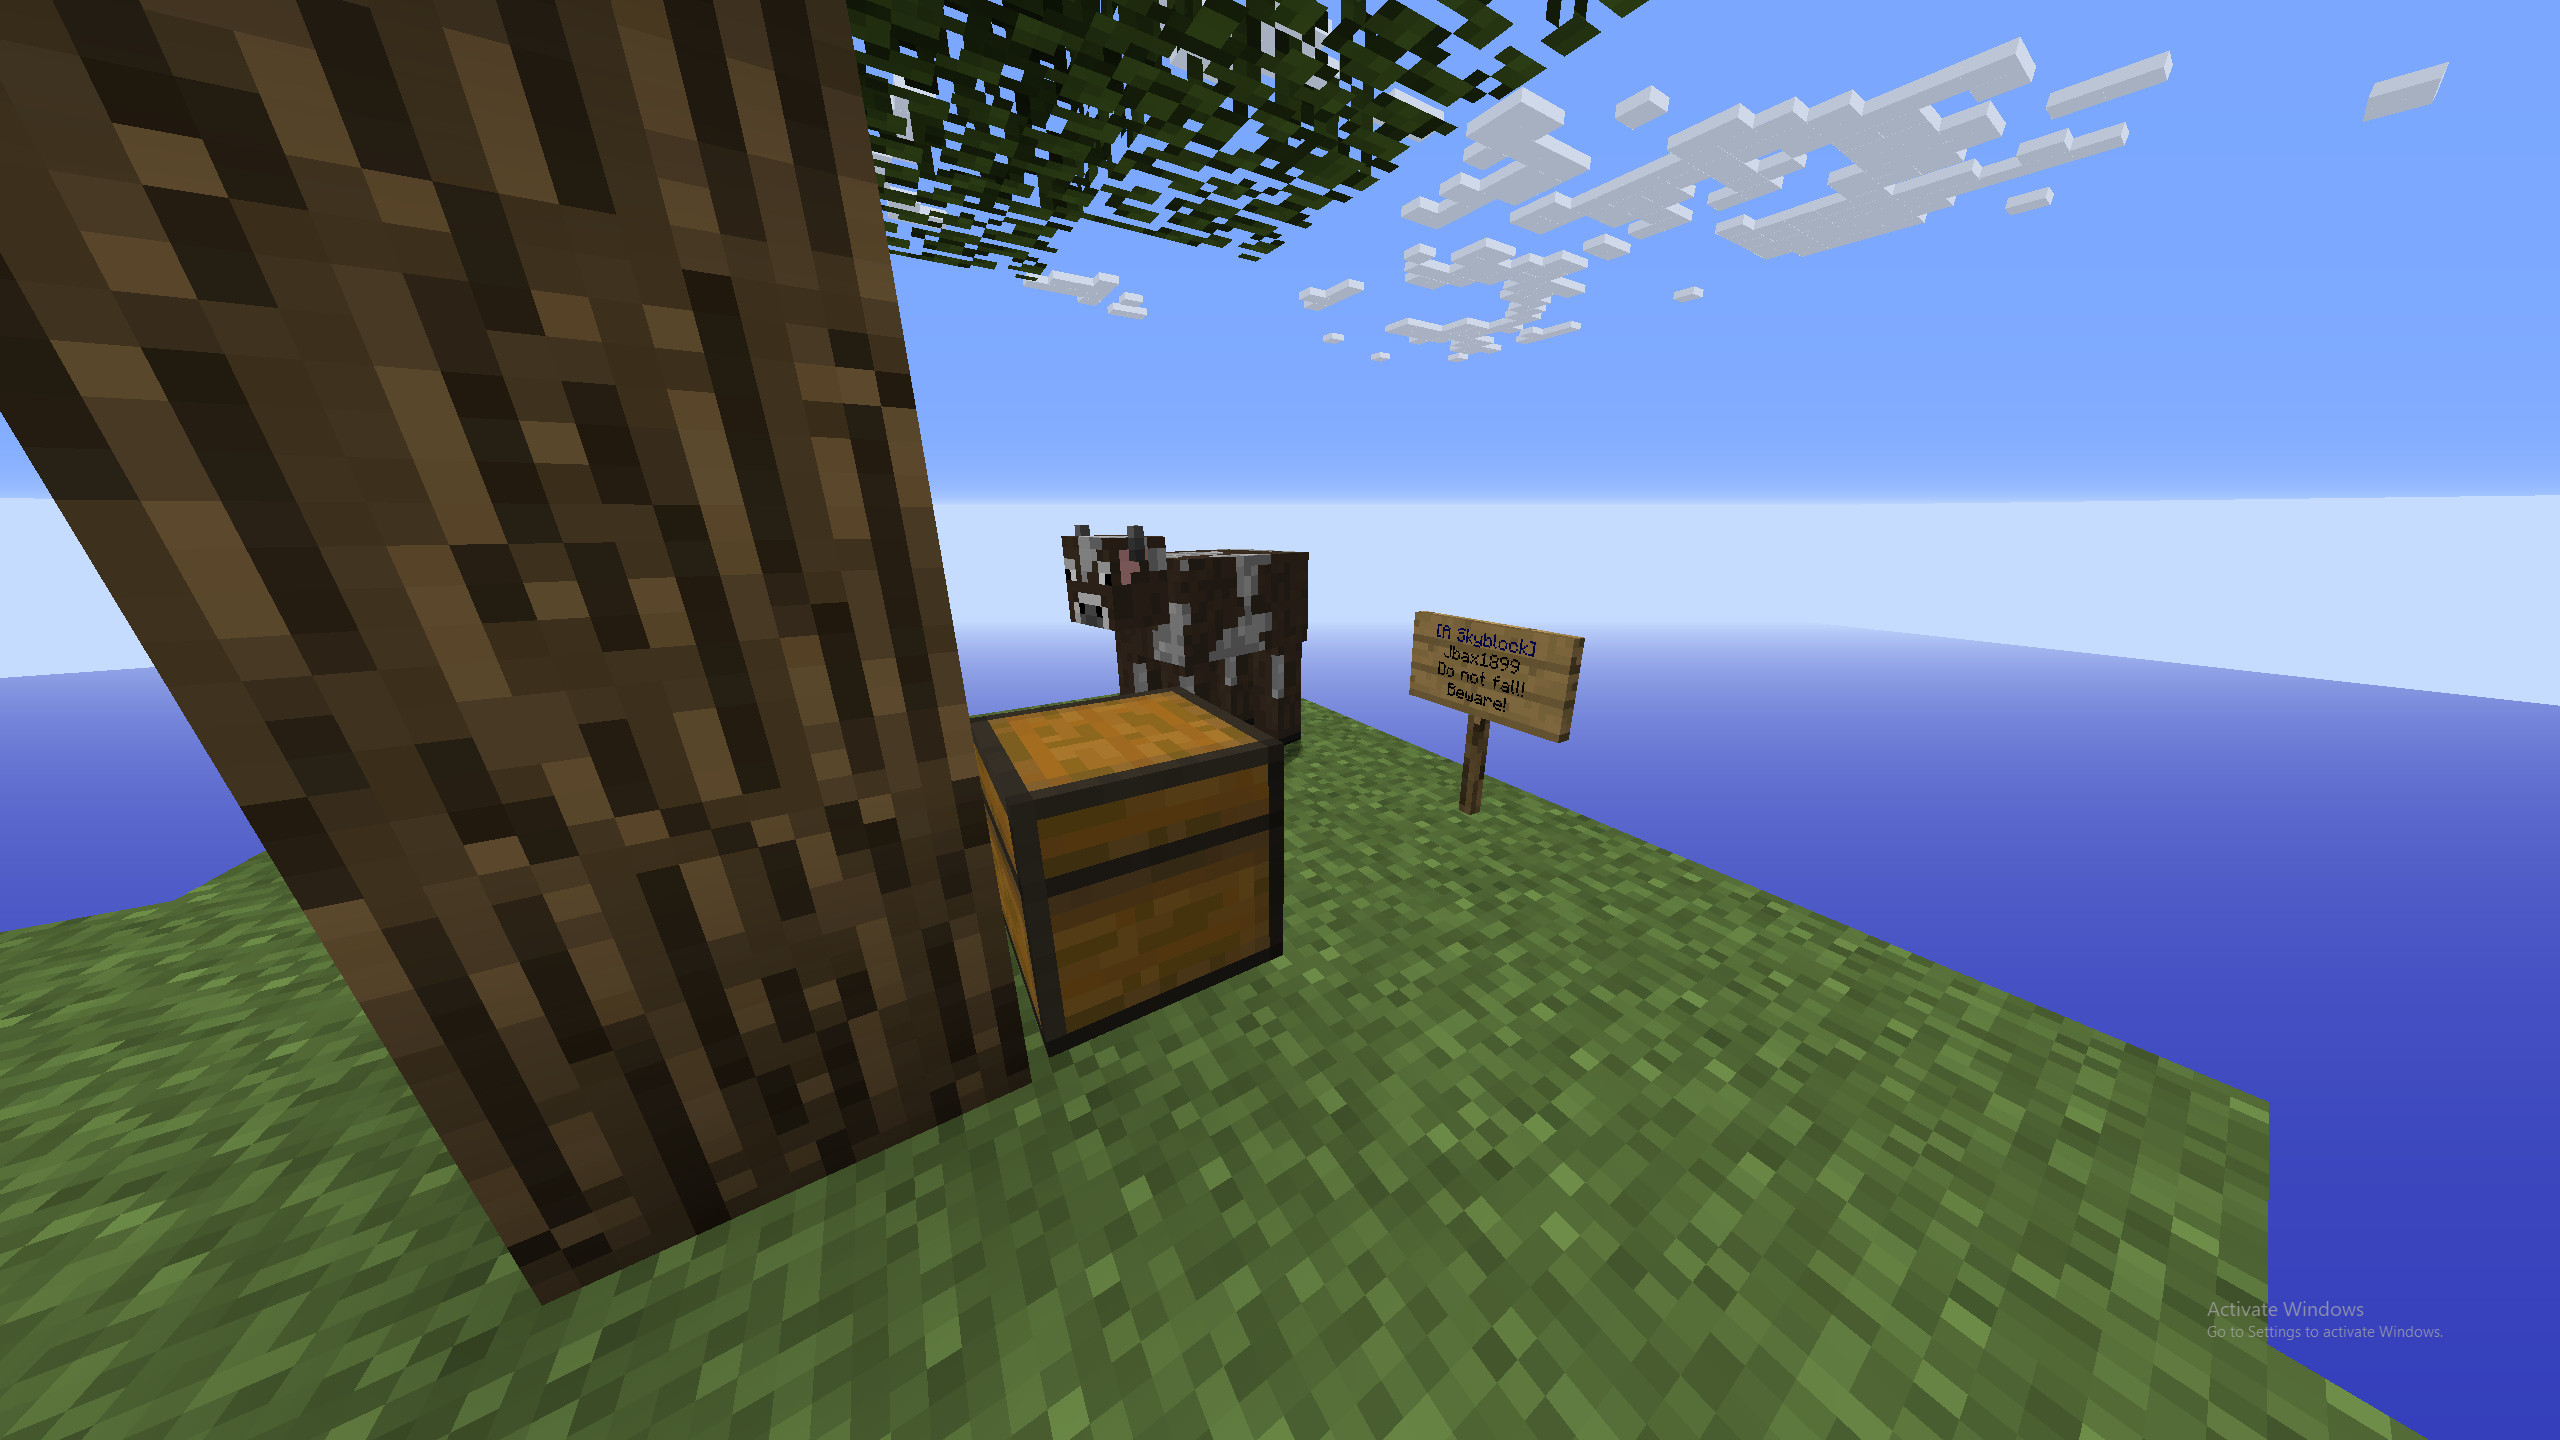 Minecraft Skyblock Island on Raspberry Pi Zero Server
Running a Minecraft server on a Raspberry Pi Zero is definitely possible, although it comes with limitations. Don’t expect to host a bustling public server with dozens of players. However, for a small group of friends playing Skyblock or similar lightweight modes, it’s surprisingly viable.
With careful optimization and realistic expectations, a Raspberry Pi Zero Minecraft server can be a fun and educational project. It demonstrates the capabilities of this tiny, inexpensive computer and provides a platform for enjoying Minecraft in a unique way.
For enhanced stability, consider setting up a server monitoring script that automatically restarts the server in case of crashes, especially given the Pi Zero’s resource constraints. Exploring automated startup on boot is also a good next step for a more robust server setup.
If you have a Raspberry Pi Zero lying around, this project is a fantastic way to put it to use and learn more about server administration, Linux, and the versatility of these miniature computers. Stay tuned for future projects exploring Minecraft servers on even more unconventional hardware!