
Making a Minecraft server is simple with this comprehensive guide, and rental-server.net can help you find the perfect server hosting solution. We provide a range of options to ensure your server runs smoothly, offering flexibility and optimal performance. Explore our offerings today and unlock the full potential of your Minecraft world with reliable server hosting. You can also find dedicated server hosting solutions and virtual private servers (VPS) for enhanced performance.
1. What is a Minecraft Server and Why Should You Create One?
A Minecraft server is a private network that allows multiple players to engage in Minecraft together. Minecraft servers let you control the game environment, customize rules, and create unique experiences for your friends or community. Setting up your own server offers advantages like personalized gameplay and community management.
- Customization: Tailor the game to your preferences.
- Community: Build and manage your own community.
- Control: Full administrative control over the server.
For those seeking alternatives, rental-server.net offers streamlined Minecraft server hosting solutions, providing robust performance and support for creating unforgettable gaming experiences.
2. What are the Key Search Intents for “How to Make a Minecraft Server?”
Understanding user search intents can help tailor content to meet their specific needs. Here are five key intents for people searching “how to make a Minecraft server”:
- Beginner’s Guide: Users want step-by-step instructions for setting up a basic server.
- Optimization: Players look for tips to improve server performance.
- Modding and Plugins: Gamers seek information on adding mods and plugins.
- Hosting Options: Individuals compare different hosting solutions (self-hosting vs. paid).
- Troubleshooting: Users search for solutions to common server issues.
3. What are the Basic Requirements for Hosting a Minecraft Server?
Hosting a Minecraft server requires specific hardware and software to ensure smooth gameplay. You’ll need a computer with sufficient processing power, memory, and a stable internet connection.
- Processor: Intel Core i5 or equivalent
- Memory: 8GB RAM or more
- Storage: SSD with at least 10GB free
- Internet: Broadband connection with high upload speed
Additionally, you’ll need the Java Development Kit (JDK) and the Minecraft server software from Mojang. If these requirements seem daunting, consider exploring rental-server.net for hassle-free server hosting solutions tailored to your needs.
4. What Are The Different Types of Minecraft Servers?
Minecraft offers various server types, each providing distinct gameplay experiences. The choice depends on your preferences and the community you want to create.
- Vanilla Server: The standard, unaltered Minecraft experience.
- Modded Server: Enhanced with mods for new features and gameplay mechanics.
- Plugin Server: Uses plugins to add functionalities like economy systems and mini-games.
- Skyblock Server: Players start on a small island in the sky, challenging them to expand their resources.
- Mini-Game Server: Features various mini-games like survival games, hunger games, and parkour.
Each type offers unique benefits, but maintaining them can be challenging. Services like rental-server.net provide expert support to manage and optimize your Minecraft server.
5. How To Choose the Right Minecraft Server Hosting?
Choosing the right Minecraft server hosting depends on several factors, including the number of players, desired performance, and budget. Self-hosting, VPS hosting, and dedicated server hosting are the main options.
- Self-Hosting: Host the server on your own computer. It’s cost-effective but requires technical knowledge and may suffer from performance issues.
- VPS Hosting: Rent a virtual server from a provider. It offers better performance and scalability than self-hosting.
- Dedicated Server Hosting: Rent an entire physical server. It provides the best performance and control but is the most expensive option.
Rental-server.net specializes in providing top-tier dedicated server hosting, ensuring your Minecraft server operates at peak performance with unparalleled control and customization.
6. Step-by-Step Guide: How to Create a Minecraft Server on Windows
Creating a Minecraft server on Windows involves several steps, from downloading the necessary software to configuring the server properties.
6.1. Install Java
Minecraft requires Java to run. Download the latest version of the Java Development Kit (JDK) from the Oracle website and follow the installation instructions. According to research from Oracle, in July 2025, Java 21 will have significant performance enhancements.
6.2. Download Minecraft Server Software
Download the Minecraft server software from the official Minecraft website. Place the downloaded server.jar file in a new folder.
6.3. Create a Startup Script
Create a new text file in the server folder and name it start.bat. Edit the file with the following content:
java -Xmx1024M -Xms1024M -jar server.jar nogui
pause
Adjust the -Xmx and -Xms values to allocate more memory to the server if needed. Save the file.
6.4. Run the Server
Double-click the start.bat file to run the server. The first time you run it, it will generate several files, including the eula.txt file.
6.5. Accept the EULA
Open the eula.txt file and change eula=false to eula=true to accept the Minecraft End User License Agreement. Save the file.
6.6. Configure Server Properties
Open the server.properties file to configure the server settings. You can change the game mode, difficulty, maximum number of players, and more.
6.7. Restart the Server
Double-click the start.bat file again to restart the server with the new settings.
6.8. Port Forwarding
To allow players outside your local network to connect to the server, you need to configure port forwarding on your router. Forward port 25565 (the default Minecraft server port) to the local IP address of your computer.
6.9. Connect to the Server
Launch Minecraft and click “Add Server.” Enter your public IP address (or local IP address if you’re on the same network) and the port number (25565). You should now be able to connect to your Minecraft server.
While these steps can get you started, managing a server on your own can be complex. Consider rental-server.net for reliable and efficient Minecraft server hosting solutions.
7. Step-by-Step Guide: How to Create a Minecraft Server on Linux
Creating a Minecraft server on Linux is similar to Windows but involves using the command line.
7.1. Update Your System
Open a terminal and update your system’s package list:
sudo apt update
sudo apt upgrade
7.2. Install Java
Install the Java Development Kit (JDK):
sudo apt install default-jdkVerify the installation by checking the Java version:
java -version7.3. Download Minecraft Server Software
Download the Minecraft server software using wget:
wget https://launcher.mojang.com/v1/objects/51b307e8a737c1a7282c5031df22c97a09a5a962/server.jarCreate a new folder for the server and move the server.jar file into it.
7.4. Create a Startup Script
Create a new file named start.sh using a text editor like nano:
nano start.shAdd the following content to the file:
#!/bin/bash
java -Xmx1024M -Xms1024M -jar server.jar nogui
Save the file and make it executable:
chmod +x start.sh7.5. Run the Server
Run the server by executing the startup script:
./start.shThe first time you run it, it will generate several files, including the eula.txt file.
7.6. Accept the EULA
Open the eula.txt file using nano:
nano eula.txtChange eula=false to eula=true and save the file.
7.7. Configure Server Properties
Open the server.properties file to configure the server settings:
nano server.propertiesAdjust the settings as needed and save the file.
7.8. Restart the Server
Restart the server by running the startup script again:
./start.sh7.9. Port Forwarding
Configure port forwarding on your router to allow external connections. Forward port 25565 to the local IP address of your server.
7.10. Connect to the Server
Launch Minecraft and add a new server. Enter your public IP address and the port number (25565). You can now connect to your Minecraft server.
For users who find these steps intricate, rental-server.net offers simplified Linux-based server hosting solutions, providing optimal performance and dedicated support.
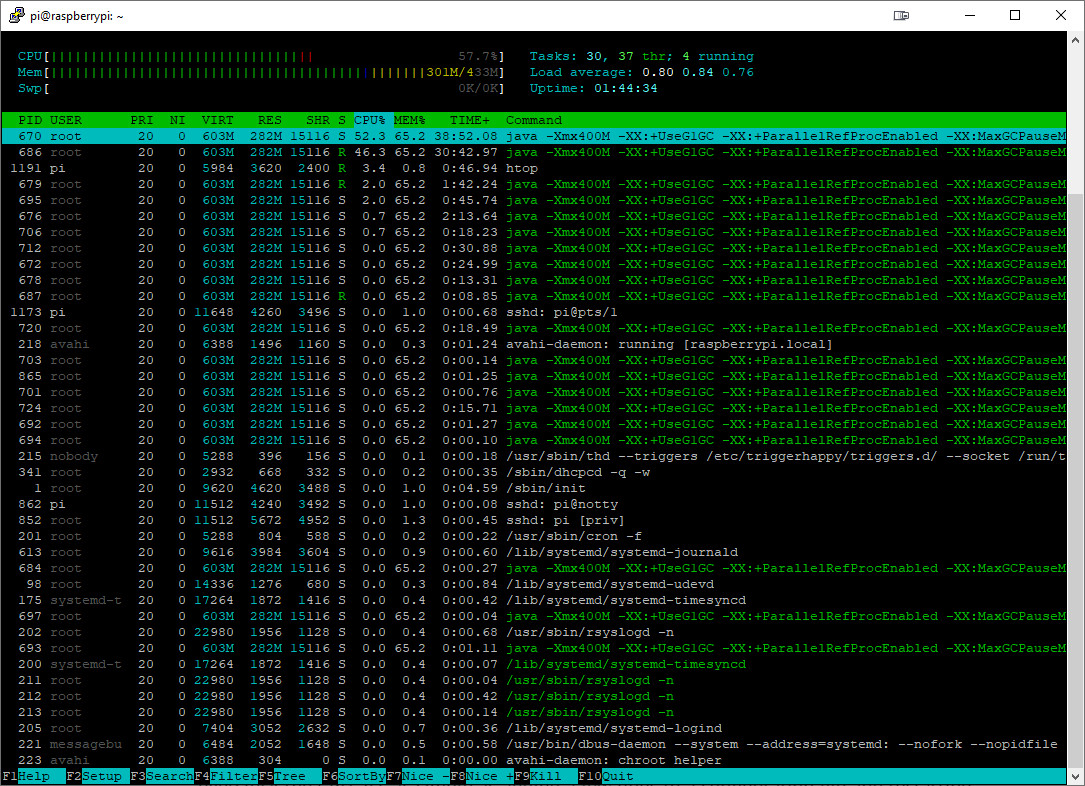
8. How to Optimize Your Minecraft Server for Better Performance
Optimizing your Minecraft server is crucial for ensuring smooth gameplay, especially with multiple players.
8.1. Allocate Sufficient RAM
Allocate enough RAM to the server to handle the number of players and loaded chunks. A good starting point is 2GB for a small server and increasing it based on usage. You can do this by modifying the -Xmx and -Xms values in the startup script.
8.2. Optimize Server Properties
Adjust the settings in the server.properties file to improve performance. Some key settings include:
view-distance: Reduce the view distance to decrease the number of loaded chunks.max-tick-time: Increase the maximum tick time to prevent the server from freezing.spawn-protection: Reduce the spawn protection radius to minimize lag around the spawn area.
8.3. Use Performance-Enhancing Plugins
Install plugins like ClearLagg to automatically clear ground items and reduce entity counts, thereby minimizing lag and optimizing server performance.
8.4. Pre-Generate Chunks
Use a tool like Chunky to pre-generate chunks around the spawn area. This reduces the load on the server when players explore new areas.
8.5. Regularly Restart the Server
Restart the server regularly to clear memory leaks and prevent performance degradation.
While these optimizations can help, sometimes dedicated hardware and expertise are necessary. Consider rental-server.net for optimized server hosting solutions tailored to Minecraft.
9. What are the Best Plugins for a Minecraft Server?
Plugins can significantly enhance the Minecraft server experience by adding new features, improving performance, and providing administrative tools.
9.1. EssentialsX
EssentialsX is a comprehensive plugin that provides essential commands and features, such as:
/home: Allows players to set and teleport to their home./spawn: Teleports players to the spawn area./warp: Allows players to teleport to predefined locations./mute: Mutes players to prevent them from sending messages.
9.2. WorldEdit
WorldEdit is a powerful plugin that allows you to easily edit and manipulate the world. It provides tools for:
- Creating and modifying structures.
- Copying and pasting sections of the world.
- Replacing blocks in a large area.
9.3. LuckPerms
LuckPerms is a flexible permissions plugin that allows you to manage player permissions and groups. It provides:
- Granular control over player access to commands and features.
- Support for multiple permission systems.
- A web-based interface for easy management.
9.4. Vault
Vault is an API plugin that provides a standardized way for plugins to interact with economy systems and permissions. It is required by many other plugins.
9.5. GriefPrevention
GriefPrevention allows players to claim land and protect it from griefing. It provides:
- A simple and intuitive claiming system.
- Protection against block breaking, placing, and using.
- The ability to share claims with other players.
By installing and configuring these plugins, you can greatly enhance the functionality and enjoyment of your Minecraft server. Rental-server.net can help you choose the best plugins and provide the necessary support for installation and configuration.
10. How to Add Mods to Your Minecraft Server
Adding mods to your Minecraft server can greatly enhance the gameplay experience by introducing new content, features, and mechanics.
10.1. Install Minecraft Forge
To run mods, you need to install Minecraft Forge, a modding API that provides a framework for loading and managing mods.
- Download the latest version of Minecraft Forge from the official Minecraft Forge website.
- Run the installer and select “Install server.”
- Choose the server folder where your Minecraft server is located.
- Click “OK” to install Forge.
10.2. Add Mods to the Mods Folder
- Locate the
modsfolder in your server directory. If it doesn’t exist, create it. - Download the desired mods from reputable sources like CurseForge.
- Place the downloaded
.jarfiles into themodsfolder.
10.3. Run the Server
Run the server using the Forge .jar file. This will load the installed mods.
10.4. Configure Mods
Some mods may require configuration. Check the mod documentation for instructions on how to configure the mod settings.
10.5. Ensure Compatibility
Ensure that all mods are compatible with each other and with the version of Minecraft Forge you are using. Incompatible mods can cause crashes and other issues.
Adding mods can be complex, especially when ensuring compatibility and performance. Rental-server.net offers specialized hosting solutions that simplify mod management and ensure optimal performance for your modded Minecraft server.
11. How to Backup Your Minecraft Server
Backing up your Minecraft server is crucial for preventing data loss in case of crashes, corruption, or other issues.
11.1. Manual Backups
- Stop the server to prevent data corruption.
- Copy the entire server folder to a safe location, such as an external hard drive or cloud storage.
- Restart the server.
11.2. Automated Backups
Use a script or plugin to automate the backup process. Several plugins can automatically create backups on a schedule.
11.3. Cloud Backups
Use a cloud storage service like Google Drive or Dropbox to store backups. This provides an extra layer of protection against data loss.
11.4. Test Backups
Regularly test your backups to ensure they are working correctly. Restore the backup to a test server and verify that all data is intact.
Backups are essential, but managing them can be time-consuming. Rental-server.net offers automated backup solutions to protect your Minecraft server data, ensuring peace of mind.
12. How to Secure Your Minecraft Server
Securing your Minecraft server is essential to protect it from griefing, hacking, and other malicious activities.
12.1. Use a Strong Password
Use a strong, unique password for your Minecraft server account. Avoid using common passwords or personal information.
12.2. Enable Whitelisting
Enable whitelisting to allow only approved players to join the server. This prevents unauthorized access and griefing.
12.3. Install Anti-Griefing Plugins
Install anti-griefing plugins like GriefPrevention to protect player builds and prevent unauthorized modifications.
12.4. Monitor Server Logs
Regularly monitor server logs for suspicious activity. Look for signs of hacking, unauthorized access, or other malicious behavior.
12.5. Keep Software Updated
Keep the Minecraft server software, Java, and plugins updated to the latest versions. This ensures that you have the latest security patches and bug fixes.
Security is paramount, and rental-server.net offers advanced security features and support to protect your Minecraft server from threats, ensuring a safe and enjoyable gaming environment.
13. How to Promote Your Minecraft Server
Promoting your Minecraft server is essential to attract new players and grow your community.
13.1. List Your Server on Server Lists
List your server on popular Minecraft server lists like MinecraftServers.org and TopMinecraftServers.com. Provide a detailed description of your server and its features.
13.2. Use Social Media
Promote your server on social media platforms like Twitter, Facebook, and Reddit. Share updates, announcements, and screenshots of your server.
13.3. Create a Website or Discord Server
Create a website or Discord server for your Minecraft server. This provides a central hub for players to communicate, share information, and get support.
13.4. Host Events and Contests
Host regular events and contests on your server to attract new players and keep existing players engaged. Offer prizes and rewards for participation.
13.5. Collaborate with Other Servers
Collaborate with other Minecraft servers to cross-promote each other. This can help you reach a wider audience and attract new players.
Promoting your server effectively can be challenging. Rental-server.net offers resources and support to help you market your server and grow your community.
14. Common Issues and Troubleshooting Tips for Minecraft Servers
Running a Minecraft server can sometimes be challenging, and you may encounter various issues. Here are some common problems and troubleshooting tips:
14.1. Server Not Responding
If the server is not responding, check the server logs for errors. Ensure that the server has enough RAM and CPU resources. Restart the server to see if that resolves the issue.
14.2. Lag Issues
Lag can be caused by various factors, including high CPU usage, insufficient RAM, and network issues. Optimize server settings, install performance-enhancing plugins, and ensure that your server has a stable internet connection.
14.3. Crashing Issues
Crashing issues can be caused by incompatible mods, corrupted files, or other software problems. Check the server logs for error messages and try removing recently installed mods or plugins.
14.4. Connection Issues
If players are unable to connect to the server, ensure that port forwarding is configured correctly and that the server is running. Check the firewall settings to ensure that Minecraft traffic is allowed.
14.5. Plugin Issues
Plugin issues can be caused by outdated plugins, incompatible plugins, or configuration errors. Update plugins to the latest versions, check for compatibility issues, and review the plugin configuration files.
Troubleshooting server issues can be complex and time-consuming. Rental-server.net offers 24/7 technical support to help you resolve server issues quickly and efficiently.
15. How Much Does It Cost to Run a Minecraft Server?
The cost of running a Minecraft server depends on several factors, including the hosting solution, number of players, and additional features.
15.1. Self-Hosting
Self-hosting can be cost-effective, but it requires an initial investment in hardware and ongoing costs for electricity and internet.
15.2. VPS Hosting
VPS hosting costs vary depending on the provider and the resources allocated to the server. Prices can range from $5 to $50 per month.
15.3. Dedicated Server Hosting
Dedicated server hosting is the most expensive option, with prices ranging from $50 to $500 per month, depending on the hardware and features.
15.4. Other Costs
Other costs may include domain registration, website hosting, and plugin licenses.
Rental-server.net offers competitive pricing and flexible hosting plans to fit your budget and needs, ensuring you get the best value for your Minecraft server hosting.
16. The Future of Minecraft Servers: Trends and Innovations
The world of Minecraft servers is constantly evolving, with new trends and innovations emerging regularly.
16.1. Cross-Platform Play
Cross-platform play allows players on different devices (e.g., PC, consoles, mobile) to connect to the same server. This trend is expected to grow in popularity as Minecraft continues to expand its reach.
16.2. Enhanced Security
Enhanced security measures are becoming increasingly important to protect Minecraft servers from hacking and griefing. This includes advanced anti-cheat systems, DDoS protection, and intrusion detection systems.
16.3. AI and Machine Learning
AI and machine learning are being used to enhance the Minecraft server experience in various ways, such as:
- Automated moderation and support.
- Intelligent world generation.
- Dynamic game mechanics.
16.4. Virtual Reality (VR)
Virtual reality (VR) is opening up new possibilities for Minecraft servers, allowing players to immerse themselves in the game like never before.
Rental-server.net stays at the forefront of these trends, offering innovative solutions and support to help you create the ultimate Minecraft server experience.
17. Conclusion: Start Your Minecraft Server Journey Today
Creating a Minecraft server can be a rewarding experience, allowing you to build a community, customize gameplay, and create unique worlds for you and your friends to enjoy. Whether you choose to self-host, use VPS hosting, or opt for dedicated server hosting, the possibilities are endless.
Remember to optimize your server for performance, secure it against threats, and promote it to attract new players. With the right tools and knowledge, you can create a thriving Minecraft server community.
For those seeking a hassle-free experience, rental-server.net offers reliable and efficient Minecraft server hosting solutions tailored to your needs. Explore our offerings today and unlock the full potential of your Minecraft world.
Ready to start your Minecraft server journey? Contact us today at Address: 21710 Ashbrook Place, Suite 100, Ashburn, VA 20147, United States, Phone: +1 (703) 435-2000, or visit our website at rental-server.net to learn more and get started.
18. FAQ: Common Questions About Minecraft Servers
18.1. What is the best hosting option for a Minecraft server?
The best hosting option depends on your budget and technical expertise. Self-hosting is cost-effective but requires technical knowledge. VPS hosting offers better performance and scalability. Dedicated server hosting provides the best performance and control.
18.2. How much RAM do I need for a Minecraft server?
The amount of RAM you need depends on the number of players and the complexity of the server. A good starting point is 2GB for a small server and increasing it based on usage.
18.3. How do I port forward for a Minecraft server?
To port forward for a Minecraft server, you need to access your router settings and forward port 25565 (the default Minecraft server port) to the local IP address of your server.
18.4. How do I add plugins to a Minecraft server?
To add plugins to a Minecraft server, download the plugin files and place them in the plugins folder in your server directory. Restart the server to load the plugins.
18.5. How do I add mods to a Minecraft server?
To add mods to a Minecraft server, install Minecraft Forge and place the mod files in the mods folder in your server directory.
18.6. How do I backup a Minecraft server?
To backup a Minecraft server, stop the server and copy the entire server folder to a safe location. You can also use automated backup plugins.
18.7. How do I secure a Minecraft server?
To secure a Minecraft server, use a strong password, enable whitelisting, install anti-griefing plugins, and monitor server logs.
18.8. How do I promote a Minecraft server?
To promote a Minecraft server, list it on server lists, use social media, create a website or Discord server, and host events and contests.
18.9. What are some common issues with Minecraft servers?
Common issues with Minecraft servers include server not responding, lag issues, crashing issues, connection issues, and plugin issues.
18.10. How much does it cost to run a Minecraft server?
The cost of running a Minecraft server depends on the hosting solution and additional features. Self-hosting can be cost-effective, while VPS hosting and dedicated server hosting vary in price.