
Are you tired of endless group chats that bury important messages and make it impossible to follow conversations? Or perhaps you’re looking to create a dedicated online space for your community, friends, or gaming group? Discord servers offer a powerful solution for organized and engaging online communication. This guide will walk you through the process of creating your own Discord server, step-by-step, so you can build a thriving online hub for your community.
What Exactly is a Discord Server?
While a simple definition of a Discord server is “a place on Discord for groups to talk,” it’s much more than just a chatroom. Imagine a Discord server as your personalized online clubhouse. Think of it as a digital space where different rooms are set up for various activities and conversations.
For example, picture your friend’s house as a real-world server. In the living room, some friends might be discussing the latest movies, while in the kitchen, others are planning a weekend trip. Everyone is together in one place, but conversations are naturally organized by room and topic.
 Friends chatting in different rooms, visualizing a Discord server as a house
Discord servers bring this concept online, allowing people from anywhere in the world to connect and communicate in organized spaces. They are perfect for communities of all sizes, from small groups of friends to large online communities built around games, hobbies, or shared interests. Let’s get you started on creating your own server and bringing your community together!
Getting Started: Creating Your Discord Server
Ready to build your own digital clubhouse? Here’s how to create a Discord server in a few easy steps:
1. Download and Open Discord:
First, you’ll need the Discord application. You can download it for your computer or mobile device from discord.com/download. Alternatively, you can use Discord directly in your web browser by visiting discord.com/login.
2. Initiate Server Creation:
Once you’re logged into your Discord account, look to the left-hand side of the application. You’ll see a green “+” (Plus) button. Click this button to begin creating your new server.
3. Choose a Server Template (or Create Your Own):
Discord will ask you about the purpose of your server and offer templates to help you get started. These templates provide pre-set channels based on common server types, like “Gaming,” “Friends,” or “Creators.”
For this guide, we’ll select the “For me and my friends” template as a common starting point. However, feel free to explore other templates if they better suit your needs.
 Discord server template selection screen, highlighting the "For me and my friends" option
Click the “Create a server” button to proceed.
4. Name Your Server and Add a Server Icon:
Now, it’s time to give your server a name! Choose something that reflects your community or purpose. Let’s name our example server “Community Hub.”
You can also upload a server icon to personalize your server’s appearance. This icon will be visible in your Discord server list. Don’t worry if you don’t have a perfect icon right away; you can always change the server name and icon later in your server settings.
5. Server Creation Complete!
Congratulations! You’ve just created your Discord server. Discord will automatically create some basic text and voice channels based on the template you chose. Your new server is now ready to be customized and populated with members.
Inviting Friends and Building Your Community
With your server created, the next step is to invite your friends and community members to join. Discord provides several easy ways to invite people:
1. The “Invite Your Friends” Button:
Directly after creating your server, you’ll likely see a prominent “Invite Your Friends” button in the middle of the chat window. Clicking this button will open the invite menu.
2. Server Drop-Down Menu Invite Option:
If you don’t see the initial invite button, or need to invite more people later, you can always find the invite option in the server’s drop-down menu. This menu is located at the top-left of your Discord window, next to your server name.
 Accessing the invite option from the server drop-down menu
Clicking the server name will open the drop-down menu, where you’ll find the “Invite People” option.
3. Creating and Sharing Invite Links:
Within the invite menu, you’ll have options to:
- Invite Discord Friends Directly: Discord will show a list of your friends, and you can directly invite them to your server.
- Create an Invite Link: You can generate a unique invite link that you can share anywhere – via email, social media, or messaging platforms. Anyone with this link can join your server.
Invite Link Settings (Optional but Recommended): For more control over who joins your server, explore the invite link settings. You can set:
- Expiration Date: Make the link expire after a certain time or number of uses. This is useful for temporary invites.
- Maximum Uses: Limit the number of people who can join through a specific link.
Once you’ve sent out invites, watch your server grow as your community joins!
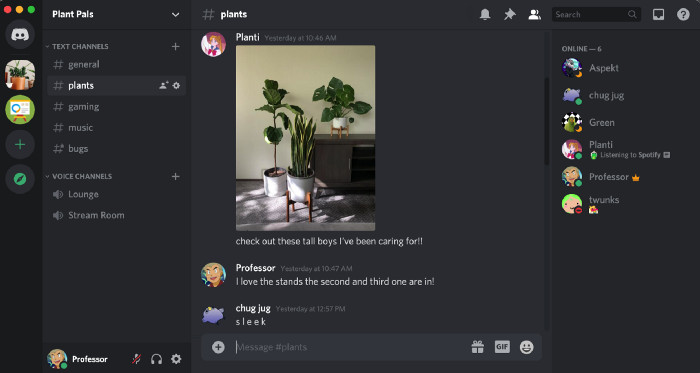
Understanding Text and Voice Channels: The Heart of Your Server
Discord servers are organized using channels, which are categorized into Text Channels and Voice Channels. These channels are the spaces where conversations and interactions happen.
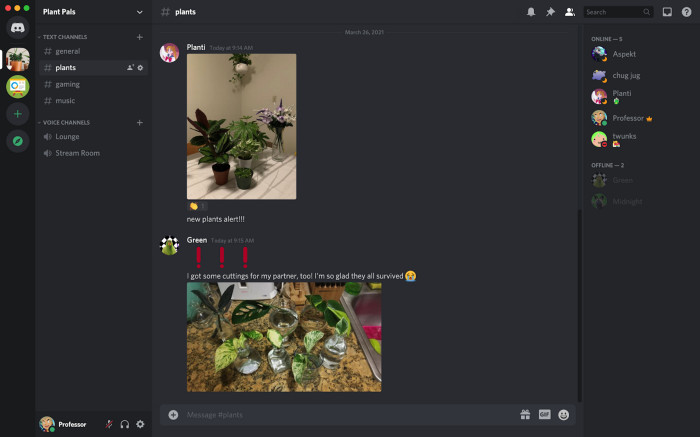
Text Channels:
Text channels are the equivalent of chatrooms within your server. They are primarily for text-based communication, allowing members to:
- Send Messages: Type and send messages to everyone in the channel.
- Share Files and Images: Upload files, images, and GIFs directly into the chat.
- Use Mentions: Notify specific members or roles using the “@” symbol (e.g., “@username” or “@role”).
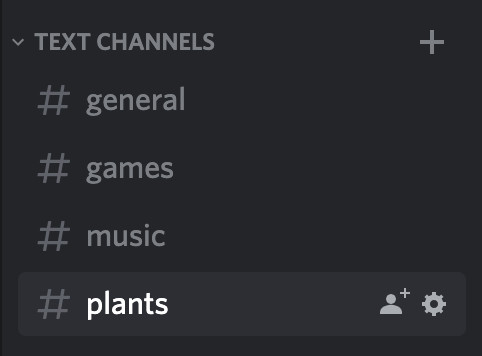
Each text channel has a specific name that indicates its topic or purpose. For instance:
- #general: A common channel for general chat and announcements.
- #gaming-chat: Dedicated to discussions about games.
- #off-topic: For conversations that don’t fit into other channels.
 Example of text channels with different topics, like #general and #plant-talk
By default, most text channels are public, meaning everyone in the server can see and participate in them. This makes it easy to have open and accessible conversations within your community.
Voice Channels:
Voice channels are where real-time audio communication happens. They bring the “clubhouse” analogy to life, allowing members to:
- Voice Chat: Join a voice channel and talk to others using their microphones. No ringing or calls are necessary – simply join the channel, and you’re in the conversation.
- Video Chat: Share your webcam to have video calls with other members in the voice channel.
- Screen Sharing: Broadcast your screen to show gameplay, presentations, or anything else on your computer.
Voice channels are perfect for:
- Live Discussions: Real-time conversations and debates.
- Gaming Sessions: Coordinating and chatting during online games.
- Virtual Hangouts: Simply socializing and spending time together online.
 People in a voice channel, some with video and screen sharing enabled
Discord voice channels are designed for large groups. You can have a significant number of people in a voice call simultaneously, with up to 25 people able to use video chat and up to 50 viewers for screen sharing.
Customizing Your Server: Adding and Managing Channels
As your server evolves, you’ll likely want to add, remove, or modify channels to better organize conversations and activities.
Adding New Channels:
Creating new channels is straightforward:
- Access Server Drop-Down Menu: Click on your server name at the top-left to open the drop-down menu.
- Select “Create Channel”: Choose the “Create Channel” option from the menu. On mobile, swipe right to access the channel list, tap the server name, and select “Create Channel.”
 Creating a new text channel from the server drop-down menu
-
Choose Channel Type and Name: A pop-up menu will appear. Select either “Text Channel” or “Voice Channel,” and then enter a name for your new channel. For example, you might create a text channel called “#community-events” or a voice channel named “Chill Zone.”
-
Channel Creation Complete: Click “Create Channel,” and your new channel will be added to the server’s channel list.
How Many Channels Should You Have?
When starting out, it’s generally better to begin with a smaller number of channels. Overwhelming your members with too many channels can make navigation confusing.
 Visual representation of a server with a manageable number of channels
Start with essential channels like #general, and then add more specialized channels as needed based on your community’s interests and activities. You can always add more channels later as your server grows and you understand how your members use them.
Deleting Channels:
You can also delete channels that are no longer needed. However, deleting a channel is permanent, and all messages and content within it will be lost. Be absolutely sure you want to delete a channel before doing so. Sometimes, keeping an inactive channel is preferable to permanently deleting its content.
Creating Private Channels for Specific Members:
In some cases, you might want to create channels that are only visible to specific members or groups within your server. This is where Private Channels come in. Private channels are excellent for:
- Moderator Discussions: A private channel for server moderators to discuss server management.
- VIP Access: Exclusive channels for supporting members or specific groups.
- Sensitive Topics: Channels for discussions that are only relevant to a subset of members.
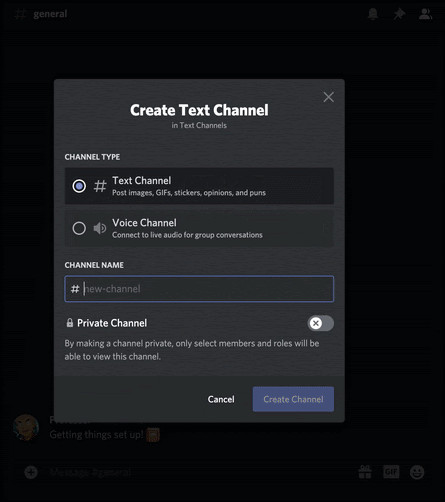
Creating a Private Channel:
- Start Channel Creation: Follow the same steps as adding a public channel (Server Drop-Down Menu -> Create Channel).
- Toggle “Private Channel”: In the channel creation menu, you’ll see an option to make the channel “Private.” Toggle this option to enable private channel settings.
 Creating a private channel and selecting authorized members
-
Select Authorized Members/Roles: After toggling “Private Channel,” you’ll be prompted to select the specific members or roles who should have access to the channel. Choose the members you want to include and click “Create Channel.”
-
Managing Private Channel Permissions: If you need to add or remove members from a private channel later, you can right-click (or long-press on mobile) the channel, select “Edit Channel,” and navigate to the “Permissions” tab. Here, you can adjust who has access to the private channel.
Welcome to Your New Discord Home!
You’ve now successfully created your own Discord server and learned the basics of channels and member management. Your server is a blank canvas – a space to build your community, connect with friends, and create engaging online experiences.
 A welcoming image representing a thriving Discord server community
Start exploring the many features Discord offers, experiment with different channel setups, and most importantly, have fun building your online community! If you found this guide helpful, share it with others who might benefit from creating their own Discord server. For more advanced server management tips, be sure to check out Discord’s Help Center and community resources.
