
Minecraft, the globally beloved sandbox game, continues to captivate millions with its boundless creativity and immersive worlds. In a landscape where gaming trends shift rapidly, Minecraft’s enduring appeal lies in its simplicity and the endless possibilities it offers.
But what exactly is Minecraft? At its core, Minecraft is a game where players construct and explore procedurally generated 3D worlds built entirely of blocks. This block-based universe allows for unparalleled freedom, from crafting simple tools to building elaborate structures and even entire cities.
While solo adventures in Minecraft are rewarding, the true magic often unfolds when players connect and collaborate. Minecraft’s multiplayer functionality is a cornerstone of its popularity, enabling players to share experiences, build together, and engage in friendly competition within a shared digital space. This is made possible through servers, which act as central hubs connecting players in the same virtual world.
This guide will delve into How To Find A Server Address On Minecraft, a crucial step for joining multiplayer games. We’ll also expand on the original article by providing more in-depth information and SEO optimization for an English-speaking audience, making this the ultimate resource for understanding Minecraft server addresses. Furthermore, we will elaborate on how to set up your own Minecraft server on Windows, offering a more detailed walkthrough than the original article.
Understanding the Minecraft Server Address
To participate in Minecraft’s multiplayer universe, you need a Minecraft server address, often referred to as an IP address. Think of it as the unique digital address of a specific Minecraft world, allowing your game to locate and connect to that particular server. This address is the key that unlocks shared gameplay, enabling you to team up with friends or join communities from across the globe.
Minecraft server addresses come in various forms. Some are public and readily available, advertised on forums and server lists. Others are private, requiring invitations or membership in specific communities. Regardless of the type, having the correct Minecraft server IP address is essential to join the virtual world you desire.
With the right server address, you can seamlessly jump into a shared Minecraft experience, enriching your gameplay through interaction, collaboration, and competition. This social element is a significant part of what makes Minecraft such a compelling and long-lasting game.
Locating Your Minecraft Server IP Address: A Step-by-Step Guide
Are you wondering, “What is my Minecraft server IP?” Many players, especially those new to server hosting, find themselves searching for this information. Finding your Minecraft server’s IP address is a straightforward process. If you’ve set up your own server, here’s how to locate its IP address on a Windows system.
Step 1: Open the Run Command Prompt
The Run command is a quick way to execute commands in Windows. Press the Windows key + R simultaneously. This will open the Run dialog box in the bottom-left corner of your screen.
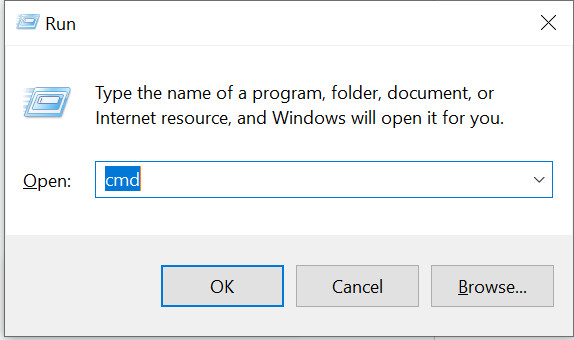 Open Run Command to Find Minecraft Server Address
In the Run dialog box, type “cmd” and press Enter or click “OK”. This will launch the Command Prompt, a command-line interpreter for Windows. A black window with white text will appear – this is your Command Prompt.
Step 2: Use the ipconfig/all Command
The Command Prompt allows you to interact with your computer’s operating system using text commands. To find your Minecraft server IP address, you’ll use the command ipconfig /all. Type this command exactly as shown (including the space after ipconfig) into the Command Prompt and press Enter.
> ipconfig /allThis command will display a wealth of network configuration information, including details about your IP addresses, network adapters, and more. Don’t be overwhelmed by the amount of text! We are specifically looking for your IPv4 Address.
 Command Prompt showing IPv4 Address for Minecraft Server IP Lookup
Scroll through the output until you find the section that corresponds to your active network connection. If you are connected to the internet via a wired connection (Ethernet), look for “Ethernet adapter Ethernet”. If you are using Wi-Fi, look for “Wireless LAN adapter Wi-Fi”.
Within the relevant section, locate “IPv4 Address”. The series of numbers next to “IPv4 Address” is your computer’s local IP address, which is also your Minecraft server IP address for players on your local network. If you are hosting a server for players outside your home network, you’ll need your public IP address, which can be found by searching “what is my IP” on Google.
You can leave the Command Prompt window open if you are proceeding to set up your Minecraft server. Otherwise, you can close it by typing exit and pressing Enter, or simply clicking the ‘X’ button in the corner.
Now that you know how to find your server IP, let’s explore how to set up a Minecraft server on Windows.
Setting Up a Minecraft Server on Windows: A Detailed Guide
Hosting your own Minecraft server allows for complete control over the game world and who can join. While it might seem daunting, setting up a basic Minecraft server on Windows is quite manageable. Here’s an expanded guide to help you through the process:
Prerequisites for Minecraft Server Setup
Before you begin, ensure your system meets these basic requirements:
- Operating System: Windows 10 or newer is recommended for ease of use and compatibility.
- RAM: At least 4GB of RAM is recommended for a smooth server experience, especially with multiple players or mods. 8GB or more is preferable for larger servers.
- Internet Connection: A stable, high-bandwidth internet connection is crucial. Unlimited bandwidth is ideal to avoid data overage charges.
- Java: Minecraft servers run on Java, so you need to have Java installed.
Step-by-Step Minecraft Server Installation on Windows
Follow these steps to install and configure your Minecraft server:
Step 1: Install Java
If you don’t have Java installed, or are unsure, download the latest version from the official Java website. Choose the Java version appropriate for your Windows system (usually 64-bit).
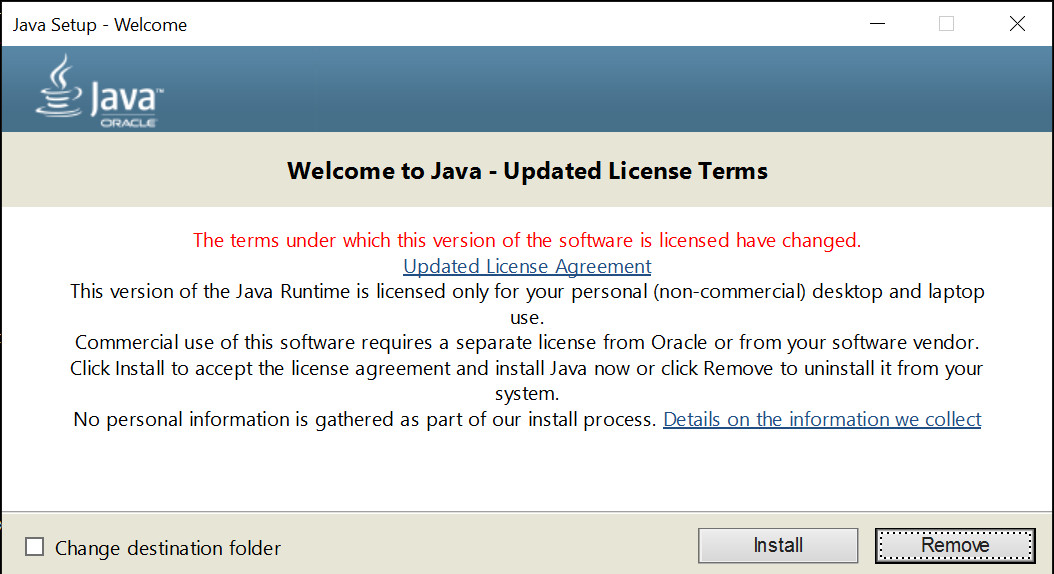 Java Download Page for Minecraft Server Setup
Run the downloaded .exe installer file and follow the on-screen instructions to install Java. After installation, it’s advisable to restart your computer to ensure the changes are properly applied.
Step 2: Download the Minecraft Server Software
Navigate to the official Minecraft download page. Download the minecraft_server.jar file. This file contains the server software.
Create a new folder on your computer specifically for your Minecraft server. A good location would be your Desktop or Documents folder, named something like “MinecraftServer”. Move the downloaded minecraft_server.jar file into this newly created folder.
Step 3: Run the Server JAR File and Extract Files
Double-click the minecraft_server.jar file within your MinecraftServer folder. This will execute the JAR file and attempt to start the server. Initially, it will fail to fully start, but it will generate several essential files in the same folder, including eula.txt and server.properties.
Step 4: Configure the eula.txt File
The eula.txt file contains the Minecraft End User License Agreement. Open this file with a text editor like Notepad. Read through the agreement. To proceed with setting up your server, you must agree to the EULA. Change the line eula=false to eula=true, save the file, and close it.
Step 5: Configure server.properties
The server.properties file is the heart of your server configuration. Open it with a text editor. This file contains numerous settings that control various aspects of your Minecraft server, such as:
server-port=25565: The default port for Minecraft servers. You usually don’t need to change this unless you have a specific reason.max-players=20: Sets the maximum number of players allowed on your server simultaneously. Adjust this based on your server’s resources and desired player capacity.gamemode=0: Sets the default game mode.0for Survival,1for Creative,2for Adventure,3for Spectator.difficulty=1: Sets the game difficulty.0for Peaceful,1for Easy,2for Normal,3for Hard.motd=A Minecraft Server: The “Message of the Day” that appears below your server name in the Minecraft server list. Customize this to make your server stand out.server-ip=: You can leave this blank for a basic setup. For more complex network configurations, you might need to specify your server IP address here.online-mode=true: Keep this set totruefor official Minecraft server and player authentication. Set tofalseonly for offline mode, which is generally not recommended for public servers.max-tick-time=60000: Maximum time a single server tick can take before the server watchdog stops it.
Explore the server.properties file and adjust settings to your liking. Save the file and close it.
Step 6: Run the Server Again
Double-click the minecraft_server.jar file again. This time, with the EULA accepted and configurations in place, the Minecraft server should start properly. A Command Prompt window will appear, displaying server logs and information.
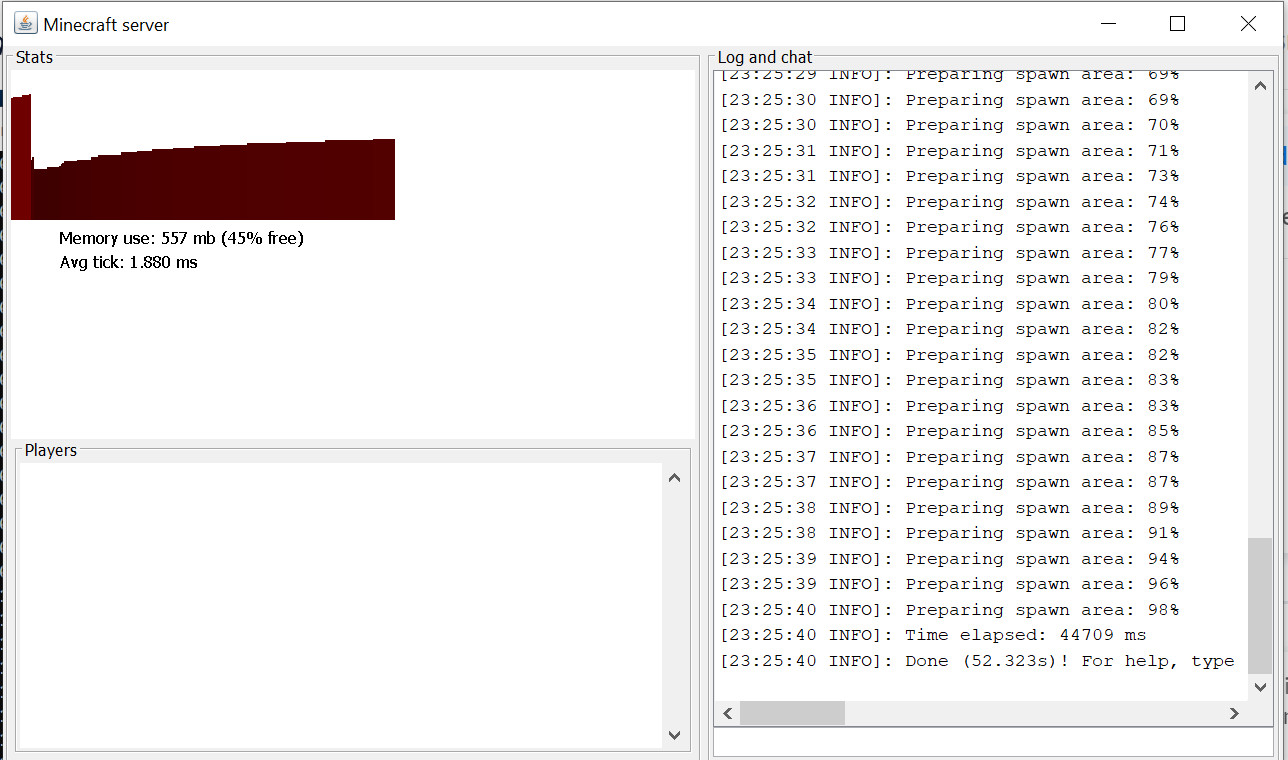 Minecraft Server Console Window Running on Windows
Step 7: Allow Access Through Windows Firewall
Windows Firewall might block incoming connections to your Minecraft server. When you run the server for the first time, Windows might prompt you to allow Java access through the firewall. Click “Allow access” on both “Private networks” and “Public networks” to ensure players can connect to your server.
If you don’t see the prompt, you might need to manually configure Windows Firewall to allow Java and port 25565 (or your custom server port) through.
Running the Server via Command Line (Optional)
For more control and potentially better performance, you can run the server from the Command Prompt. Open Command Prompt, navigate to your MinecraftServer folder using the cd command (e.g., cd DesktopMinecraftServer), and then use the following command:
java -Xmx1024M -Xms1024M -jar minecraft_server.1.20.1.jar nogui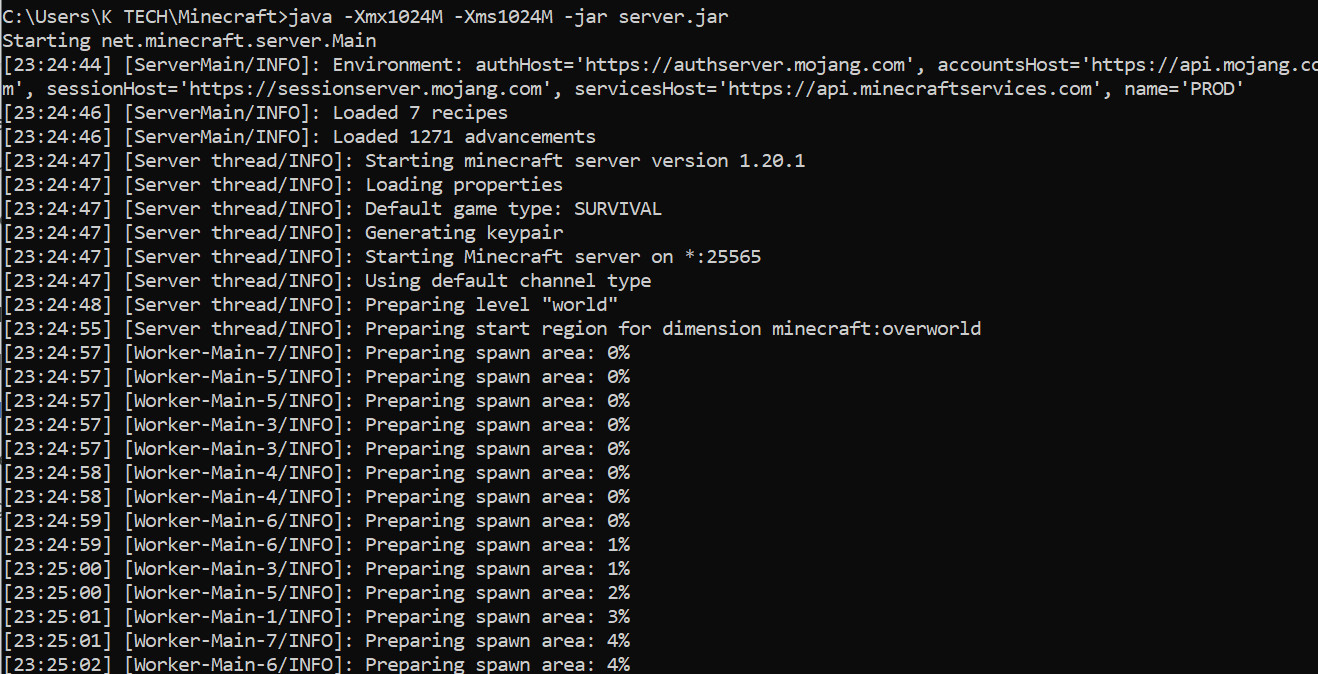 Command Prompt Running Minecraft Server with Java Command
-Xmx1024M: Sets the maximum RAM allocation to 1GB. Adjust this value (e.g.,-Xmx2048Mfor 2GB) based on your server’s RAM and player count.-Xms1024M: Sets the initial RAM allocation to 1GB.minecraft_server.1.20.1.jar: Replace with the actual filename of your server JAR file if it’s different.nogui: Runs the server without the graphical user interface, which can save resources.
Joining Your Minecraft Server and Playing Multiplayer
Once your server is running, you and your friends can join the game!
- Launch Minecraft on your computer.
- Click “Multiplayer” in the main menu.
- Click “Direct Connect”.
- In the “Server Address” field, enter your Minecraft server IP address (the IPv4 address you found earlier, or your public IP if players are connecting from outside your network). If the server is running on the same computer you are playing on, you can often use
localhostor127.0.0.1as the server address. - Click “Join Server”.
If everything is configured correctly, you should now be connected to your Minecraft server and ready to play with others! Share your server IP address with your friends so they can join too.
Key Considerations When Choosing a Minecraft Server Host in 2023
If setting up and managing your own server seems too technical, or if you want a more robust and reliable server, consider using a dedicated Minecraft server hosting provider. When choosing a host, keep these factors in mind:
- Uptime: Aim for hosts with a high uptime guarantee (99% or higher) to minimize server downtime and ensure consistent availability.
- Player Slots and Server Capacity: Choose a plan that accommodates your desired player capacity. Consider both current needs and future growth.
- Pricing and Plans: Compare hosting plans and pricing. Look for transparent pricing and understand what resources are included (RAM, storage, bandwidth). Be wary of hidden fees.
- Customer Support: Reliable 24/7 customer support is crucial. Look for hosts offering support via multiple channels (live chat, email, tickets).
- Server Locations: Choose a host with server locations geographically close to your player base to minimize latency (lag) and ensure a smooth gaming experience.
- Hardware and Performance: Opt for hosts using powerful hardware (fast processors, SSD storage) to prevent lag and ensure smooth server performance, especially with mods or plugins.
- Community and Reviews: Research the host’s reputation and community reviews. See what other users are saying about their service quality and support.
- Scalability: Consider if the hosting provider offers easy scalability so you can upgrade your plan as your server grows.
- Features: Look for hosts that offer desirable features like one-click mod/plugin installation, DDoS protection, automated backups, and user-friendly control panels.
By carefully evaluating these factors, you can select a Minecraft server host that meets your needs and provides a great multiplayer experience for you and your community.
Conclusion
Finding your Minecraft server address is the first step to unlocking the exciting world of multiplayer Minecraft. Whether you are joining an existing server or setting up your own, understanding server addresses is fundamental. This guide has provided a comprehensive walkthrough of how to find your server IP address and how to set up a basic Minecraft server on Windows. For those seeking a more managed solution, we’ve also highlighted key factors to consider when choosing a Minecraft server hosting provider.
With this knowledge, you are well-equipped to dive into the collaborative and competitive fun of Minecraft multiplayer. Start building, exploring, and gaming with friends today!
If you have any further questions or encounter any issues, feel free to leave a comment below. Happy crafting!