Craving the creamy, dreamy texture of soft serve ice cream but don’t want to haul out an ice cream maker? Or maybe you’re just looking for a fun and simple dessert project to do with the kids? Look no further! This incredibly easy Homemade Soft Serve Ice Cream recipe is a game-changer. Inspired by the classic “ice cream in a bag” method, this recipe delivers smooth, delicious vanilla soft serve in about 5 minutes, using ingredients you likely already have in your kitchen. Forget complicated machines and lengthy churning times – with a little arm power, you can enjoy fresh, homemade soft serve anytime the craving hits. While the exact origins of ice cream in a bag are shrouded in a bit of mystery, its charm and simplicity have made it a beloved treat for generations, with mentions dating back to the early 1900s.
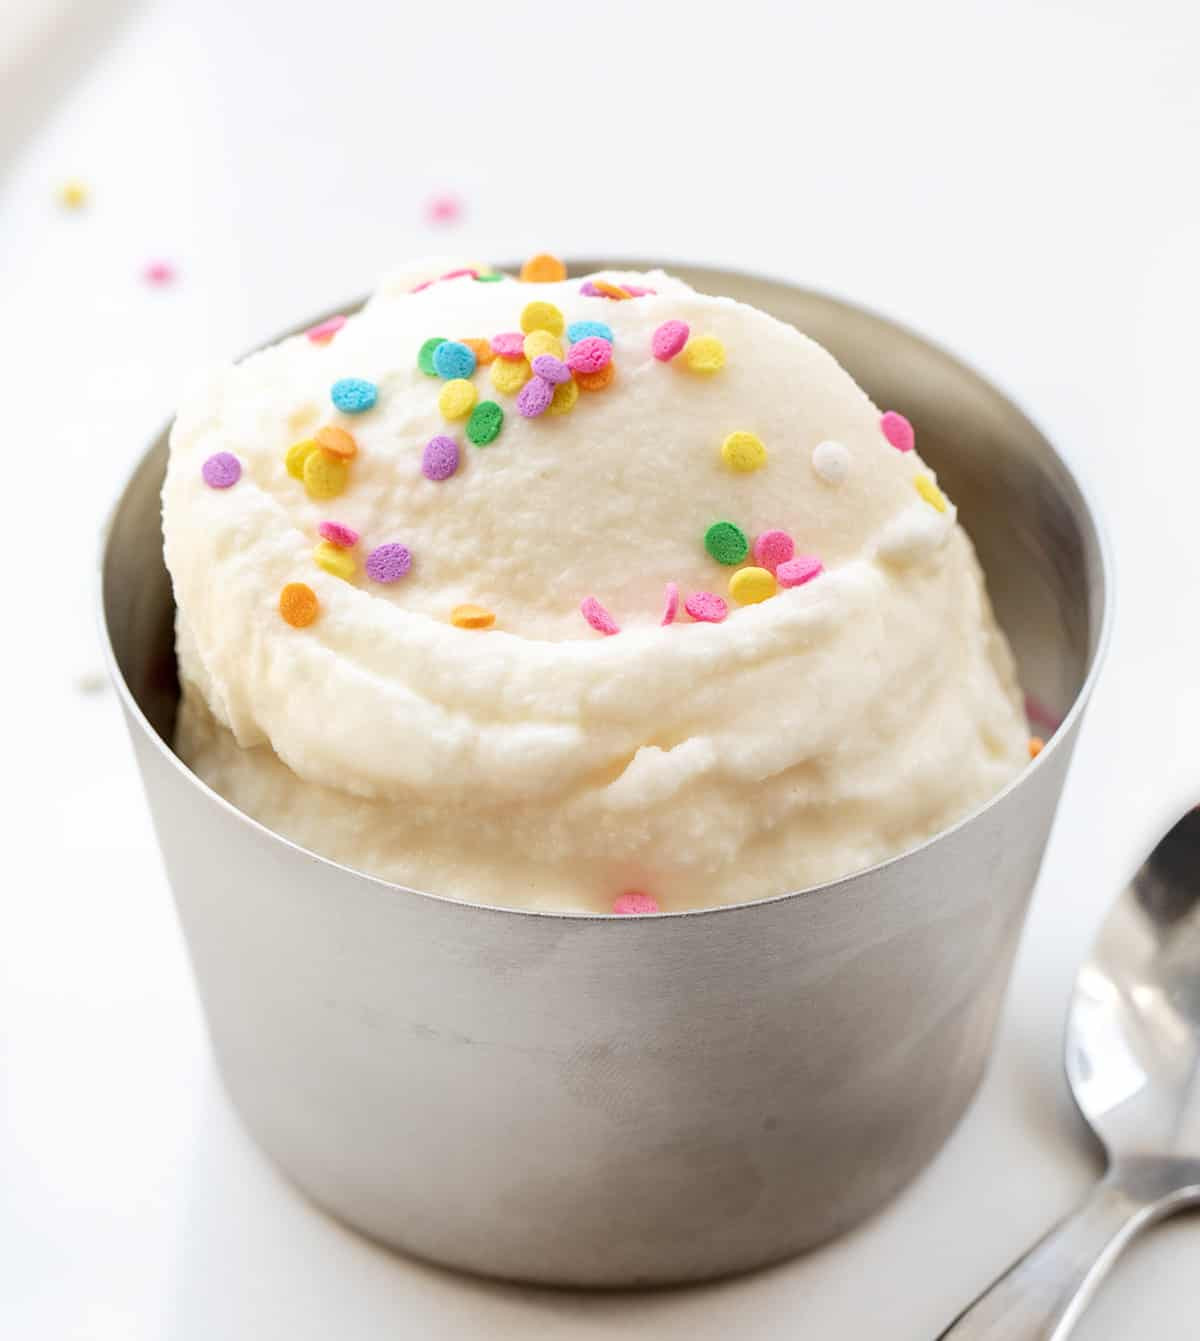 Metal Bowl with Scoops of Soft Serve Ice Cream in It with Sprinkles and a Spoon on a White Counter.
The Magic Behind Homemade Soft Serve: Simple Ingredients, Big Flavor
The beauty of this homemade soft serve ice cream lies in its simplicity. You need just a handful of basic ingredients, and the magic happens through the science of salt and ice. Let’s break down each component and why it plays a crucial role in creating that perfect soft serve texture:
Heavy Cream: This is the star of the show when it comes to achieving that rich, creamy texture we all love in soft serve. Heavy cream, sometimes labeled as heavy whipping cream, boasts a high-fat content. This fat is essential for creating a smooth, luxurious mouthfeel and preventing the ice cream from becoming icy. For a slightly lighter version, you could experiment with half-and-half or whole milk, but be aware that the final consistency will be less thick and creamy.
Whole Milk: Following the same principle as heavy cream, whole milk is preferred here for its higher fat content compared to lower-fat milk options. Using whole milk contributes to a richer and creamier final product. Skim or 1% milk will work, but the resulting ice cream will be noticeably less dense and creamy.
Granulated Sugar: Sugar isn’t just about sweetness; it also plays a vital role in the texture of your homemade soft serve. Granulated sugar dissolves easily, ensuring even distribution throughout the mixture. Beyond sweetness, sugar lowers the freezing point of the mixture, which is crucial for achieving that soft serve consistency rather than a hard block of ice cream.
Vanilla Extract: A touch of vanilla extract elevates the flavor profile, transforming it from a simple sweet treat into classic vanilla soft serve. Use pure vanilla extract for the best flavor. You can also experiment with other extracts like almond, peppermint, or even citrus for different flavor variations in your homemade soft serve.
Salt: Salt might seem like an unexpected ingredient in ice cream, but it’s absolutely essential for the ice cream-making process in a bag. Salt lowers the freezing point of water, which in turn makes the ice bath colder than ice alone. This super-cold environment is what allows the cream mixture to freeze quickly enough to become soft serve. While rock salt, also known as ice cream salt, is traditionally recommended, kosher salt is a readily available and effective substitute. You can also use Himalayan pink salt or Maldon sea salt. If using rock salt or Himalayan pink salt, double the amount specified in the recipe as they are coarser. If using Maldon sea salt, use the same amount as you would kosher salt.
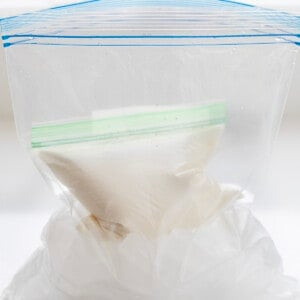
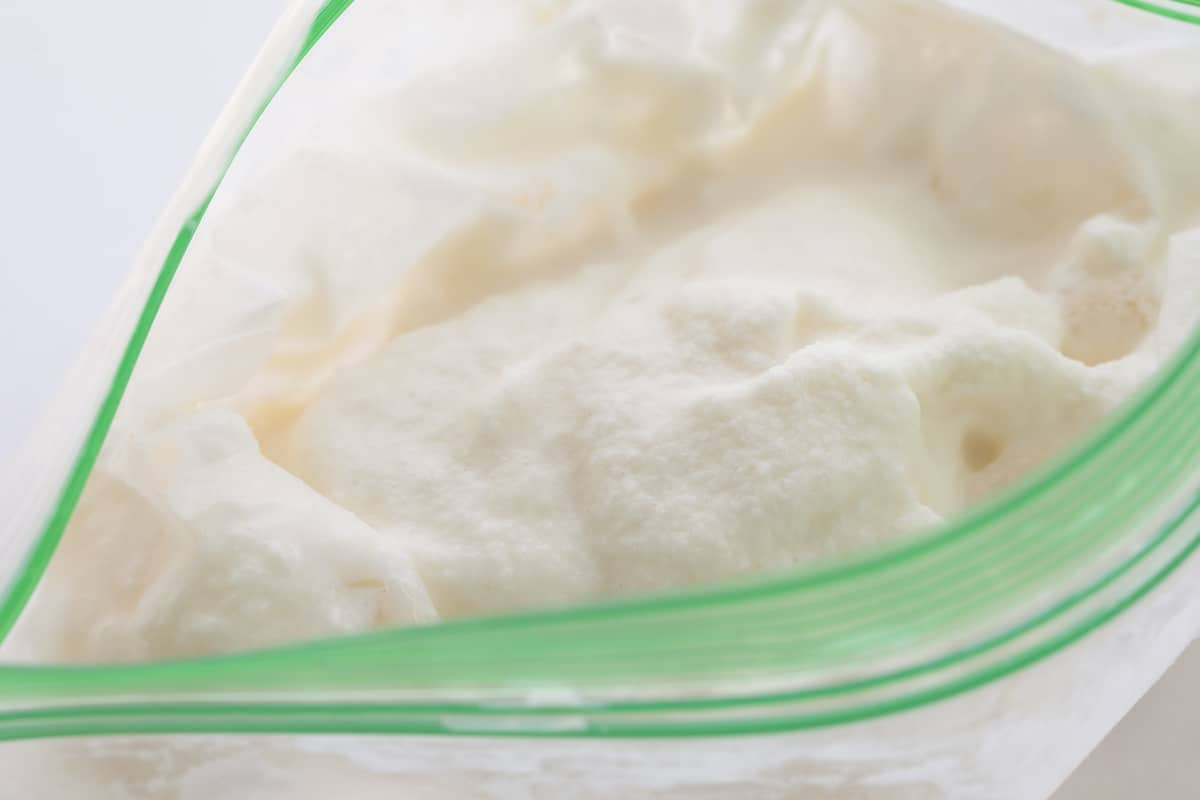 Close up of Soft Serve Ice Cream in a Plastic Bag After Shaking it in a Salt and Ice Bag.
Customize Your Creamy Creation: Irresistible Mix-Ins
One of the joys of homemade soft serve ice cream is the ability to personalize it to your exact taste! Get creative and stir in your favorite mix-ins to transform basic vanilla into a customized dessert masterpiece. Here are some fantastic ideas to get you started:
- Chocolate Lovers: Chocolate chips (mini or regular), chopped chocolate bars, brownie pieces, chocolate syrup, cocoa powder for a richer chocolate flavor.
- Cookie Crumbles: Crushed Oreos, chocolate chip cookies, graham crackers, gingersnaps.
- Fruity Delights: Fresh berries (strawberries, blueberries, raspberries), diced peaches or mangoes, fruit preserves or jams.
- Nutty Sensations: Chopped pecans, walnuts, almonds, peanut butter chips, or a swirl of Nutella.
- Spice it Up: A pinch of cinnamon, nutmeg, or cardamom for a warm, spiced soft serve.
For the best results, add your chosen mix-ins before you begin shaking the ice cream mixture in the ice and salt bag. This will ensure they are evenly distributed throughout the soft serve. Alternatively, you can keep it classic with vanilla soft serve and top it with your favorite sauces like chocolate syrup or caramel sauce after it’s ready.
Making the Perfect Batch: Tips and Tricks
While this homemade soft serve ice cream recipe is incredibly straightforward, here are a few key tips to ensure soft serve success every time:
- Don’t Double the Batch (Easily): While tempting to make more at once, doubling this recipe in a single bag is not recommended. It can take significantly longer to freeze, and the texture might not be as consistently soft serve. It’s better to make multiple single batches if you need to serve a larger group. The ice and salt mixture can be reused for subsequent batches.
- Shake Vigorously: The shaking is what agitates the mixture and helps it freeze into soft serve. Don’t be afraid to put some arm muscle into it! For kids, this is the fun part!
- Protect Your Hands: The ice and salt mixture gets very cold! Use gloves or wrap the bag with a towel to protect your hands while shaking.
- Check for Consistency: After about 5 minutes of shaking, check the consistency of your soft serve. If it’s reached your desired thickness, it’s ready! If you prefer a firmer soft serve, continue shaking for a minute or two longer.
- Serve Immediately: Homemade soft serve is best enjoyed right away when it’s at its softest and creamiest.
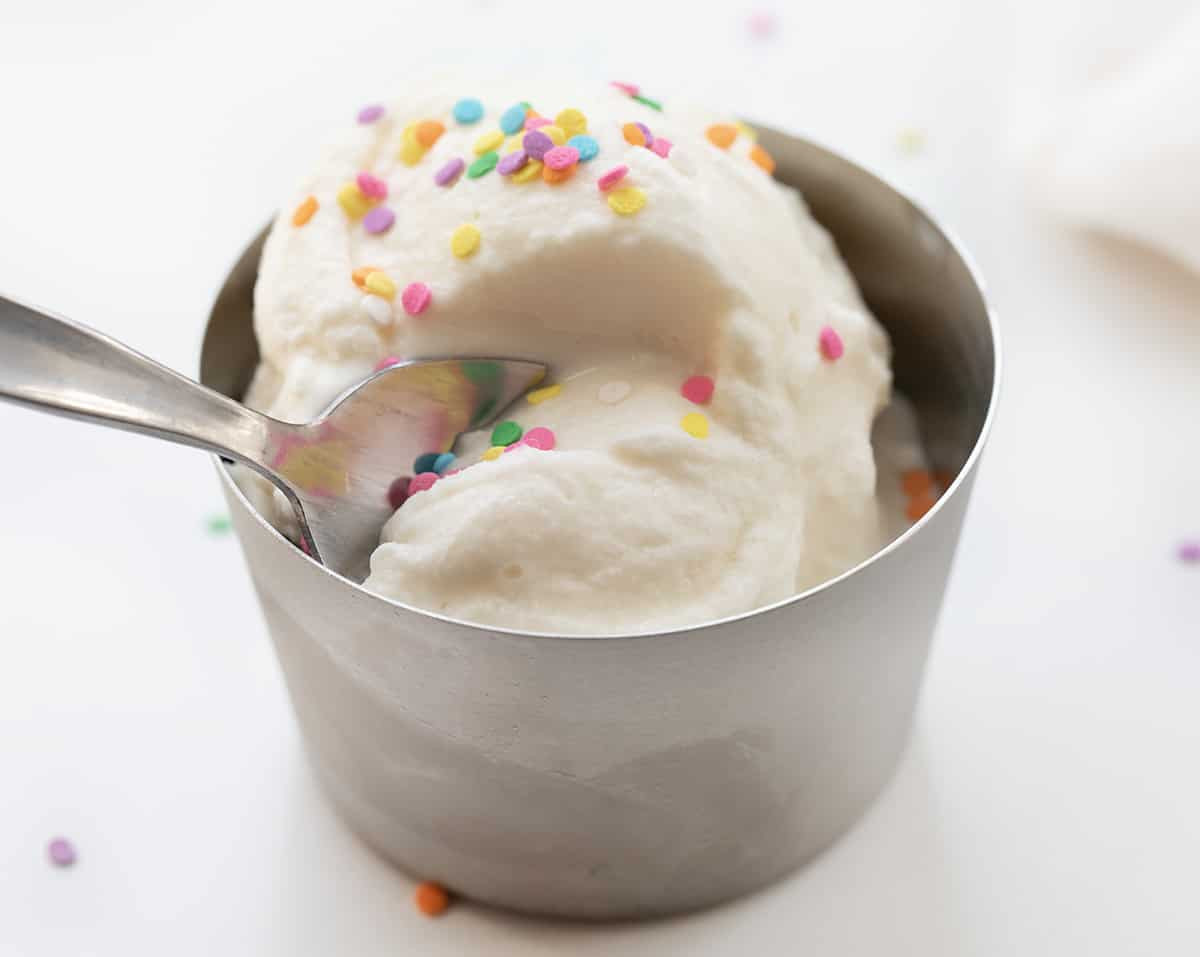 Spoon Taking a Bite out of a Metal Dish with Soft Serve Ice Cream.
Storing Leftovers (Though It’s Best Fresh!)
This recipe is designed to make a single serving (about a cup), perfect for immediate enjoyment. While technically you can store leftover homemade soft serve in the freezer, it will lose some of its signature creamy texture and become harder. If you do need to store it, transfer it to an airtight container and let it soften slightly at room temperature before serving again. However, for the ultimate soft serve experience, we highly recommend enjoying it fresh, right after shaking!
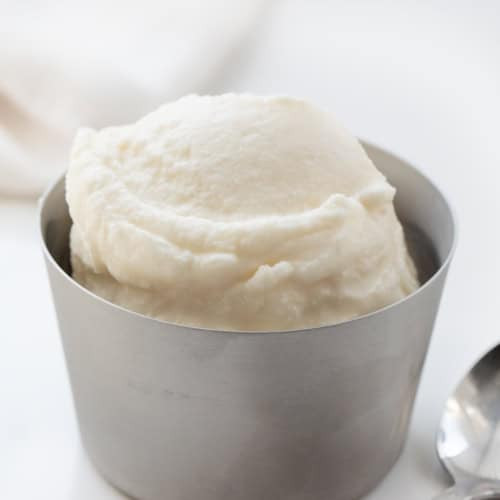 Scoop of Soft Serve Ice Cream in a Metal Bowl on a White Counter with Spoon Nearby.
Quick and Easy Homemade Soft Serve Ice Cream Recipe
Prep Time: 10 minutes
Total Time: 10 minutes
This quick and easy homemade soft serve ice cream recipe delivers creamy vanilla ice cream in minutes, no special equipment needed!
Ingredients
- ½ cup (119 g) heavy cream
- ½ cup (122.5 g) whole milk
- ¼ cup (50 g) granulated sugar
- 1 teaspoon vanilla extract
- 3 cups ice
- ⅓ cup (96 g) kosher salt (or Himalayan pink salt, rock salt, or Maldon sea salt – adjust amount as noted above)
Instructions
-
In a sealable plastic bag (quart-size recommended), combine heavy cream, whole milk, and vanilla extract.
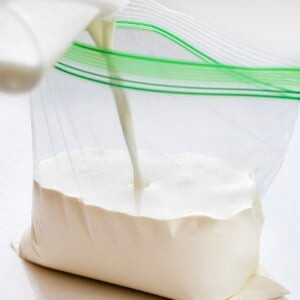 Adding Milk and Heavy Cream to a Plastic Bag to Make Soft Serve Ice Cream.
 -
Add granulated sugar to the bag. Seal the bag tightly, ensuring it’s completely closed, and shake for a few moments until the sugar is fully dissolved and evenly distributed in the cream mixture.
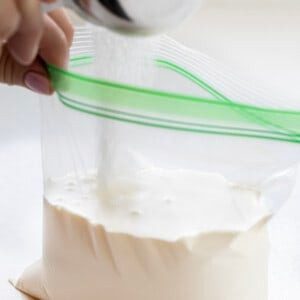 Adding Sugar to a Bag Filled with Heavy Cream to Make Soft Serve Ice Cream.
 -
Open the bag briefly to remove any excess air, then reseal it securely.
-
In a separate, larger resealable plastic bag (gallon-size), pour in the ice and salt.
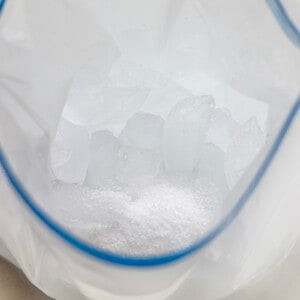 Ice and Salt in a Bag before Adding the Cream Mixture Bag to Make Soft Serve Ice Cream.
 -
Place the smaller bag containing the cream mixture inside the larger bag of ice and salt. Make sure both bags are tightly sealed.
 Cream Mixture in a Bag Inside a Bag of Ice and Salt to Make Soft Serve Ice Cream.
 -
Shake the bag vigorously over a sink for approximately 5 minutes. Using gloves or wrapping the bag in a towel is recommended to protect your hands from the cold. The salt will lower the temperature of the ice, causing the cream mixture to freeze and turn into soft serve ice cream.
-
Carefully remove the bag of ice cream from the ice bag.
-
Check the consistency of the soft serve. If it has reached your desired thickness, it’s ready to serve. Shake a little longer for a firmer consistency.
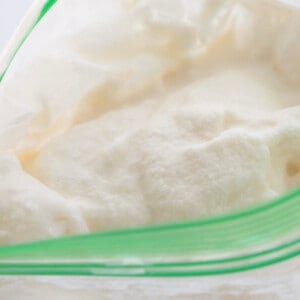 Close up of Soft Serve Ice Cream in a Plastic Bag After Shaking it in a Salt and Ice Bag.
 -
Scoop or pipe the homemade soft serve into bowls or cones and enjoy immediately!
Notes
- Customize it! Stir in your favorite mix-ins before shaking for customized flavors.
- Best enjoyed fresh: Homemade soft serve is at its prime texture right after making.
- Doubling: Making multiple single batches is recommended over doubling in one bag.
Nutrition
Serving: 2 servings | Calories: 344kcal
Course: Dessert
Keyword: Homemade Soft Serve Ice Cream, Easy Ice Cream Recipe
Servings: 1 cup
Calories: 344
Author: Amanda Rettke – iambaker.net
Enjoy your quick and easy homemade soft serve ice cream!