
Customizing your Enshrouded server settings is crucial for tailoring the gameplay experience to your and your community’s preferences. Whether you’re aiming for a more challenging survival scenario or a relaxed exploration environment, understanding how to Enshrouded Change Server Settings unlocks a world of possibilities. This guide provides a detailed walkthrough on editing your Enshrouded dedicated server settings, ensuring you can adjust everything from player stats to world behaviors effectively.
This tutorial focuses on modifying the enshrouded_server.json file, the central configuration hub for your server. Remember, it’s best practice to completely shut down your Enshrouded server before implementing any configuration changes to prevent data corruption or unexpected issues.
Step-by-Step Guide to Edit Enshrouded Server Settings
-
Access Your Nodecraft Control Panel: Begin by logging into your Nodecraft Control Panel using your provided credentials. This is your gateway to managing your server.
-
Select Your Enshrouded Server: From the main dashboard, locate and select your active Enshrouded server. This action directs you to the server management interface.
-
Navigate to Server Files: On the left-hand sidebar menu, find and click on the Server Files option. This will open the file management system for your server.
-
Locate the Configuration File: Within the Server Files directory, scroll through the list to find the file named
enshrouded_server.json. This JSON file is where all the server settings are stored. -
Initiate File Editing: Select the
enshrouded_server.jsonfile and then click the Edit button. This action opens the file editor, allowing you to modify the server settings.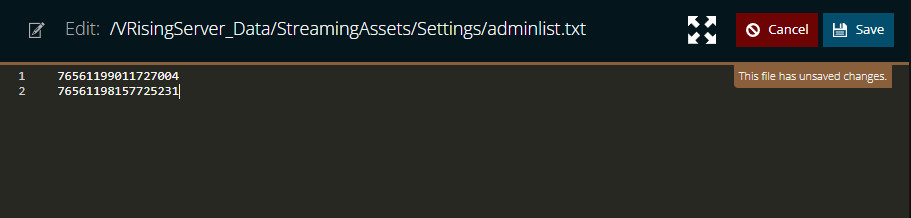 Editing the Enshrouded server configuration file named enshrouded_server.json within the Nodecraft control panel, highlighting the edit button to change server settings.
 -
Implement Your Desired Changes: Now you can directly edit the values within the
enshrouded_server.jsonfile to adjust your server settings. Refer to the settings breakdown below for details on available options. -
Save Your Modifications: After making your adjustments, click the Save button to ensure your changes are recorded in the configuration file.
-
Restart Your Enshrouded Server: Finally, restart your Enshrouded server for the new settings to take effect. This step is crucial for applying the configurations you’ve just saved.
Understanding Key Enshrouded Server Settings
The enshrouded_server.json file is organized into sections, each controlling different aspects of your Enshrouded server. Here’s a detailed breakdown of the most important settings you can modify:
General Server Settings
These settings define the fundamental aspects of your server environment.
name: Customize the server name as it appears in the public server list. A descriptive and inviting name can attract more players.{ "name": "The Shrouded Peaks - Community Server" }saveDirectory: Specifies the directory where your server’s save data is stored. It’s generally recommended to leave this at the default setting unless you have specific organizational needs.logDirectory: Defines the directory for storing server logs. Logs are essential for troubleshooting and monitoring server performance.ip: The IP address of your server. In most cases,"0.0.0.0"is the optimal setting, allowing the server to listen for connections on all network interfaces.queryPort: The port number used for server queries. The default port is usually suitable, but ensure it doesn’t conflict with other services if you’re using a custom setup.
Player Gameplay Settings
Adjust these settings to fine-tune the player experience in your Enshrouded world.
playerHealthFactor: Modifies the base health of players. Setting it to a value higher than 1 increases player health, making survival easier. Conversely, a value below 1 decreases health for a greater challenge.{ "playerHealthFactor": 1.2 } // Players have 20% more healthplayerStaminaFactor: Controls player stamina levels. Increasing this factor allows players to perform actions for longer durations before tiring.{ "playerStaminaFactor": 1.5 } // Players have 50% more staminaplayerHungerToStarving: Determines the duration (in milliseconds) before players start taking damage from starvation after becoming hungry. Increasing this value provides a longer grace period before starvation penalties kick in.{ "playerHungerToStarving": 7200000000 } // Players take longer to starve
World and In-Game Time Settings
These settings govern the game world’s rules and the passage of time.
tombstoneMode: Dictates what happens to a player’s inventory upon death."AddBackpackMaterials"is a common setting, creating a tombstone with the player’s items for retrieval.dayTimeDuration: Sets the length of daytime in milliseconds. Longer days (1800000000or more) offer more time for exploration and building during daylight.{ "dayTimeDuration": 2160000000 } // Longer daytimenightTimeDuration: Sets the length of nighttime in milliseconds. Shorter nights (720000000or less) reduce the time spent in darkness and potential nighttime dangers.{ "nightTimeDuration": 540000000 } // Shorter nighttime
Enemy Behavior Settings
Customize the challenge level of your server by adjusting enemy attributes.
enemyHealthFactor: Modifies the health of enemies. Increasing this value makes enemies tougher to defeat, enhancing combat difficulty.{ "enemyHealthFactor": 1.15 } // Enemies have 15% more healthenemyDamageFactor: Controls the damage dealt by enemies. Increasing this factor makes combat encounters more dangerous.{ "enemyDamageFactor": 1.2 } // Enemies deal 20% more damageenemyAggroRange: Determines the distance at which enemies will detect and aggro onto players. Options may include"Normal","High", or"Low"to adjust the enemy detection range and combat engagement frequency.
Resource Management Settings
Fine-tune resource gathering and world economy through these settings.
miningDamageFactor: Adjusts the damage dealt by mining tools to resources like ores and wood. Increasing this factor can speed up resource gathering.{ "miningDamageFactor": 1.3 } // Mining tools are 30% more effectiveplantGrowthSpeedFactor: Controls the rate at which plants grow in the game world. Increasing this factor accelerates plant growth, impacting farming and resource regeneration.{ "plantGrowthSpeedFactor": 1.4 } // Plants grow 40% fasterresourceDropStackAmountFactor: Modifies the quantity of resources dropped when gathered from nodes or enemies. Increasing this factor boosts resource yields.{ "resourceDropStackAmountFactor": 1.25 } // 25% more resources dropped
Best Practices for Enshrouded Server Configuration
- Backup Your Configuration: Before making any changes to
enshrouded_server.json, always download a backup copy. This precautionary step allows you to quickly revert to your previous settings if needed. - Incremental Testing: Implement changes gradually and test your server after each modification. This approach helps identify any issues arising from specific setting changes and ensures a stable server environment.
Conclusion: Tailor Your Enshrouded Experience
By mastering the enshrouded change server settings process, you gain complete control over your Enshrouded server environment. From adjusting player attributes and enemy difficulty to world behaviors and resource management, these configurations empower you to create a truly unique and engaging multiplayer experience. Experiment with different settings to find the perfect balance that suits your community’s playstyle and preferences.
Should you require further assistance or have specific inquiries regarding server settings, don’t hesitate to reach out to Nodecraft support for expert guidance.