The wedding cake cutting ceremony is a cherished moment, often captured beautifully in photos and memories. While many venues offer standard cake serving sets, creating your own personalized Bridal Cake Serving Set adds a unique and memorable touch to your special day. For couples seeking a blend of DIY charm and dazzling elegance, a glitter-infused design is the perfect choice. This guide unveils how to craft a stunning DIY glitter bridal cake server set, proving that personalization doesn’t have to break the bank. In fact, with a little creativity and readily available materials, you can achieve a custom look that truly reflects your style.
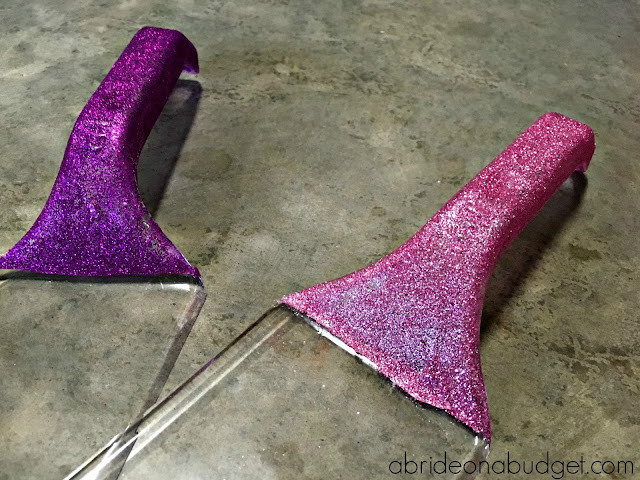
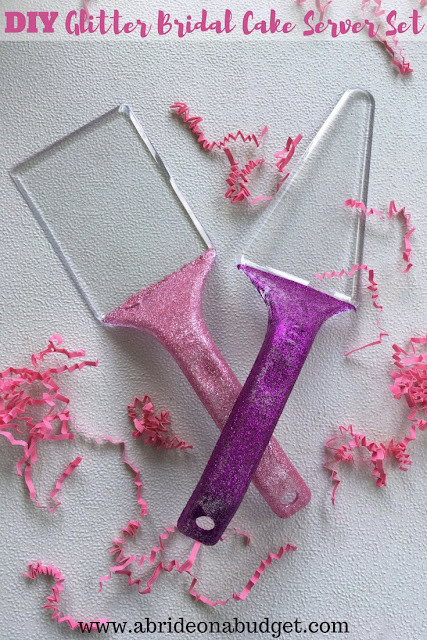 Close-up of glitter handles on a DIY bridal cake server and knife, sparkling elegantly, showcasing the detail of the handmade wedding decor.
This DIY project is wonderfully simple, making it ideal for even novice crafters. However, to ensure the best results and complete drying time, it’s recommended to start this project a few days before your wedding. This avoids any last-minute rushes and guarantees your handmade bridal cake serving set is picture-perfect for the big day.
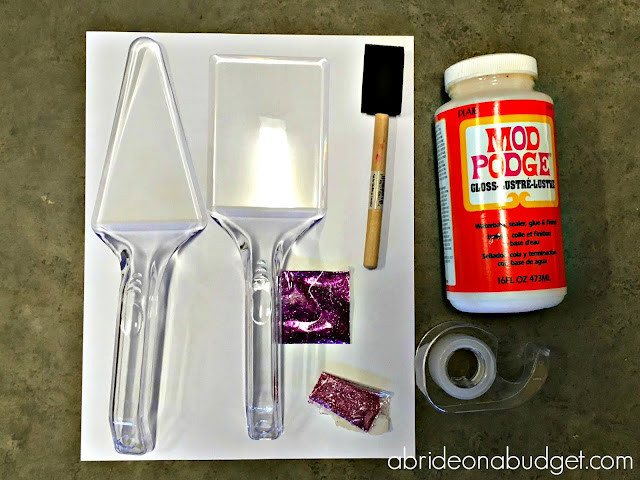 Overhead shot of materials needed for a DIY glitter bridal cake server set project, including clear plastic servers, glitter, Mod Podge, foam brush, paper, and tape.
Materials You Will Need:
- Clear Plastic Cake Servers: Affordable and readily available, these can often be found at dollar stores or craft supply stores. Opt for a set that includes both a server and a knife for a complete bridal cake serving set.
- Fine Glitter: Choose a color that complements your wedding theme. Silver, gold, rose gold, or even a subtle pastel glitter can create stunning effects. Consider extra fine glitter for a smoother, more elegant finish.
- Mod Podge: A crucial element for sealing the glitter and ensuring it’s food-safe once dry. Select a non-toxic Mod Podge formula to guarantee safety when using your bridal cake serving set.
- Foam Brush: Provides smooth and even application of Mod Podge, essential for a professional-looking finish.
- Paper Sheets: Protect your work surface and make glitter cleanup easier.
- Painter’s Tape: For creating clean, crisp lines and defining the glittered areas on your server set.
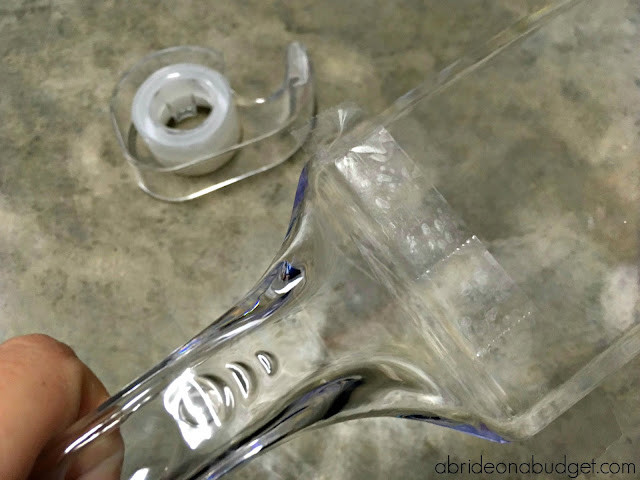 Close-up showing painter's tape being applied to a clear plastic cake server handle to mark off the area for glitter application in the DIY project.
Step-by-Step Guide:
-
Prepare the Handles: Use painter’s tape to carefully mark off the areas where you want to apply glitter. Many choose to glitter the entire handle of both the cake server and knife for a fully glamorous look. Ensure the tape is firmly pressed down to prevent Mod Podge from seeping underneath and creating uneven lines.
-
Apply the First Layer of Mod Podge: Using your foam brush, apply a generous, even layer of Mod Podge to the areas you’ve taped off. Work in sections to prevent the Mod Podge from drying before you apply the glitter.
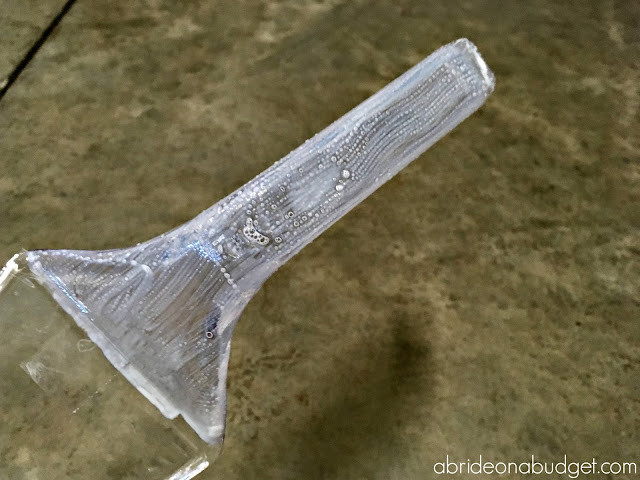 Applying Mod Podge with a foam brush to the handle of a clear plastic cake server in preparation for adding glitter to the DIY bridal cake serving set.
- Generously Apply Glitter: Immediately after applying Mod Podge, sprinkle a generous amount of glitter over the wet adhesive. To minimize mess and reclaim excess glitter, place a sheet of paper underneath your server set. This allows you to easily collect the extra glitter and pour it back into its container. Ensure every Mod Podge-covered area is thoroughly coated with glitter for maximum sparkle.
 Pouring glitter over a Mod Podge-covered cake server handle, with paper underneath to catch excess glitter during the DIY bridal cake serving set creation.
-
Let it Dry (Overnight is Best): Allow the first layer of Mod Podge and glitter to dry completely. This is crucial for preventing the top coat from reactivating the base layer and causing glitter to detach. Ideally, let it dry overnight to ensure it’s thoroughly set.
-
Seal with a Top Coat of Mod Podge: Once the glitter layer is completely dry, apply a second, generous coat of Mod Podge over the glitter. This top coat is essential for sealing the glitter, preventing shedding, and making your bridal cake serving set comfortable to handle and safe for use with your cake.
Applying a top coat of Mod Podge over glitter on a cake server handle to seal and protect the glitter finish of the DIY bridal cake serving set.
-
Final Drying Time: Allow the top coat of Mod Podge to dry completely, again, overnight is recommended for the best outcome. This ensures the glitter is fully sealed and the bridal cake serving set is ready for your wedding.
-
Remove the Tape: The next day, carefully peel off the painter’s tape. You’ll be left with beautifully defined, glittered handles and a professional, polished look for your DIY bridal cake serving set.
Finished DIY glitter bridal cake server set with clean lines and sparkling glitter handles, ready for a wedding cake cutting ceremony.
Personalization Tips:
- Color Coordination: Match the glitter color to your wedding color scheme for a cohesive and elegant look. Consider using different shades of the same color for the server and knife for added visual interest.
- Beyond Glitter: While glitter provides fantastic sparkle, you can also explore other embellishments. Consider adding small rhinestones, pearls, or even delicate ribbon accents for extra detail.
- Matching Toasting Flutes: Extend the glitter theme to your toasting flutes for a coordinated set. Follow a similar DIY process to create matching glitter wedding glasses and enhance the overall sparkle of your wedding décor. Explore tutorials on DIY glitter wine glasses for inspiration.
Creating your own DIY glitter bridal cake serving set is a rewarding and budget-friendly way to personalize your wedding. It’s a simple project that yields stunning results, adding a touch of sparkle and handmade charm to your cake cutting ceremony. Embrace the DIY spirit and create a memorable keepsake that you can cherish for years to come.