
Before diving into the setup, let’s understand why an Aska Dedicated Server elevates your gaming experience. An ASKA dedicated server establishes a persistent and always-accessible game world, independent of individual player sessions. Imagine a dynamic online realm that evolves continuously, much like a live service website, available for players whenever they choose to connect.
The primary benefit of an aska dedicated server is its 24/7 availability. Your gaming community can access the server and play together regardless of the original host’s presence. This is ideal for groups with varied schedules or players across different time zones, fostering a vibrant and continuous shared gaming environment.
Step-by-Step ASKA Dedicated Server Installation
Part 1: Initializing SteamCMD
SteamCMD, the command-line interface for Steam, is our starting point for server management. Here’s how to get it ready:
- Download SteamCMD: Begin by downloading SteamCMD directly from the official Steam website. Ensure you choose the correct version for your operating system (Windows, Linux, or macOS).
- Extract Files: After downloading, extract the contents of the downloaded archive (usually a ZIP file) into a dedicated folder. Choose a location that’s easily accessible and remember this path for future steps.
- Run SteamCMD: Locate
steamcmd.exewithin the extracted folder and execute it. This will initiate the SteamCMD application. - Wait for Updates: Upon the first run, SteamCMD will automatically download necessary updates and components. This process may take a few minutes depending on your internet connection. Be patient and allow it to complete.
- Explore SteamCMD Documentation: While waiting, it’s beneficial to familiarize yourself with SteamCMD commands. The SteamCMD documentation offers a comprehensive overview of commands that will be useful for server administration and updates.
Understanding SteamCMD is fundamental as it’s the backbone for installing, updating, and managing your aska dedicated server. It provides the necessary tools to keep your server software current and functioning correctly.
Part 2: Installing the ASKA Server Software via Steam
With SteamCMD prepared, the next step is to install the ASKA dedicated server software itself through the Steam platform.
- Open Steam Client: Launch your standard Steam client application.
- Access Tools Filter: Navigate to your Steam Library and locate the filter options, usually positioned at the top of your games list.
- Change Filter to “Tools”: Click on the filter dropdown menu and switch the category from “Games” to “Tools.” This will display software tools available in your Steam library.
- Search for “ASKA Dedicated Server”: In the search bar within the Tools section, type “ASKA Dedicated Server.” The ASKA dedicated server tool should appear in the search results.
- Install ASKA Dedicated Server: Click on “ASKA Dedicated Server” and then click the “Install” button. Choose the computer where you intend to host the server as the installation destination.
It’s crucial to ensure the chosen server computer meets the recommended specifications for running the ASKA server smoothly. A robust machine with a stable, high-speed internet connection is essential for optimal server performance and a positive player experience.
Part 3: Server Configuration Essentials
Proper server configuration is paramount for the successful operation of your aska dedicated server. This involves setting up key parameters that govern how your server functions and interacts with players.
-
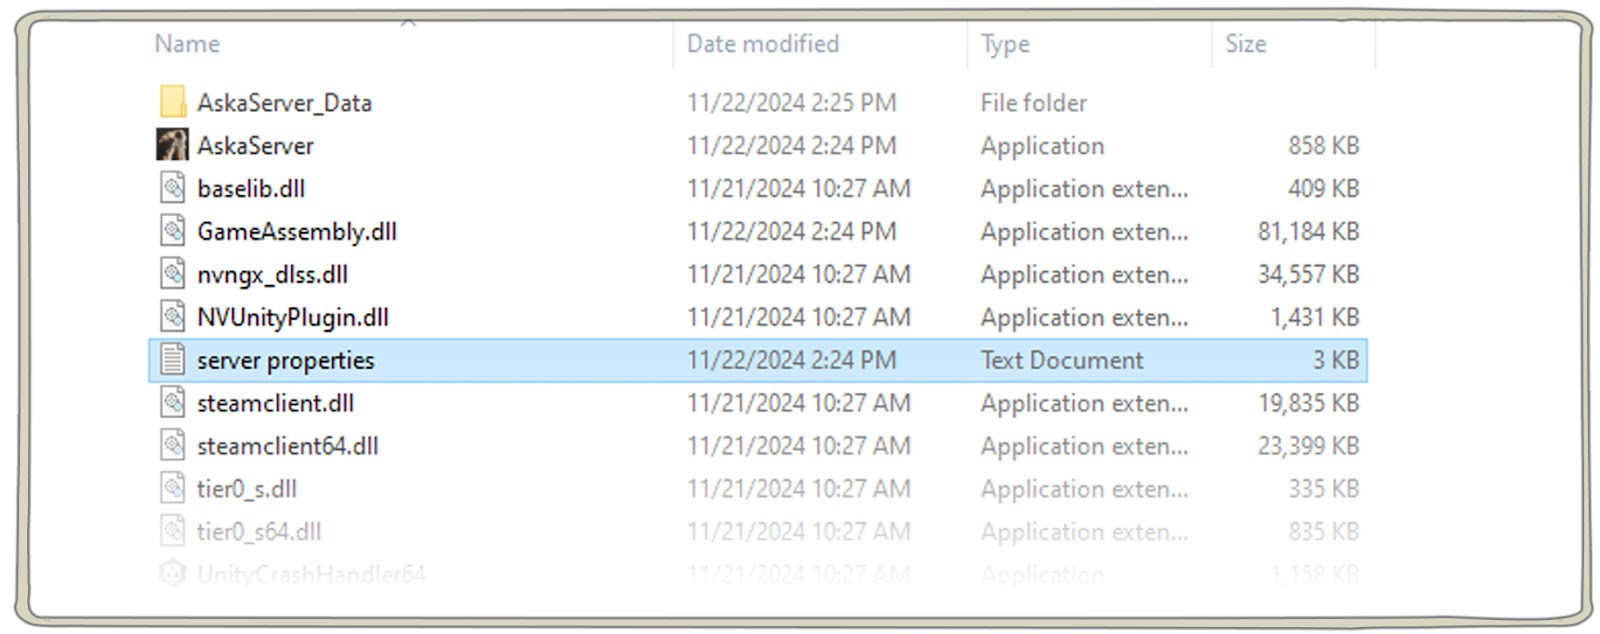
Locate Server Installation Directory: Navigate to the directory where you installed the ASKA Dedicated Server. Typically, this is found within your Steam library folders, for example:
<drive>:SteamLibrarysteamappscommonASKA Dedicated Server</drive>. -
Find “server properties.txt”: Within the installation directory, locate the file named “server properties.txt”. This file is the central configuration hub for your server settings.
-
Open with Text Editor: Open “server properties.txt” using a plain text editor such as Notepad++ or Visual Studio Code. Avoid using word processors like Microsoft Word, as they can introduce formatting that can corrupt the file.
-
Configure Essential Parameters: Carefully adjust the following critical parameters within the “server properties.txt” file. These settings are vital for your server to function correctly and be accessible to players:
- Authentication Token: This token is essential for verifying your server with Steam’s game server authentication system. You’ll need to generate this token from the Steamworks website (explained in Part 5).
- Steam Game Port: This port is used by players to connect to your ASKA game server. The default port is usually fine, but ensure it’s not conflicting with other applications.
- Steam Query Port: The query port allows server browsers to locate and display your server in server lists. This needs to be correctly configured for visibility.
- Display Name: This is the name players will see when browsing for servers in the ASKA multiplayer server list. Choose a descriptive and appealing name.
- Password (Optional): If you wish to restrict access to your server to a select group of players, set a password. Leave it blank for a public server.
- Region: Select the geographical region where your server is located. This affects server visibility in regional server lists and can impact connection quality for players in different locations. Choose a region that is geographically closest to your target player base.
Part 4: Setting Up for Long-Term Server Stability
For sustained and reliable server operation, implementing these setup enhancements is highly recommended.
-
Configuration File Protection:
- Create a Dedicated Server Folder: Create a new folder specifically for your server configuration files, for instance:
<drive>:SteamLibrarysteamappscommonASKA_ServerConfig</drive>. - Copy “server properties.txt”: Copy the “server properties.txt” file from the ASKA Dedicated Server installation directory to this newly created folder.
- Purpose: This separation safeguards your configuration settings from being overwritten or lost during game server updates. Game updates typically only modify files within the main installation directory, leaving your custom configuration intact.
- Create a Dedicated Server Folder: Create a new folder specifically for your server configuration files, for instance:
-
Customize Server Launch File:
- Locate AskaServer.bat: Find the “AskaServer.bat” file within your ASKA Dedicated Server installation directory. This is the batch file used to launch the server.
- Edit with Text Editor: Open “AskaServer.bat” with a text editor.
- Modify File Paths: Update the file paths within the batch file to point to your new configuration file location. The modified line should resemble this format:
"AskaServer.exe" -propertiesPath "<your new path>server properties.txt". Replace<your new path>with the actual path to your configuration folder (e.g.,<drive>:SteamLibrarysteamappscommonASKA_ServerConfig).
Part 5: Launching Your ASKA Server
With configuration complete, you’re ready to bring your aska dedicated server online.
- Obtain Authentication Token:
- Visit Steam Game Server Account Management: Go to https://steamcommunity.com/dev/managegameservers in your web browser. You may need to log in with your Steam account.
- Generate New Token: Follow the instructions on the Steamworks page to generate a new game server authentication token. You may need to input the App ID for ASKA, if required, which you can find on the Steamworks documentation or ASKA server documentation.
- Copy Token: Once generated, copy the authentication token to your clipboard.
- Enter Token in Configuration:
- Open “server properties.txt”: Re-open your “server properties.txt” file (the one you copied to the separate configuration folder).
- Paste Token: Locate the
AuthenticationToken=line and paste the authentication token you copied from the Steamworks website after the equals sign. Save the file.
- Start Your Server:
- Execute AskaServer.bat: Double-click the modified “AskaServer.bat” file in your ASKA Dedicated Server installation directory to launch the server.
- Monitor Initialization: A console window will appear, displaying the server initialization process. Wait for this process to complete. The console will indicate when the server is ready.
- Server Visibility: Once initialization is complete, your aska dedicated server should appear in the ASKA multiplayer server list, ready for players to join.
Understanding ASKA Server Behavior: Saving and Dormancy
Your ASKA server intelligently manages game world saving and resource usage through its saving and dormancy mechanisms.
-
World Saving: The server automatically saves the game world in these instances:
- Start of New In-Game Day: At the beginning of each new game day cycle, the server performs a save to preserve progress.
- Last Player Leaves: When the final player disconnects from the server, a save is triggered to ensure no progress is lost.
-
Dormant State for Resource Conservation: To optimize resource usage, the server enters a “dormant” state when no players are online. In this state:
- Game World Paused: The game world is effectively frozen in time; no in-game events progress.
- No Resource Consumption: Game world processes cease, minimizing CPU and RAM usage.
- Minimal Memory Footprint: The server retains the game state in a low-resource state, ready to resume when players connect.
This dormancy feature is crucial for efficient server operation, especially for servers intended to be online continuously but may experience periods of low player activity.
Maintaining Your ASKA Dedicated Server
Consistent maintenance is key to ensuring a smooth and enjoyable experience on your aska dedicated server for the long term.
-
Regular Maintenance Tasks:
- Check for Updates: Periodically check for updates to the ASKA Dedicated Server tool through the Steam client. Keeping your server software updated is vital for security, stability, and access to new features or bug fixes.
- Configuration Backups: Regularly back up your “server properties.txt” file. This allows for quick restoration of your server settings in case of accidental changes or data corruption.
- Server Performance Monitoring: Monitor your server’s performance metrics (CPU usage, RAM usage, network traffic) to identify potential bottlenecks or issues. Tools like Task Manager (Windows) or
top/htop(Linux) can be helpful. - Establish Server Rules: Define clear and concise server rules for players to maintain a positive community environment. Communicate these rules clearly to your player base.
-
Safe Server Shutdown Procedure: When you need to stop your server for maintenance or other reasons, follow a safe shutdown process:
- Use Console Commands (Ctrl+C): In the server console window, press
Ctrl+C. This sends a shutdown signal to the server application, allowing it to gracefully save data and terminate. - Close Console Window (X Button): Alternatively, clicking the “X” button to close the console window will also typically initiate a safe shutdown sequence.
- Avoid Forceful Termination: Do not forcefully terminate the server process through Task Manager or similar tools unless absolutely necessary, as this can lead to data corruption or unsaved game world states.
- Use Console Commands (Ctrl+C): In the server console window, press
Troubleshooting Common ASKA Server Issues
Encountering issues is part of server administration. Here are solutions to common problems with aska dedicated servers:
-
Server Not Visible in Server List:
- Verify Port Configuration: Double-check that your Steam Game Port and Steam Query Port are correctly configured in “server properties.txt” and that these ports are forwarded correctly in your router/firewall settings if necessary.
- Authentication Token Check: Ensure your authentication token is correctly entered in “server properties.txt” and is valid.
- Firewall Configuration: Confirm that your server’s firewall (Windows Firewall or any third-party firewall) is not blocking inbound or outbound connections on the necessary ports (Game Port and Query Port). You may need to create firewall rules to allow traffic through these ports.
-
Player Connection Problems:
- Region Setting Verification: Verify that the server region setting in “server properties.txt” is appropriate. An incorrect region can affect server visibility and connection quality for players in different locations.
- Password Accuracy: If your server is password-protected, double-check that players are using the correct password.
- Server Capacity: Ensure the server is not full. ASKA servers have a maximum player capacity. If the server is at its limit, new players will be unable to connect.
-
Game World Save Issues:
- Automatic Save Triggers: Remember that server saves are automatic at the start of each in-game day and when the last player leaves. Individual players cannot manually force server saves.
- Server Log Review: Check the server log files (typically located in the server installation directory) for any error messages related to saving. The log can provide insights into potential save failures.
- Last Save Time Tracking: Monitor the server log to track the last successful save time. This can help diagnose if saves are occurring as expected.
Best Practices for Effective Server Administration
Adhering to these best practices will enhance the security, performance, and community aspects of your aska dedicated server.
-
Security Hardening:
- Keep Authentication Token Private: Never share your server authentication token publicly. Treat it as a sensitive credential.
- Implement Strong Password (If Needed): If you choose to password-protect your server, use a strong, unique password.
- Regular Software Updates: Maintain your ASKA Dedicated Server software with the latest updates from Steam to patch security vulnerabilities and benefit from improvements.
-
Performance Optimization:
- Resource Monitoring: Continuously monitor server resource utilization (CPU, RAM, network) to identify potential bottlenecks.
- Reasonable Player Slots: Set a player slot limit that is appropriate for your server hardware capabilities. Overcrowding can lead to performance degradation.
- Hardware Considerations: When configuring server settings, consider the specifications of your server hardware. Adjust settings (e.g., world size, entity density if configurable) to match your hardware’s capacity.
-
Community Management Excellence:
- Establish Clear Server Rules: Create and communicate a clear set of server rules to foster a positive and respectful player community.
- Open Communication Channels: Maintain open communication channels with your players (e.g., Discord server, in-game chat moderation). Respond to player inquiries and feedback promptly.
- Document Server Settings: Keep documentation of any custom server settings, modifications, or important configurations. This is useful for troubleshooting and for communicating server specifics to your community.
By following this comprehensive guide, you’ll be well-equipped to set up and manage a robust and engaging aska dedicated server that provides a superior gaming experience for your community. Remember that server administration is an ongoing commitment, but with proper setup, maintenance, and community engagement, it can be a highly rewarding endeavor for both you and your players.
Looking for Aska Dedicated Server Hosting? Rent one from us.
