
Introduction
For those venturing into web development or server management, understanding the LAMP stack is fundamental. LAMP stands for Linux, Apache, MySQL, and PHP. This powerful combination of open-source software is the bedrock for hosting dynamic websites and web applications. A Lamp Server, therefore, is a server environment built using this stack, optimized for delivering web content.
This guide provides a detailed walkthrough on how to install and configure a LAMP server on Ubuntu 22.04. These instructions are also applicable to Ubuntu 18.04 and later versions, ensuring you have a robust and up-to-date environment.
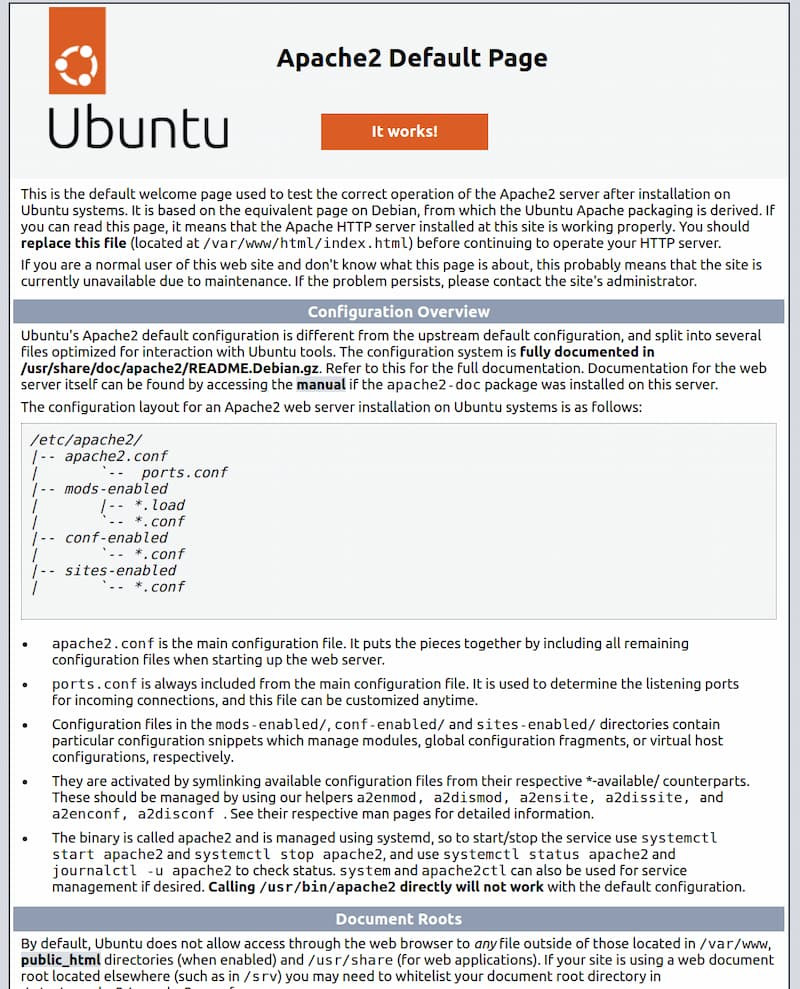 Ubuntu 22.04 Apache default web page with an overview of your default configuration settings
Prerequisites
Before we begin setting up your lamp server, ensure you have the following prerequisites in place:
- Ubuntu Server: You’ll need a server running Ubuntu. For optimal security and performance, it’s recommended to use the latest LTS (Long Term Support) version, currently Ubuntu 22.04.
- Non-Root User with Sudo Privileges: It’s best practice to avoid working directly with the root user. Set up a non-root user with
sudoprivileges for administrative tasks. - Active Firewall: A firewall is crucial for server security. Ensure you have a firewall configured and enabled, such as UFW (Uncomplicated Firewall).
Refer to the Initial Server Setup Guide for your chosen Ubuntu distribution for detailed instructions on these initial steps.
For database management, consider leveraging DigitalOcean Managed Databases. This service handles scaling, maintenance, and upgrades, allowing you to focus on your applications.
Step 1 — Installing Apache and Configuring the Firewall
Apache, a leading web server, is the first component we’ll install for our lamp server. Its reliability, extensive documentation, and active community make it an excellent choice for hosting websites.
First, update your package manager cache to ensure you have the latest package information:
sudo apt updateNext, install the Apache web server package:
sudo apt install apache2Confirm the installation when prompted by pressing Y and then ENTER.
Once Apache is installed, you need to adjust your firewall to allow web traffic. UFW, Ubuntu’s default firewall, simplifies this process with application profiles. List the available UFW application profiles:
sudo ufw app listAvailable applications:
Apache
Apache Full
Apache Secure
OpenSSHThese profiles represent different Apache traffic configurations:
- Apache: Allows traffic on port
80(standard HTTP, unencrypted web traffic). - Apache Full: Allows traffic on ports
80(HTTP) and443(HTTPS, encrypted traffic). - Apache Secure: Allows traffic on port
443(HTTPS only).
For a fresh lamp server setup, allowing only HTTP traffic on port 80 is sufficient initially. We’ll address HTTPS later. Enable the Apache profile:
sudo ufw allow in "Apache"Verify the firewall change:
sudo ufw statusStatus: active
To Action From
-- ------ ----
OpenSSH ALLOW Anywhere
Apache ALLOW Anywhere
OpenSSH (v6) ALLOW Anywhere (v6)
Apache (v6) ALLOW Anywhere (v6)Port 80 traffic is now permitted through your firewall, enabling access to your lamp server via HTTP.
To confirm Apache is running correctly, visit your server’s public IP address in a web browser. If you are unsure of your server’s public IP, consult the following section.
http://your_server_ipYou should see the default Ubuntu Apache welcome page. This page is for testing and informational purposes, confirming that your web server is correctly installed and reachable through the firewall.
Finding Your Server’s Public IP Address
If you are unsure of your server’s public IP address, here are a couple of methods to find it:
Using iproute2:
ip addr show ens3 | grep inet | awk '{ print $2; }' | sed 's//.*$//'This command will display your server’s IP address. There might be multiple addresses listed; try each one if necessary.
Using curl:
curl http://icanhazip.comThis command uses an external service to report your server’s public IP address.
Enter the obtained IP address into your web browser to verify your running Apache server.
Step 2 — Installing MySQL
The next crucial component of our lamp server is MySQL, a robust database management system. MySQL will store and manage the data for your websites and applications.
Install MySQL using apt:
sudo apt install mysql-serverConfirm the installation by typing Y and pressing ENTER.
After installation, it’s highly recommended to run the mysql_secure_installation script. This script enhances the security of your MySQL installation by removing insecure defaults and restricting access.
Warning: As of July 2022, running mysql_secure_installation directly might lead to an error due to changes in root user authentication. The script attempts to set a password for the MySQL root account, but the default authentication method in Ubuntu installations might not be password-based.
To avoid issues, adjust the root user’s authentication method before running the security script. Access the MySQL prompt:
sudo mysqlChange the root user’s authentication to mysql_native_password:
ALTER USER 'root'@'localhost' IDENTIFIED WITH mysql_native_password BY 'your_secure_password';Replace 'your_secure_password' with a strong password.
Exit the MySQL prompt:
exitNow, run the mysql_secure_installation script:
sudo mysql_secure_installationThe script will guide you through several security options:
- VALIDATE PASSWORD PLUGIN: This plugin enforces password strength policies. Enabling it is recommended for production environments. Choose a validation level based on your security requirements.
- Set password for root user: Even though the default root authentication might not rely on a password, setting one here adds a layer of security.
- Remove anonymous users: Removes default anonymous user accounts for enhanced security.
- Disallow remote root login: Restricts root user login to only the local server.
- Remove test database and access to it: Removes the default test database.
- Reload privilege tables: Applies the security changes immediately.
Answer Y (yes) to the prompts to apply these recommended security settings.
After the script completes, test your MySQL root login:
sudo mysqlYou should be able to access the MySQL monitor without a password prompt, as sudo authenticates you using your system user privileges.
Exit the MySQL console:
exitFor enhanced security, especially in multi-database environments, create dedicated MySQL user accounts with limited privileges for each database. This principle of least privilege minimizes potential security risks.
Note: Older PHP versions might not fully support caching_sha2_password, the default authentication method in MySQL 8. If compatibility issues arise with PHP applications, you might need to configure user accounts to use mysql_native_password instead. We will demonstrate this in Step 6.
Your MySQL server is now installed and secured, ready to store and manage your data.
Step 3 — Installing PHP
PHP, the final core component of the LAMP server, processes code to generate dynamic web content. We’ll install PHP along with essential modules:
php: The core PHP package.php-mysql: A PHP module enabling communication with MySQL databases.libapache2-mod-php: An Apache module allowing Apache to handle PHP files.
Install these packages using apt:
sudo apt install php libapache2-mod-php php-mysqlVerify the PHP installation and version:
php -vPHP 8.1.2 (cli) (built: Mar 4 2022 18:13:46) (NTS)
Copyright (c) The PHP Group
Zend Engine v4.1.2, Copyright (c) Zend Technologies
with Zend OPcache v8.1.2, Copyright (c), by Zend TechnologiesThis output confirms PHP is installed and shows the installed version.
(Optional) Adjusting Apache’s Directory Index Preference
By default, when a directory is requested, Apache prioritizes index.html files. To make your lamp server prioritize PHP files, modify Apache’s directory index configuration. This ensures that index.php files are served if present in a directory.
Open the dir.conf file:
sudo nano /etc/apache2/mods-enabled/dir.confLocate the DirectoryIndex line:
<IfModule mod_dir.c>
    DirectoryIndex index.html index.cgi index.pl index.php index.xhtml index.htm
</IfModule>
Move index.php to the first position after DirectoryIndex:
<IfModule mod_dir.c>
    DirectoryIndex index.php index.html index.cgi index.pl index.xhtml index.htm
</IfModule>
Save and close the file (CTRL+X, Y, ENTER).
Restart Apache for the changes to take effect:
sudo systemctl restart apache2You can check Apache’s status using:
sudo systemctl status apache2Press Q to exit the status output.
(Optional) Installing PHP Extensions
PHP extensions expand PHP’s capabilities. To explore available PHP modules, use apt search with less to navigate the output:
apt search php- | lessUse arrow keys to scroll and Q to quit.
To learn more about a specific module, use apt show:
apt show package_nameFor example, to see details about php-cli:
apt show php-cliInstall desired extensions using apt install:
sudo apt install php-extension_nameFor multiple extensions, list them separated by spaces:
sudo apt install php-extension1 php-extension2 ...With PHP installed and configured, your lamp server is almost complete. The next step is setting up a virtual host for your website.
Step 4 — Setting Up a Virtual Host for Your Website
Apache virtual hosts enable hosting multiple domains on a single server. We will set up a virtual host for your_domain (replace this with your actual domain name).
Note: If using DigitalOcean for DNS, refer to DigitalOcean’s DNS documentation for domain setup instructions.
Apache on Ubuntu has a default virtual host serving files from /var/www/html. While suitable for a single site, it becomes complex for multiple sites. We’ll create a directory structure within /var/www for your_domain, leaving /var/www/html as the default.
Create the directory for your_domain:
sudo mkdir /var/www/your_domainAssign ownership to your user:
sudo chown -R $USER:$USER /var/www/your_domainCreate a virtual host configuration file in sites-available:
sudo nano /etc/apache2/sites-available/your_domain.confAdd the following configuration, replacing your_domain with your actual domain:
<VirtualHost *:80>
    ServerName your_domain
    ServerAlias www.your_domain
    DocumentRoot /var/www/your_domain
    ErrorLog ${APACHE_LOG_DIR}/error.log
    CustomLog ${APACHE_LOG_DIR}/access.log combined
</VirtualHost>
Save and close the file.
Enable the virtual host:
sudo a2ensite your_domain.confDisable the default Apache site, especially if not using a custom domain, to prevent conflicts:
sudo a2dissite 000-default.confTest the Apache configuration for errors:
sudo apache2ctl configtestReload Apache to apply the virtual host configuration:
sudo systemctl reload apache2Your virtual host is now active. Create an index.html file in /var/www/your_domain to test:
nano /var/www/your_domain/index.htmlAdd the following HTML content:
<!DOCTYPE html>
<html>
<head>
    <title>your_domain website</title>
</head>
<body>
    <h1>Hello World!</h1>
    <p>This is the landing page of <strong>your_domain</strong>.</p>
</body>
</html>
Save and close the file.
Access your domain or server IP in a browser:
http://server_domain_or_IPYou should see the “Hello World!” page, confirming your virtual host is working.
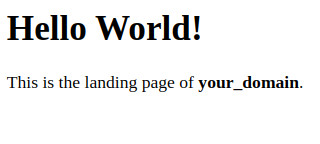 Apache virtual host test landing page that reveals your HTML code to the user
This index.html serves as a temporary landing page. Replace it with index.php when you deploy your PHP application. Remember to remove or rename index.html then, as it takes precedence over index.php by default unless you modified DirectoryIndex settings.
Apache DirectoryIndex Behavior
By default, index.html has priority over index.php in Apache’s DirectoryIndex setting. This is useful for maintenance pages: create a temporary index.html with a maintenance message, and it will override the application’s index.php. Once maintenance is done, remove or rename index.html to restore the application page.
To change this preference, edit /etc/apache2/mods-enabled/dir.conf and adjust the order in DirectoryIndex:
sudo nano /etc/apache2/mods-enabled/dir.confModify DirectoryIndex to prioritize index.php:
<IfModule mod_dir.c>
    DirectoryIndex index.php index.html index.cgi index.pl index.xhtml index.htm
</IfModule>
Restart Apache after saving:
sudo systemctl reload apache2Step 5 — Testing PHP Processing on Your Web Server
Now, test if Apache can process PHP files. Create a info.php file in your virtual host’s document root:
nano /var/www/your_domain/info.phpAdd the following PHP code:
<?php
phpinfo();
?>
Save and close the file.
Access info.php in your browser:
http://server_domain_or_IP/info.phpYou should see the PHP information page.
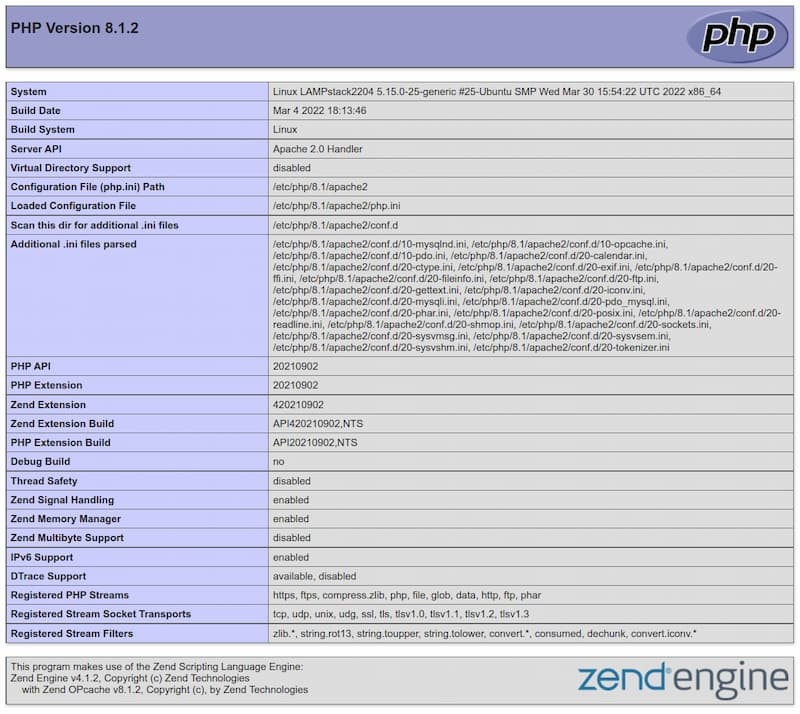 Ubuntu 22.04 PHP web page revealing pertinent information about the current PHP version and settings
This page confirms PHP is working correctly with Apache.
For security, remove info.php after testing as it reveals sensitive server information:
sudo rm /var/www/your_domain/info.phpStep 6 — (Optional) Testing Database Connection from PHP
To verify PHP’s database connectivity, we’ll create a test database, user, table, and a PHP script to query it.
First, create a database named example_database and a user example_user.
Connect to the MySQL console as root:
sudo mysqlCreate the database:
CREATE DATABASE example_database;Create a user example_user with a password and grant access to example_database:
CREATE USER 'example_user'@'%' IDENTIFIED BY 'your_database_password';
GRANT ALL PRIVILEGES ON example_database.* TO 'example_user'@'%';
Replace 'your_database_password' with a secure password.
Note: If facing issues with PHP and caching_sha2_password authentication later (e.g., with phpMyAdmin), you might need to set the root user to mysql_native_password as mentioned in Step 2.
Exit the MySQL shell:
exitTest the new user’s permissions:
mysql -u example_user -pEnter the password when prompted.
Show databases to confirm access to example_database:
SHOW DATABASES;You should see example_database in the list.
Create a test table todo_list in example_database:
CREATE TABLE example_database.todo_list (
    item_id INT AUTO_INCREMENT,
    content VARCHAR(255),
    PRIMARY KEY(item_id)
);
Insert sample data:
INSERT INTO example_database.todo_list (content) VALUES ("My first todo item");
INSERT INTO example_database.todo_list (content) VALUES ("Another important task");
Query the table to verify data insertion:
SELECT * FROM example_database.todo_list;You should see the inserted data.
Exit the MySQL console:
exitCreate a PHP script todo_list.php in your virtual host’s directory:
nano /var/www/your_domain/todo_list.phpAdd the following PHP code, replacing placeholders with your database credentials:
<?php
$user = 'example_user';
$password = 'your_database_password';
$database = 'example_database';
$table = 'todo_list';

try {
    $db = new PDO("mysql:host=localhost;dbname=$database", $user, $password);
    echo "<h2>TODO</h2><ol>";
    foreach ($db->query("SELECT content FROM $table") as $row) {
        echo "<li>" . $row['content'] . "</li>";
    }
    echo "</ol>";
} catch (PDOException $e) {
    print "Error!: " . $e->getMessage() . "<br/>";
    die();
}
?>
Save and close the file.
Access todo_list.php in your browser:
http://your_domain_or_IP/todo_list.phpYou should see a webpage displaying your todo list items from the database.
 Example PHP todo list web page in the browser
This confirms PHP can connect to and query your MySQL database.
Conclusion
Congratulations! You have successfully set up a fully functional lamp server on Ubuntu. This robust foundation allows you to host PHP-based websites and applications, leveraging the power of Apache, MySQL, and PHP.
As a next step, secure your web server with HTTPS using Let’s Encrypt. Refer to these tutorials for your Ubuntu version:
- Ubuntu 22.04
- Ubuntu 20.04
- Ubuntu 18.04
Securing your lamp server with HTTPS is crucial for protecting user data and improving your website’s SEO and trustworthiness.
Thank you for using this guide. Explore DigitalOcean’s offerings for compute, storage, networking, and managed databases to further enhance your infrastructure.
Learn more about our products
About the author(s)
Kong Yang
See author profile
Erika Heidi
Developer Advocate
See author profile
Category: Tutorial
Tags: LAMP Stack, Ubuntu