Minecraft, the globally acclaimed sandbox game, thrives on creativity and community. While solo adventures are engaging, the true magic unfolds when you explore, build, and conquer alongside friends. Want to dive into a shared Minecraft world? Setting up your own server is the answer, and the best part is: you can do it for free!
This guide will walk you through the process of creating your very own Minecraft server on your computer, absolutely free of charge. Get ready to invite your friends and craft unforgettable memories together in your personalized Minecraft universe.
What is a Minecraft Server and Why Host Your Own?
Imagine a Minecraft server as a private club for you and your friends. It’s a dedicated space where multiple players can simultaneously interact within the same Minecraft world. Hosting your own server puts you in the driver’s seat, granting you complete authority over the game environment and player experience.
Why go through the effort of setting up your own server? Here are compelling reasons:
- Complete Control: You dictate the rules, choose the game mode (Survival, Creative, Adventure, Spectator), install mods, and manage every aspect of your Minecraft world.
- Personalized World: Shape the landscape, build custom structures, and create unique challenges tailored to your and your friends’ preferences.
- Cost-Effective Multiplayer: Skip monthly fees associated with paid hosting services. Running a server on your own computer means you only incur the cost of your computer’s electricity usage.
- Learn Valuable Tech Skills: Setting up a server is a fantastic way to learn about networking, server configuration, and basic command-line operations – skills that extend beyond gaming.
- Private and Secure Environment: You control who joins your server, ensuring a safe and enjoyable experience, especially important for younger players.
 Boy playing on minecraft server
A young player immersed in building on a Minecraft server, showcasing the engaging and creative possibilities of multiplayer gaming.
Is it Really Free? Understanding the Costs
When we say “free,” we mean you won’t be paying for dedicated server hosting services. However, it’s crucial to understand the actual costs involved in running a Minecraft server from your home:
- Electricity: Running a server 24/7 will consume electricity, increasing your power bill. The cost depends on your computer’s power consumption and your local electricity rates.
- Internet Bandwidth: Multiple players on your server will use your internet bandwidth. Ensure you have a stable and sufficient internet connection, especially upload speed, to avoid lag.
- Computer Resources: Your computer will dedicate processing power (CPU), memory (RAM), and storage to run the server. This might slightly impact your computer’s performance for other tasks while the server is active.
- Your Time and Effort: Setting up and maintaining a server requires time and technical effort, especially for tasks like port forwarding and troubleshooting.
Free vs. Paid Hosting: While the initial server setup is free, consider these points compared to paid Minecraft server hosting:
| Feature | Free Server (Self-Hosted) | Paid Server Hosting |
|---|---|---|
| Cost | Electricity, internet, time | Monthly fees |
| Control | Full control | Limited control |
| Technical Skill | Required | Minimal |
| Server Uptime | Dependent on your computer | High uptime guaranteed |
| Performance | Limited by your PC | Scalable performance |
| Security | Your responsibility | Hosting provider’s responsibility |
If you’re comfortable with the technical aspects and want maximum control without recurring fees, a free, self-hosted server is an excellent choice. For those seeking ease of use, guaranteed uptime, and less technical hassle, paid hosting services are worth considering.
Step-by-Step Guide: Setting Up Your Free Minecraft Server
Ready to build your free Minecraft server? Follow these detailed steps:
Step 1: Prerequisites – What You Need Before You Start
Before diving in, ensure you have the following:
- A Desktop Computer: A Windows, macOS, or Linux computer capable of running Minecraft and the server software simultaneously. While technically possible, running a server on a Chromebook is more complex and not covered in this guide.
- Stable Internet Connection: A reliable broadband internet connection with decent upload speed. A wired (Ethernet) connection is recommended for better stability than Wi-Fi.
- Minecraft Java Edition: This guide focuses on setting up a server for Minecraft Java Edition, not Bedrock Edition. Ensure you and your friends have Minecraft Java Edition.
- Latest Version of Java: Minecraft servers require Java to run. We’ll guide you through downloading the latest version.
- Patience and Parental Guidance (Recommended): Some steps, especially port forwarding, can be technically challenging and involve security considerations. If you’re under 18, we strongly recommend having a parent or guardian assist you.
Step 2: Downloading Java – Ensuring Compatibility
Minecraft servers are built on Java. If you don’t have Java installed or have an outdated version, your server won’t run correctly.
-
Create a Server Folder: Start by creating a dedicated folder on your desktop to keep all your server files organized. Right-click on your desktop, select “New Folder,” and name it something like “MinecraftServer” or “My Awesome Server.”
 Minecraft server step 1 Java
Creating a new folder named “My Awesome Server” on the desktop to organize Minecraft server files.
-
Download Java: Visit the official Java download page: https://www.java.com/en/download/.
-
Click “Download Java”: The website should automatically detect your operating system and offer the appropriate Java download. Click the “Download Java” button to start the download.
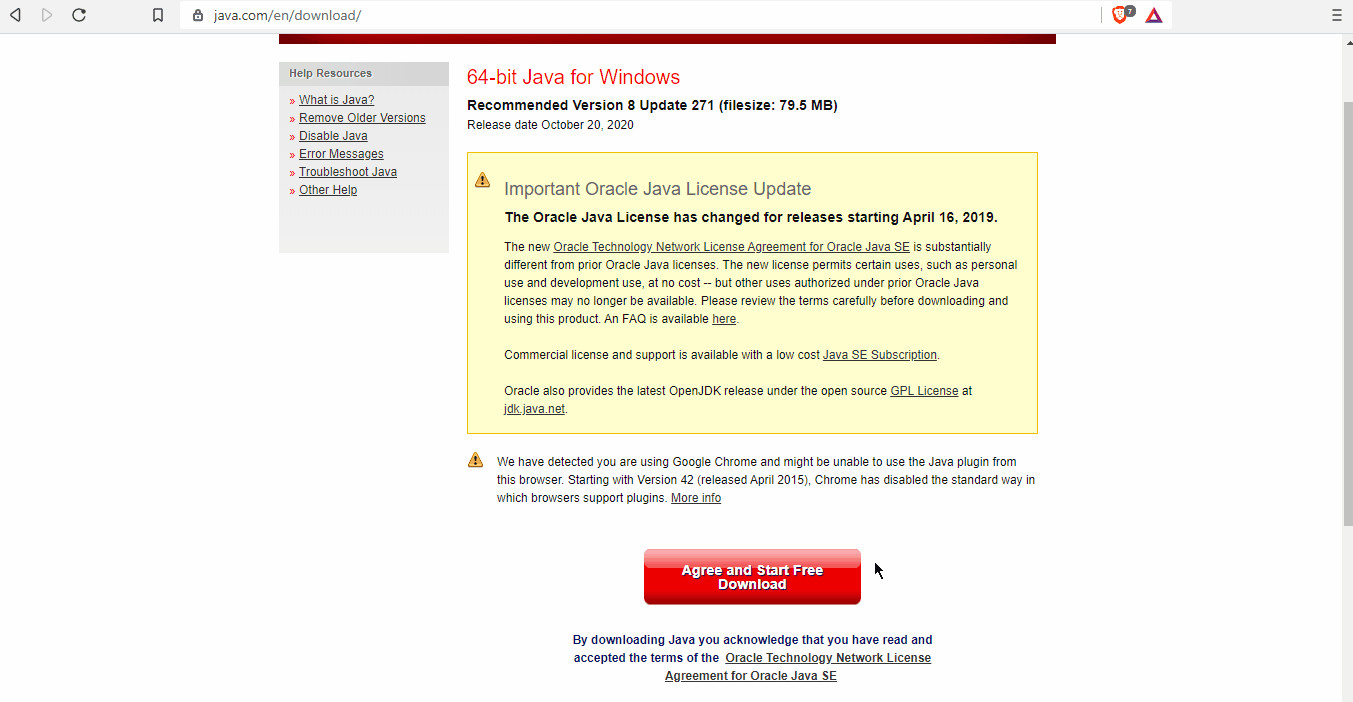 Minecraft server step 1 Java
Clicking the “Download Java” button on the official Java website to initiate the Java installer download.
-
Run the Installer: Once the download completes, locate the Java installer file (usually in your Downloads folder) and move it to the “MinecraftServer” folder you created. Double-click the installer file and follow the on-screen instructions to install Java.
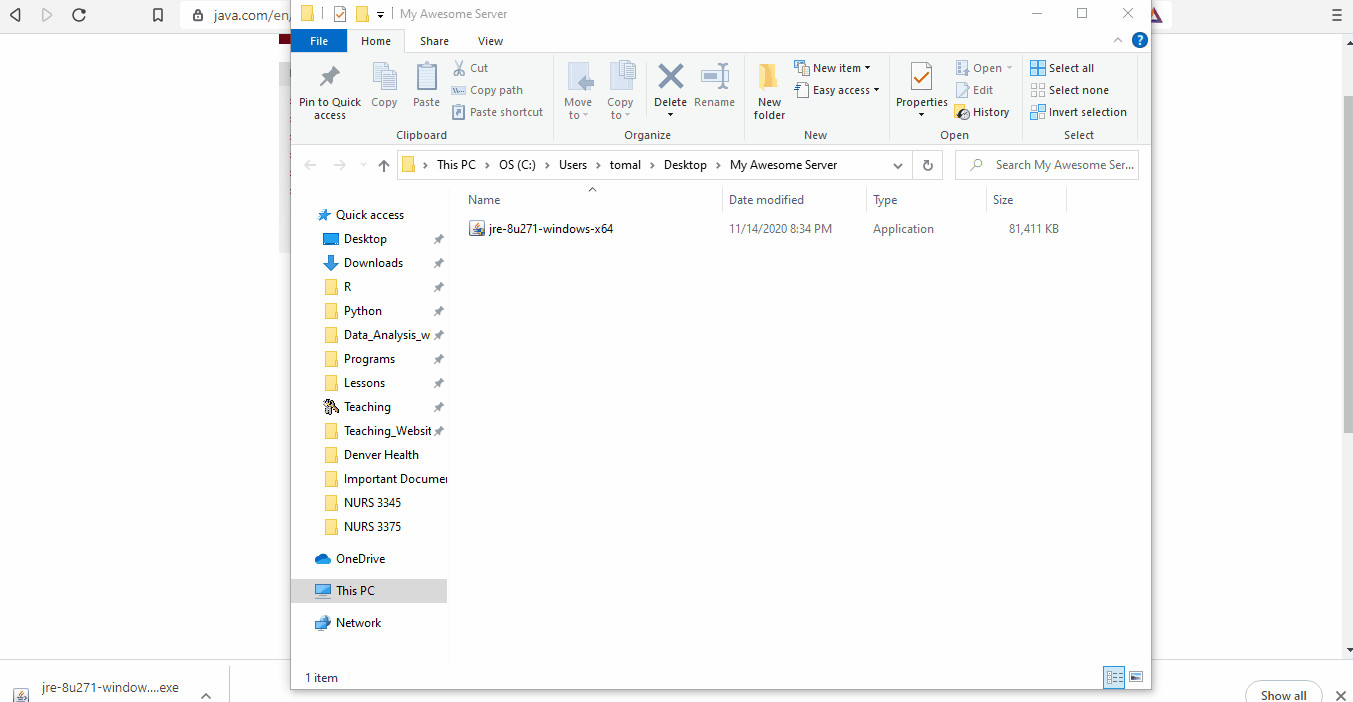 Minecraft server step 1 Java
Running the downloaded Java installer file and following the prompts to complete the Java installation process.
Step 3: Getting the Minecraft Server.jar File
The heart of your Minecraft server is the server.jar file, provided by Mojang (Minecraft developers).
-
Go to Minecraft Downloads: Navigate to the official Minecraft server download page: https://www.minecraft.net/en-us/download/server.
-
Download
minecraft_server.jar: Look for the download link for “Minecraft server jar” for Minecraft Java Edition. The version number may vary depending on the latest Minecraft release. Click the link to download theminecraft_server.jarfile. -
Save to Server Folder: Save the downloaded
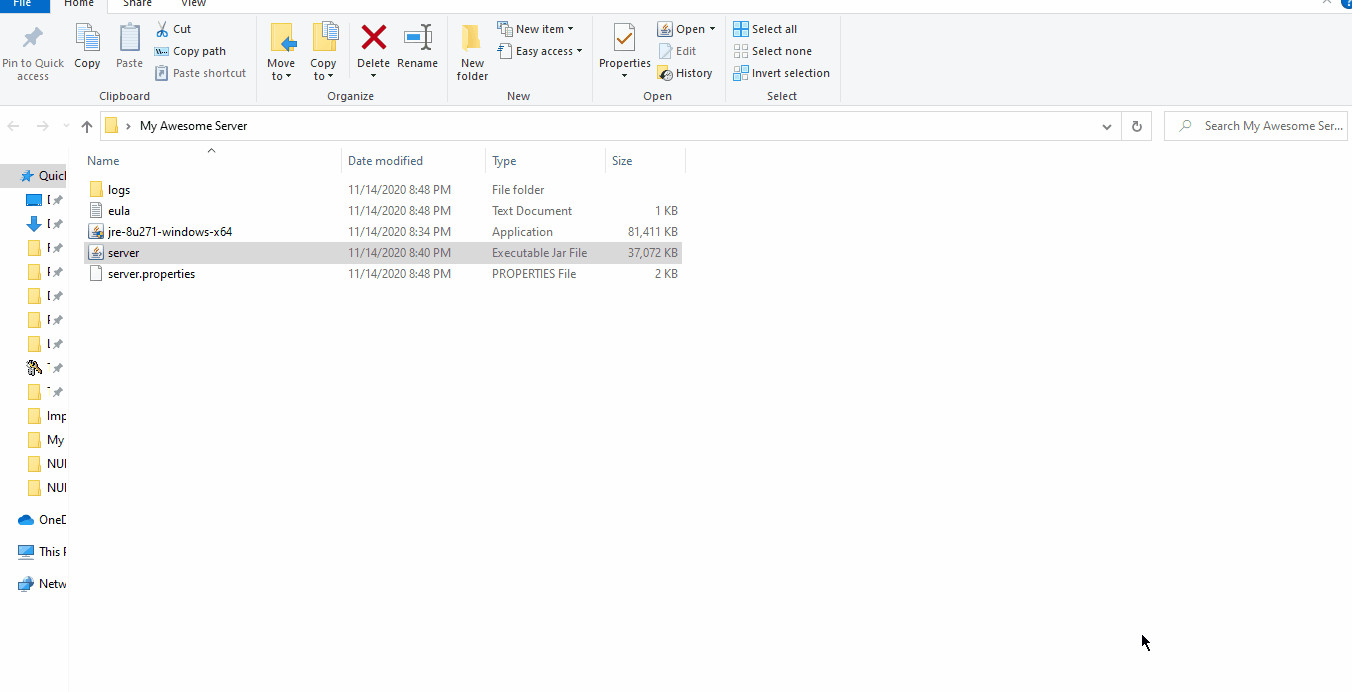
minecraft_server.jarfile directly into your “MinecraftServer” folder.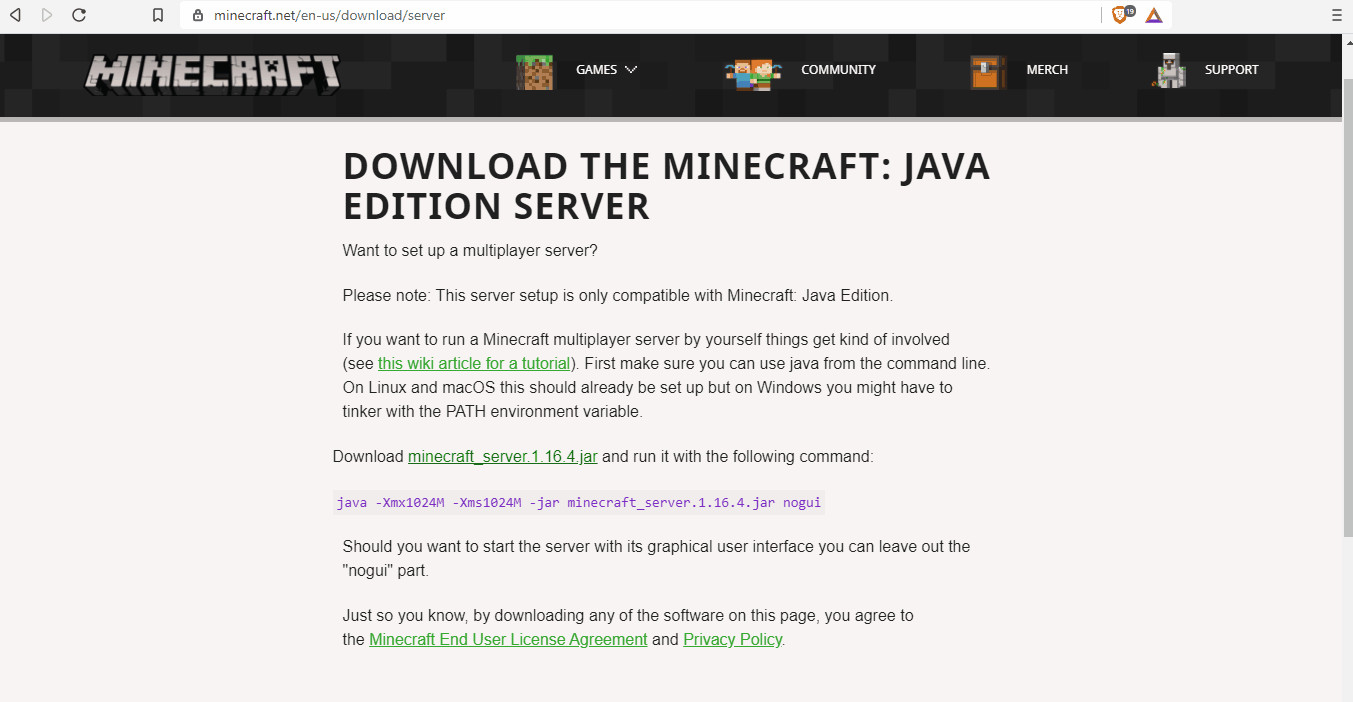 Minecraft server step 2 download server.jar
Saving the downloaded
minecraft_server.1.20.1.jarfile into the “My Awesome Server” folder.
Step 4: Creating Your Server Folder and Running the .jar File
Now it’s time to initialize your server and create the necessary configuration files.
-
Open “MinecraftServer” Folder: Navigate to the “MinecraftServer” folder you created earlier.
-
Run
server.jar: Double-click theminecraft_server.jarfile. Alternatively, you can right-click and select “Open.” -
Initial File Generation: The first time you run
server.jar, it will generate several essential files and folders within your “MinecraftServer” folder, includingeula.txt,server.properties, and folders for world data and logs. You might see a brief command prompt window appear and then close – this is normal. The server won’t fully start yet because you need to accept the EULA.
Step 5: Accepting the EULA – Essential for Server Launch
The End User License Agreement (EULA) is a legal agreement you must accept to run a Minecraft server.
-
Open
eula.txt: Locate theeula.txtfile in your “MinecraftServer” folder and open it with a text editor like Notepad (Windows) or TextEdit (macOS). -
Change
eula=falsetoeula=true: Inside theeula.txtfile, you’ll find a line that sayseula=false. Changefalsetotrueto indicate your acceptance of the EULA. -
Save the File: Save the modified
eula.txtfile and close the text editor.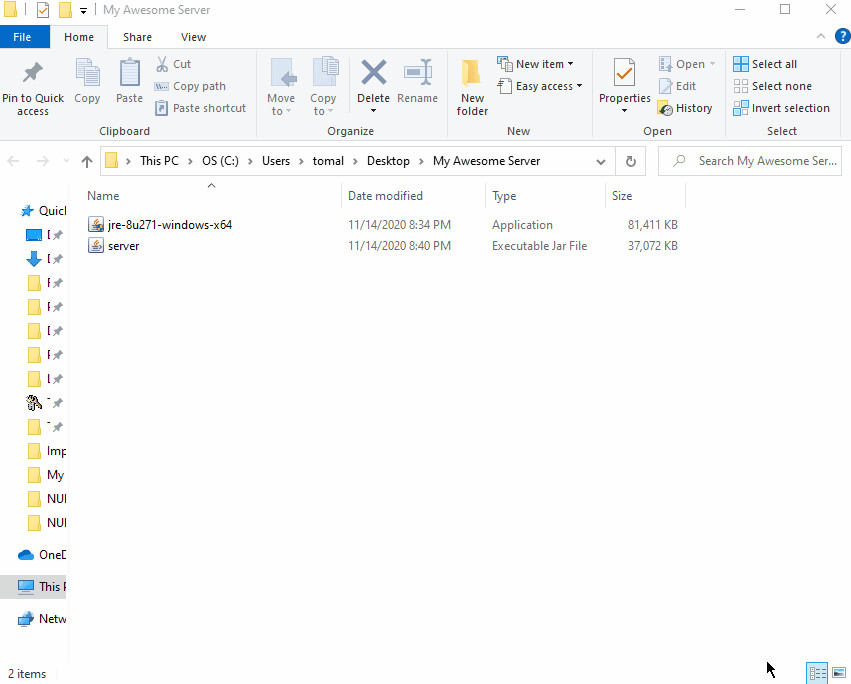 Minecraft server step 3 configure files
Editing the
eula.txtfile to changeeula=falsetoeula=trueto accept the Minecraft server End User License Agreement.
Step 6: Running Your Minecraft Server – Going Live!
With the EULA accepted, you can now fully launch your Minecraft server.
-
Run
server.jarAgain: Double-click theminecraft_server.jarfile in your “MinecraftServer” folder once more. -
Server Startup: This time, the server will start properly. A command prompt window (the server console) will appear, displaying server initialization messages. Wait until you see the message “Done (number)s! For help, type “help”” – this indicates your server is up and running!
 Minecraft server step 4 run your server
The Minecraft server console window displaying server startup messages and indicating that the server is successfully running.
-
Joining from the Same Network (LAN): If you and your friends are on the same home Wi-Fi network, they should be able to join your server directly. In Minecraft, go to “Multiplayer,” and your server should automatically appear under the “Available LAN Games” tab. If not, they can click “Direct Connection” and enter
localhostor your computer’s local IP address.
Step 7: Port Forwarding – Playing with Friends Online
To allow friends outside your home network to join, you need to set up port forwarding on your router. Warning: This step can be complex and poses potential security risks if not done correctly. Parental supervision is strongly advised.
-
Find Your Router’s Make and Model: Locate the make and model number of your internet router. This information is usually found on a sticker on the router itself.
-
Access Router Settings: Open a web browser and enter your router’s IP address in the address bar. This is often
192.168.1.1or192.168.0.1. If these don’t work, search online for “how to find my router IP address.” You’ll need your router’s username and password to log in – these are often printed on the router or are default credentials (like “admin” and “password”). -
Find Port Forwarding Settings: Router interfaces vary, but look for sections like “Port Forwarding,” “NAT Forwarding,” or “Virtual Servers.” Consult your router’s manual or search online for “[Your Router Make and Model] port forwarding” for specific instructions.
-
Create a Port Forwarding Rule: Create a new port forwarding rule with these settings:
- Service Name/Description: Minecraft Server (or anything descriptive)
- Port Range:
25565(Minecraft’s default port) - Local Port:
25565 - Protocol: TCP/UDP or “Both”
- Internal IP Address/Destination IP: Enter your computer’s local IP address. To find this on Windows, open Command Prompt and type
ipconfig. Look for “IPv4 Address” under your active network adapter. On macOS, open Terminal and typeipconfig getifaddr en0oripconfig getifaddr en1.
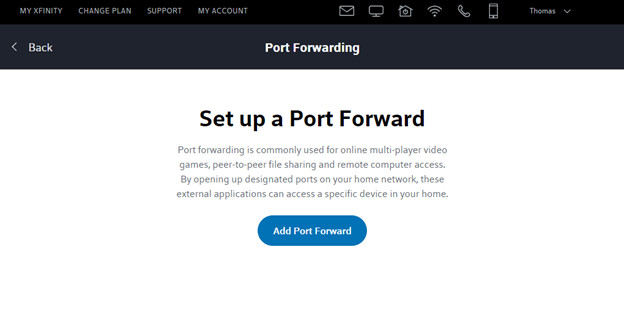 Minecraft server step 5 port forwarding
Port forwarding settings page on an Xfinity router, configured for Minecraft server port 25565.
-
Save Port Forwarding Rule: Save the new port forwarding rule in your router’s settings. You may need to restart your router for the changes to take effect.
-
Find Your Public IP Address: Search “what’s my IP address” on Google or visit a website like https://www.whatismyip.com/ to find your public IP address.
-
Share IP with Friends: Give your public IP address to your friends so they can connect to your server. Important Security Reminder: Only share your IP address with people you trust, as it can be used to locate your general geographic location.
 Minecraft server step 5 port forwarding
An example of a configured port forwarding rule for Minecraft server on an Xfinity router interface, with the user’s IP address intentionally blurred for security.
-
Friends Connect to Server: In Minecraft, your friends click “Multiplayer,” then “Direct Connection,” and enter your public IP address, optionally followed by
:25565(e.g.,123.456.789.101:25565). They can also add your server to their server list using “Add Server.”Minecraft “Direct Connection” screen where players can enter the server IP address to join a Minecraft server.
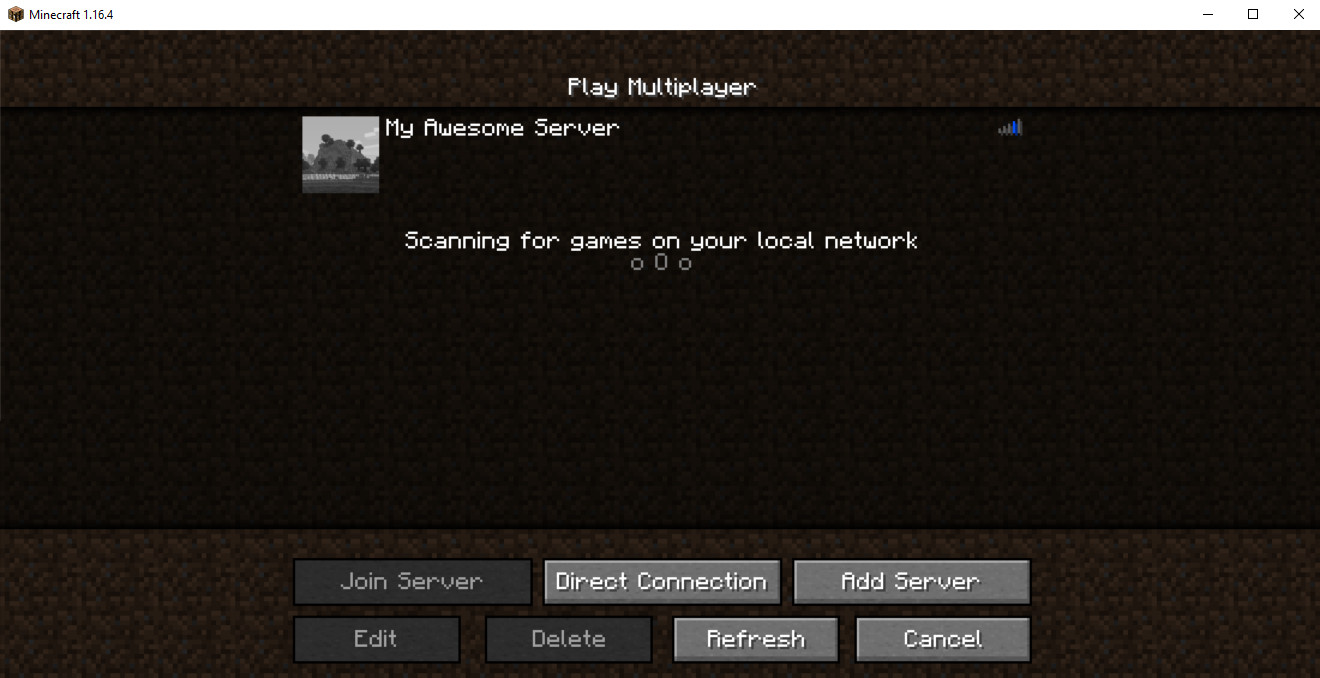 Join friends Minecraft server
Minecraft “Add Server” screen where players can add a server to their server list by entering the server name and IP address.
Step 8: Customizing Your Server – Diving into server.properties
The server.properties file is your control panel for fine-tuning your Minecraft server’s settings.
-
Locate
server.properties: Find theserver.propertiesfile in your “MinecraftServer” folder. -
Open with Text Editor: Right-click
server.propertiesand select “Open With” -> Notepad (Windows) or TextEdit (macOS). -
Edit Properties: The file contains numerous settings, each with a description. Here are some key properties to customize:
difficulty: Sets the game difficulty (peaceful,easy,normal,hardor integers0,1,2,3respectively).gamemode: Defines the default game mode (survival,creative,adventure,spectator).max-players: Sets the maximum number of players allowed on the server. Adjust this based on your computer’s resources and internet bandwidth.motd: “Message Of The Day” – the server description displayed in the Minecraft server list. Use color codes (search “Minecraft color codes”) for formatting.pvp: Enables Player vs. Player combat (trueorfalse).level-seed: Allows you to specify a world seed for generating a specific world type. Leave blank for a random seed.
For a comprehensive list of all server properties, refer to the official Minecraft Wiki: https://minecraft.gamepedia.com/Server.properties.
-
Save Changes: After editing
server.properties, save the file and close the text editor. You’ll need to restart your server for the changes to take effect. In the server console window, typestopand press Enter to safely shut down the server, then runserver.jaragain.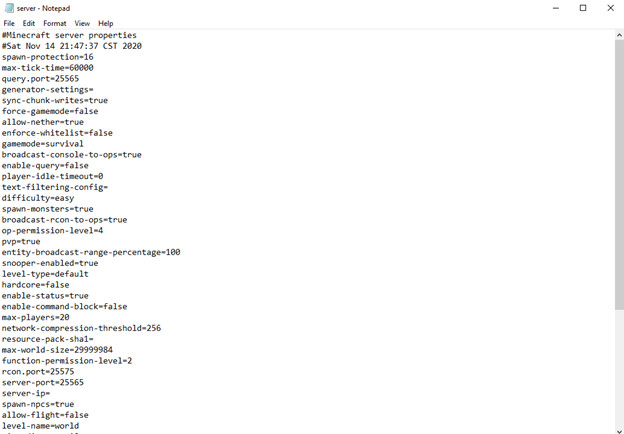 Minecraft server step 6 update server properties
The
server.propertiesfile opened in Notepad, showing various server configuration options that can be customized.
Free vs. Paid Minecraft Server Hosting: Making the Right Choice
Choosing between a free, self-hosted server and paid hosting depends on your priorities and technical comfort level.
Self-Hosted (Free) Server:
Pros:
- No Recurring Costs: Save money on monthly server fees.
- Full Control: Complete administrative access and customization options.
- Learning Experience: Gain valuable technical skills in server management and networking.
Cons:
- Technical Expertise Required: Setup and maintenance require technical knowledge, especially port forwarding and troubleshooting.
- Server Uptime Dependent on Your Computer: Server is only online when your computer is running.
- Performance Limitations: Server performance is limited by your computer’s hardware.
- Security Risks: You are responsible for server security and protecting your network.
Paid Minecraft Server Hosting:
Pros:
- Ease of Use: Simple setup and user-friendly interfaces, often with one-click server creation.
- Reliable Uptime: Hosting providers guarantee high server uptime.
- Scalable Performance: Easily upgrade server resources (RAM, CPU) as needed.
- Technical Support: Access to customer support for assistance.
- Enhanced Security: Hosting providers implement security measures to protect servers.
Cons:
- Monthly Fees: Incur recurring monthly costs.
- Less Control: Limited administrative access compared to self-hosting.
- Potential Performance Limits (Lower Tiers): Entry-level hosting plans might have performance restrictions.
When to Choose Free Self-Hosting:
- You are comfortable with technology and enjoy hands-on server management.
- You want maximum control and customization.
- You plan to play with a small group of friends and don’t require 24/7 server uptime.
- You want to learn about server administration and networking.
When to Choose Paid Server Hosting:
- You prefer a hassle-free setup and minimal technical involvement.
- You need a server that is online 24/7.
- You anticipate a larger player base and require reliable performance.
- You value customer support and enhanced server security.
Tips for Optimizing Your Free Minecraft Server
To ensure a smooth and enjoyable experience on your free Minecraft server, consider these optimization tips:
- Computer Hardware: A more powerful computer with a faster processor (CPU) and ample RAM (at least 2GB-4GB dedicated to the server) will improve server performance, especially with more players or mods.
- Wired Internet Connection: Use a wired Ethernet connection for your server computer instead of Wi-Fi for a more stable and faster internet connection.
- Limit Player Slots: Reduce the
max-playerssetting inserver.propertiesto match your computer’s capabilities and internet bandwidth. Fewer players reduce server load. - Vanilla Minecraft (No Mods): Running a vanilla (unmodded) server requires fewer resources than a modded server. If performance is a concern, avoid adding resource-intensive mods initially.
- Regular Server Restarts: Restart your server periodically (e.g., daily) to clear temporary files and refresh resources, improving performance. Use the
stopcommand in the server console, then runserver.jaragain. - Monitor Server Performance: Keep an eye on your server’s performance using the server console window. Pay attention to RAM usage and CPU load. If your server is lagging, consider reducing player slots or simplifying server settings.
Conclusion: Start Your Minecraft Adventure for Free!
Creating a free Minecraft server on your own computer is a rewarding project that unlocks a world of multiplayer possibilities. By following these steps, you can establish your private Minecraft realm and invite friends to join the adventure. While self-hosting requires some technical effort, the control, customization, and cost savings make it a fantastic option for many Minecraft enthusiasts.
Remember to prioritize online safety, especially when dealing with port forwarding and sharing your IP address. With careful setup and ongoing maintenance, your free Minecraft server will become the hub for countless hours of collaborative building, exploration, and fun.
Want to take your Minecraft skills to the next level? Explore our coding classes and Minecraft camps to learn how to create your own Minecraft mods and games!