Are you tired of endless group chats that are more chaotic than helpful? Or perhaps you’re looking to build a thriving online community around your shared interests? Creating a Discord server group might just be the perfect solution. Discord servers offer a structured and engaging platform to connect with friends, collaborate on projects, or build communities around any topic imaginable. This guide will walk you through the process of creating your own Discord server group, making it easy to set up a digital space that’s organized, fun, and perfect for your needs. Let’s dive in and learn how to make a Discord server that brings people together!
Understanding Discord Servers: More Than Just a Group Chat
Before we jump into the “how-to,” let’s clarify what a Discord server actually is. While it might seem like just another group chat app at first glance, Discord servers are much more robust and versatile. Think of a Discord server as your own private online clubhouse. Inside this clubhouse, you can create different rooms for various topics, interests, or activities. These rooms are called channels, and they come in two main flavors: text channels and voice channels.
Imagine you’re hosting a get-together at your home. Some guests might be in the living room chatting about movies, while others are in the kitchen discussing recipes, and a few are in the game room playing video games. A Discord server works similarly. You can have different channels for different conversations, keeping everything organized and easy to follow.
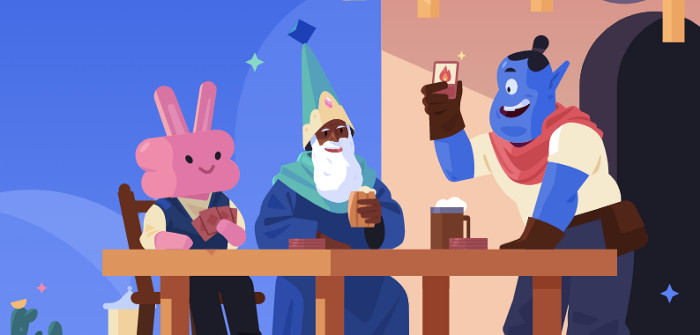 Friends chatting in different rooms, illustrating a Discord server
Image alt text: Illustration depicting friends engaging in separate conversations in different rooms of a house, symbolizing the channel structure of a Discord server.
Discord servers are designed to foster communities, whether they are small groups of friends or large online gatherings. They offer features that go beyond simple messaging, including roles for moderation, bots for automation and entertainment, and extensive customization options to make your server truly your own. Setting up your own Discord server group provides a dedicated space for your community to connect, share, and engage in a way that traditional group chats simply can’t match.
Getting Started: Creating Your Discord Server Group
Ready to build your own online clubhouse? Here’s how to create your Discord server group in a few easy steps:
1. Download and Install Discord:
If you haven’t already, the first step is to download and install the Discord application. You can find it for free at discord.com/download. Discord is available for Windows, macOS, Linux, iOS, and Android. Alternatively, you can use Discord directly in your web browser at discord.com/login without downloading the app.
2. Create or Log in to Your Discord Account:
Once you have Discord installed or open in your browser, you’ll need to create a free account or log in if you already have one. Follow the on-screen instructions to set up your account.
3. Initiate Server Creation:
After logging in, look to the left-hand side of the Discord interface. You’ll see a vertical bar with various icons. Click the green “+” (Plus) button located at the bottom of this bar. This button is your gateway to creating a new server.
4. Choose a Server Template or Create Your Own:
Clicking the “+” button will open a window asking “Create a server.” Discord offers templates to help you get started quickly, tailored to different types of communities, such as “Gaming,” “Friends,” “Study Group,” and more. For this example, and for general use with friends or groups, the “Create My Own” option is often the most flexible. You can also select “Gaming” or “Friends” templates which will pre-populate some channels for you.
 Discord server creation starting steps, highlighting the 'Create a server' and template options
Image alt text: Animated GIF demonstrating the initial steps to create a Discord server, focusing on clicking the plus button and selecting the ‘Create My Own’ option.
5. Specify Server Type:
If you choose “Create My Own,” you’ll be asked to specify whether the server is “For a club or community” or “For me and my friends.” Select the option that best suits your purpose. Choosing “For me and my friends” will provide a simpler setup, while “For a club or community” offers more advanced community features.
6. Name Your Server and Add an Icon:
Now for the fun part: naming your server! Choose a name that reflects your group’s identity or purpose. For instance, if your group is passionate about books, you might call it “Bookworms’ Haven.” You can also upload a server icon to personalize it further. This icon will be visible to members and help them easily identify your server. Don’t worry, you can always change the server name and icon later if needed.
7. Server Creation Complete!
Click the “Create” button, and congratulations, your Discord server group is now live! You’ll be taken to your newly created server, ready to start inviting members and customizing it further.
Inviting Friends to Your New Discord Home
With your server set up, it’s time to populate it with your friends or community members. Discord makes inviting people straightforward:
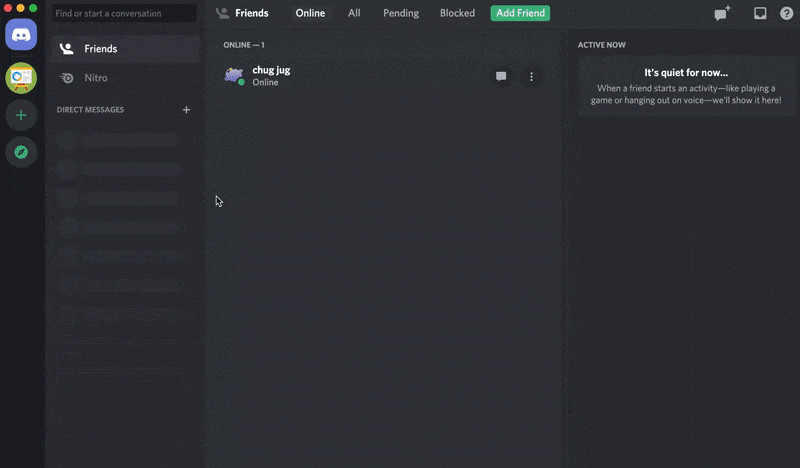
1. Locate the “Invite Friends” Button:
Once inside your server, you should see a prominent “Invite Friends” button in the middle of the channel list or at the top of the channel window. Click this button to initiate the invitation process.
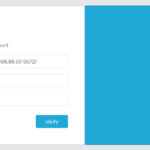
2. Generate an Invite Link or Invite Directly:
Clicking “Invite Friends” will open an invite window. Here, you’ll see two primary options:
- Invite via Username: Discord will display a list of your Discord friends. You can directly invite them by clicking the “Invite” button next to their names.
- Create Invite Link: You can generate a unique invite link that you can share via email, social media, or any other platform. You can customize the link to expire after a certain time or number of uses for added security, though for close friend groups this is often not necessary.
 Demonstration of how to invite friends to a Discord server through the invite menu
Image alt text: Animated GIF showing the steps to invite friends to a Discord server using the invite button in the server dropdown menu and generating an invite link.
3. Share the Invite Link:
If you chose to create an invite link, simply copy the generated link and share it with the people you want to join your server. When they click the link, they’ll be prompted to join your Discord server group.
Navigating Text and Voice Channels: The Heart of Your Server
Once your friends start joining, they’ll find themselves in your server’s channels. Understanding text and voice channels is crucial to making the most of your Discord server group.
Text Channels:
Text channels are spaces for written communication. They function similarly to chat rooms or messaging threads. In text channels, you can:
- Send messages: Type and send text messages to everyone in the channel.
- Share files and images: Upload files, images, GIFs, and emojis to enrich your conversations.
- Use @mentions: Directly notify specific members by typing “@” followed by their username (e.g., “@DiscordUser”).
- Organize conversations: Each text channel has a specific name and purpose, helping to keep discussions focused. For example, you might have channels like
#general,#introductions,#gaming-chat, or#book-discussions.
Voice Channels:
Voice channels enable real-time audio communication. They are like virtual rooms where members can hop in and out to chat via voice. Key features of voice channels include:
- Voice chat: Simply click on a voice channel to join and start talking using your microphone. No ringing or calling is involved – it’s like entering a room and joining the conversation.
- Video chat: Within a voice channel, you can also activate your webcam to engage in video calls with other members.
- Screen sharing: Share your screen to present presentations, showcase gameplay, or collaborate visually with others in the voice channel.
- Multiple participants: Discord voice channels can accommodate a large number of participants for voice chat, with a smaller limit for simultaneous video streams and screen sharing viewers.
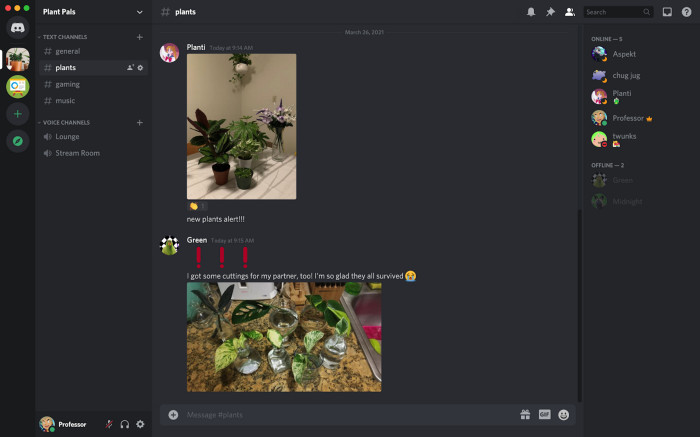 Visual representation of text channels and voice channels in a Discord server interface
Image alt text: Screenshot of a Discord server showcasing both text channels (e.g., #general, #plant-talk) and voice channels (e.g., General) in the channel list.
Customizing Your Server: Adding and Managing Channels
As your Discord server group evolves, you might want to add new channels to accommodate different topics or activities. Here’s how to manage your server’s channels:
Creating New Channels:
- Access Server Settings: Click on your server’s name in the top-left corner to open the server dropdown menu.
- Select “Create Channel”: In the dropdown menu, choose the “Create Channel” option.
- Choose Channel Type and Name: A “Create Channel” window will appear. Select whether you want to create a “Text Channel” or a “Voice Channel.” Then, enter a name for your new channel. Channel names should be descriptive and easy to understand (e.g.,
#movie-nights,Gaming Voice). - Channel Creation Complete: Click the “Create Channel” button, and your new channel will be added to your server.
 Animated demonstration of creating a new text channel within a Discord server
Image alt text: Animated GIF illustrating the process of creating a new text channel in a Discord server, from accessing the server menu to naming the channel.
Organizing Channels:
You can categorize your channels by creating categories. Right-click (or long-press on mobile) on the server name, select “Create Category,” and give it a name (e.g., “General,” “Gaming,” “Social”). You can then drag and drop channels into categories to structure your server logically.
Deleting Channels:
If a channel becomes inactive or is no longer needed, you can delete it. Be aware that deleting a channel is permanent and all messages and content within it will be lost.
- Edit Channel Settings: Right-click (or long-press on mobile) on the channel you want to delete and select “Edit Channel.”
- Delete Channel: In the channel settings, scroll down to the bottom and click the “Delete Channel” button. Confirm your decision when prompted.
Channel Quantity: Start Small and Expand
When starting a new Discord server group, it’s generally best to begin with a smaller number of channels. Avoid overwhelming new members with too many options. Start with essential channels like #general, and perhaps a couple of topic-specific channels based on your group’s main interests. You can always add more channels as your community grows and you identify the need for more specialized conversation spaces.
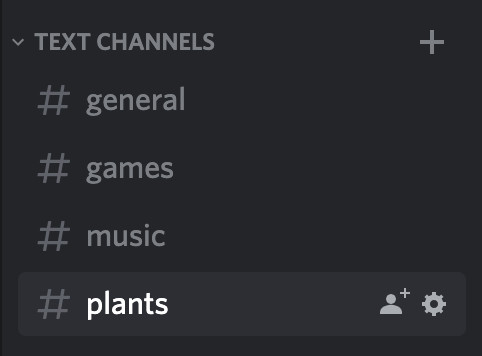 Image suggesting a small number of channels is a good starting point for a Discord server
Image alt text: Image with text overlay stating “A small number of channels is a good place to start. Expand as needed, but don’t go overboard,” advising server creators to begin with fewer channels.
Private Channels: For Exclusive Conversations
Sometimes, you might need channels that are only accessible to specific members of your server. Discord allows you to create private channels for these situations.
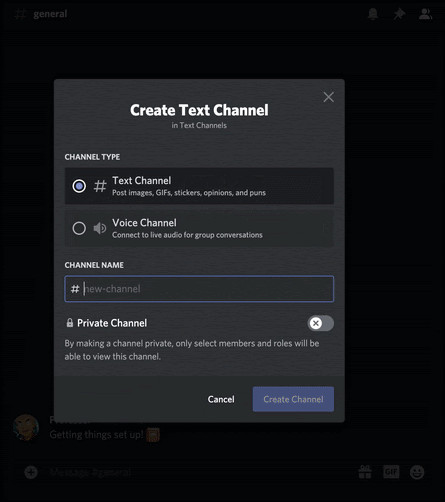
Creating Private Channels:
- Follow Channel Creation Steps: Start the channel creation process as described earlier (Server Name > Create Channel).
- Toggle “Private Channel”: In the “Create Channel” window, you’ll see an option to make the channel “Private channel.” Toggle this option to “on.”
- Select Members: After toggling “Private channel,” you’ll be prompted to select the members or roles who should have access to this channel. Choose the specific individuals you want to include.
- Create Private Channel: Click “Create Channel.” The new channel will be created and will only be visible to the selected members.
 Animated demonstration of creating a private channel in Discord and selecting authorized members
Image alt text: Animated GIF demonstrating how to create a private channel on Discord, including toggling the private option and selecting specific members to grant access.
Managing Private Channel Access:
You can adjust the members who have access to a private channel at any time. Right-click (or long-press on mobile) on the private channel, select “Edit Channel,” and navigate to the “Permissions” tab. Here, you can add or remove members from the channel’s access list.
Welcome to Your New Discord Community Hub!
Congratulations! You’ve successfully created your own Discord server group and are ready to start building your online community. Encourage your friends to join, explore the various features Discord offers, and customize your server to reflect your group’s unique personality. Whether you’re using it for gaming, study groups, book clubs, or simply staying connected with friends, your Discord server provides a versatile and engaging platform for communication and community building.
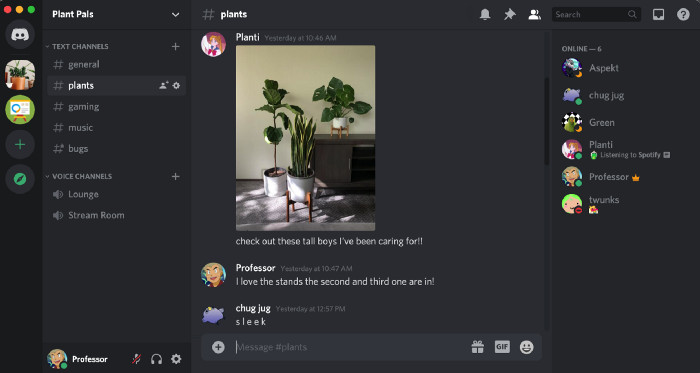 Image celebrating the creation of a new Discord server and its potential for community
Image alt text: Image with text overlay saying “Like chug jug says, your new server is pretty s l e e k if we say so ourselves,” expressing enthusiasm for the newly created Discord server.
Discord servers are highly adaptable and can be tailored to suit almost any group or community. Experiment with different channel types, explore server settings, and discover the many ways you can make your Discord server group a thriving online home for your community. For further assistance and advanced features, Discord’s Help Center is an excellent resource. Happy server building!