As the weather warms up, there’s no better feeling than extending your living space to the great outdoors. Your deck or patio becomes the perfect setting for relaxation, dining, and entertaining. With the right outdoor furniture in place, the next step is to consider those essential accessories that blend practicality with style. Imagine enjoying a beautiful evening outside, but constantly having to go back inside for drinks, snacks, or utensils. That’s where an Outdoor Serving Tray becomes indispensable.
This guide will show you how to create your own DIY painted outdoor serving tray, a simple yet impactful project that enhances your outdoor living experience. Not only is this a budget-friendly craft, but it also allows you to customize a serving tray that perfectly matches your outdoor décor and personal style. Say goodbye to constant trips indoors and hello to seamless outdoor enjoyment with your very own handcrafted outdoor serving tray.
 Quick & Easy DIY Painted Outdoor Serving Tray at thehappyhousie.com-7
Materials You’ll Need for Your DIY Outdoor Serving Tray
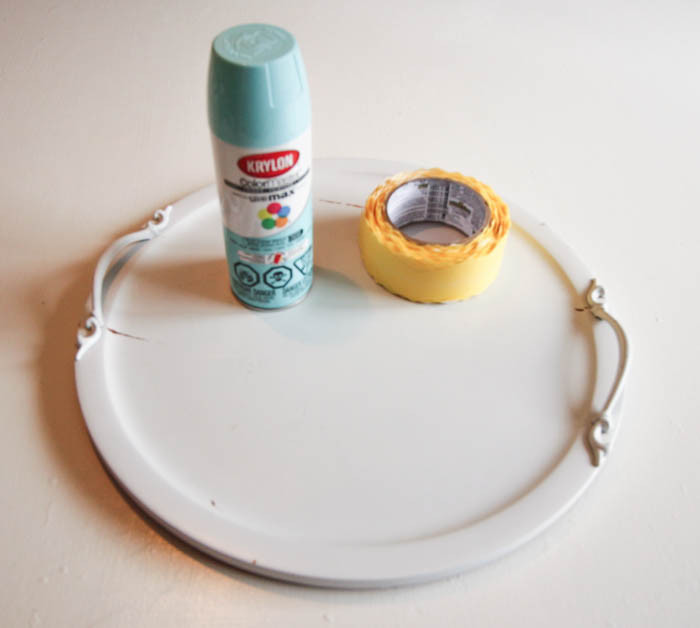
Before we dive into the step-by-step process, let’s gather all the necessary materials. This DIY project is wonderfully adaptable, allowing you to use items you might already have at home or easily source from local stores.
- A Tray: You can repurpose an old tray from a garage sale or thrift store, giving it a brand new lease of life. Alternatively, you can create a tray from scratch using a piece of wood and handles, both readily available at hardware stores. Consider the size and shape of your tray based on your serving needs.
- FrogTape Shape Tape (Chevron Design): This innovative tape makes creating crisp, geometric patterns incredibly easy. The chevron design adds a stylish and modern touch, but you can explore other patterns or even use regular painter’s tape for stripes or custom designs.
- Krylon Indoor/Outdoor Spray Paint: Choose colors that complement your outdoor décor. A “beachy blue” as used in the original project offers a refreshing, summery vibe. Select a paint specifically formulated for outdoor use to ensure durability against weather elements.
- White Spray Paint (Optional): If your base tray isn’t already white or a light color, white spray paint can be used as a base coat to make brighter colors like blue stand out more vividly.
- Clear Outdoor Sealer (Optional): For added protection and longevity, especially if you plan to keep your tray outdoors frequently, a clear outdoor sealer is recommended.
- Sandpaper (Optional): If you are using an old tray, sandpaper can be used to lightly smooth the surface before painting for better paint adhesion.
- Paint Brush (Optional): For touch-ups or applying a clear sealer.
- Small Dish (Optional): Useful if you need to touch up small areas with spray paint by spraying paint into the dish and applying with a brush.
- Credit Card or Thumbnail: For firmly pressing down the tape edges to prevent paint bleed.
 Quick & Easy DIY Painted Outdoor Serving Tray at thehappyhousie.com-1
Step-by-Step Guide to Creating Your DIY Outdoor Serving Tray
Now that you have all your materials ready, let’s embark on the fun part – creating your personalized outdoor serving tray. Follow these simple steps to transform a plain tray into a stylish and functional outdoor accessory.
1. Prepare the Tray
Begin by ensuring your tray surface is clean and ready for painting. If you are using a new wooden base, lightly sand any rough edges for a smoother finish. For an older tray, wipe it down to remove any dust or dirt. If you desire a base coat, especially if your tray is dark and you’re using light paint colors, apply a coat of white spray paint and let it dry completely before proceeding.
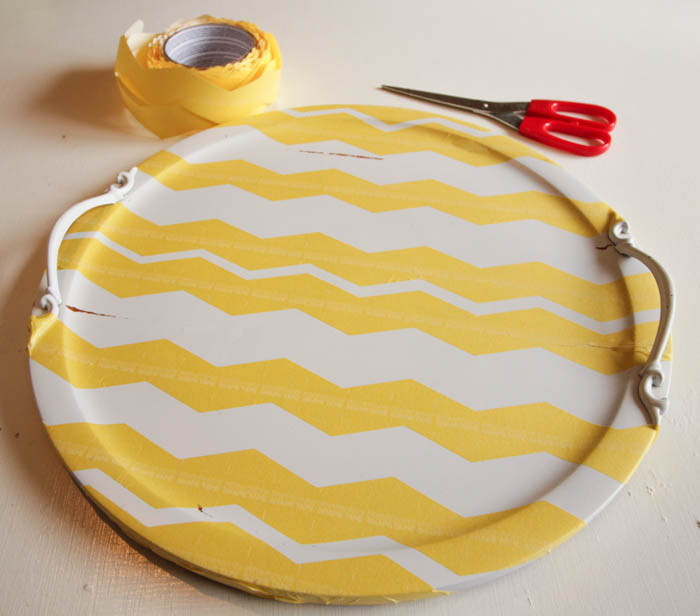
2. Apply Tape for the Chevron Design
This is where the FrogTape Shape Tape comes into play, making the chevron pattern achievable even for beginners. Start applying the tape in your desired chevron pattern. For a more relaxed and less uniform look, as demonstrated in the original project, you can apply the tape somewhat irregularly, varying the spacing between the zig-zags. This approach is not only forgiving but also creates a more unique and handcrafted aesthetic. Press down firmly on all edges of the tape using your thumbnail or a credit card to ensure a tight seal and minimize paint bleed.
 Quick & Easy DIY Painted Outdoor Serving Tray at thehappyhousie.com-2
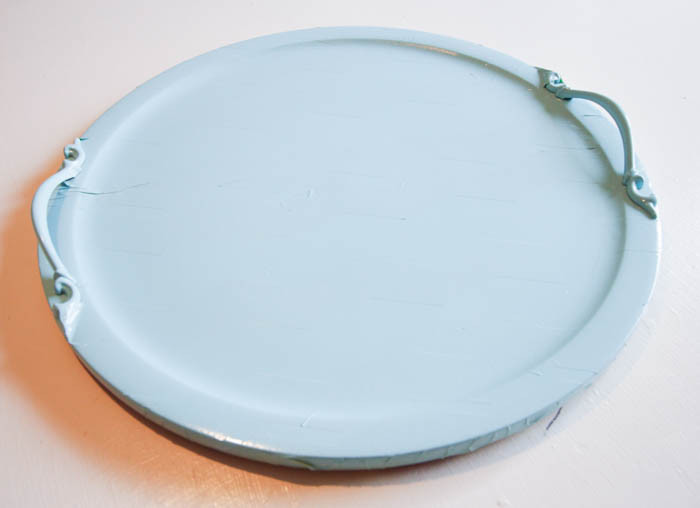
3. Painting Process
Take your taped tray to a well-ventilated outdoor area, protecting the surrounding area from overspray. Apply the Krylon Indoor/Outdoor spray paint in light, even coats. Avoid applying too much paint in one go to prevent drips and ensure a smooth finish. It’s better to do several thin coats, allowing each coat to dry slightly before applying the next. Two to three coats should provide good coverage and color vibrancy.
 Quick & Easy DIY Painted Outdoor Serving Tray at thehappyhousie.com-3
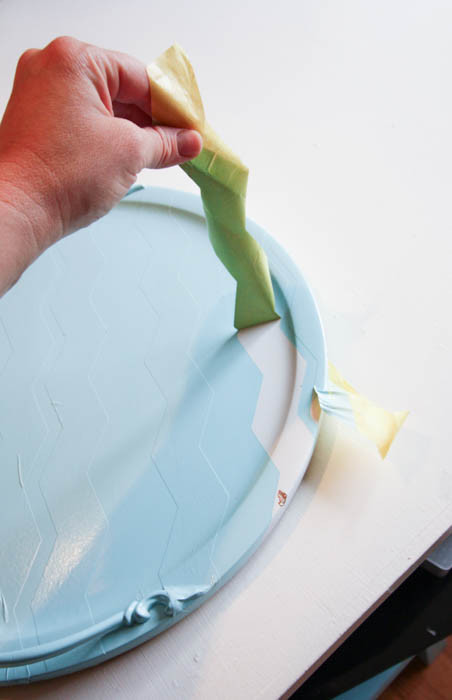
4. Drying and Finishing
Allow the paint to dry completely. The drying time will depend on the type of paint and environmental conditions, but it’s generally recommended to wait a couple of hours before peeling off the tape. Once the paint is sufficiently dry, carefully peel off the FrogTape to reveal your crisp chevron design. If you notice any minor paint bleed, you can gently scrape it off with your fingernail or touch it up using a fine brush and some white paint (sprayed into a dish for controlled application).
 Quick & Easy DIY Painted Outdoor Serving Tray at thehappyhousie.com-4
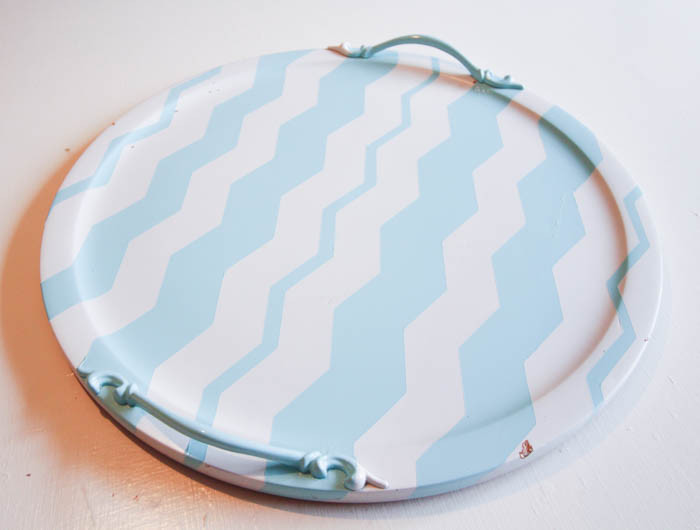 Quick & Easy DIY Painted Outdoor Serving Tray at thehappyhousie.com-5
For enhanced durability, especially if you intend to use your outdoor serving tray frequently outdoors, consider applying a clear outdoor sealer. This will protect the painted finish from scratches and weather exposure, ensuring your DIY creation lasts longer. Apply the sealer in thin, even coats, following the product instructions for drying times.
Tips for Customization and a Long-Lasting Tray
- Explore Different Patterns: While chevron is stylish, don’t hesitate to experiment with other patterns using different FrogTape designs or by creating your own patterns with painter’s tape. Stripes, geometric shapes, or even freehand designs can add a unique touch.
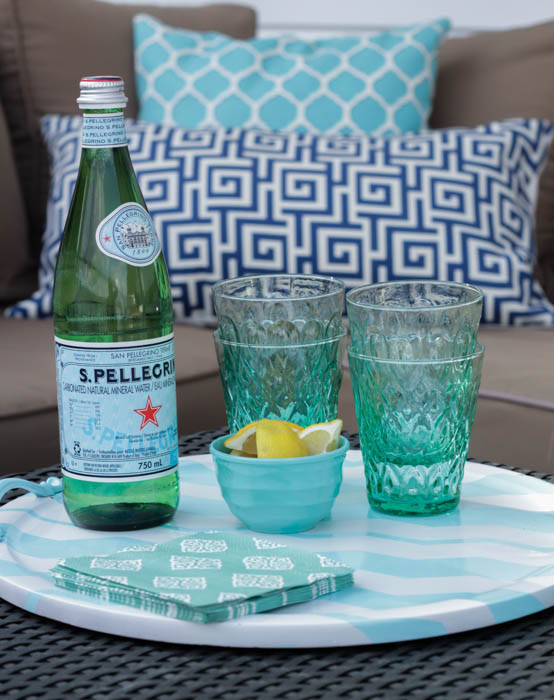
- Color Palette: Choose colors that resonate with your outdoor décor and personal taste. Consider coordinating with your patio furniture, cushions, or garden elements for a cohesive look.
- Handle Options: If you are building your tray from scratch, explore different handle styles. Rope handles can add a nautical or rustic touch, while metal handles can offer a more contemporary feel.
- Material Choice: Wood is a classic choice, but you can also consider using materials like melamine or even sturdy plastic trays for a more lightweight and weather-resistant option.
- Protection from Elements: While outdoor paints and sealers offer protection, it’s advisable to store your outdoor serving tray indoors or in a covered area when not in use, especially during harsh weather conditions, to prolong its life and maintain its appearance.
 Quick & Easy DIY Painted Outdoor Serving Tray at thehappyhousie.com-7
 Quick & Easy DIY Painted Outdoor Serving Tray at thehappyhousie.com-8
 Quick & Easy DIY Painted Outdoor Serving Tray at thehappyhousie.com-6
![]() Easy DIY Outdoor Painted Chevron Tray at thehappyhousie.com
Easy DIY Outdoor Painted Chevron Tray at thehappyhousie.com
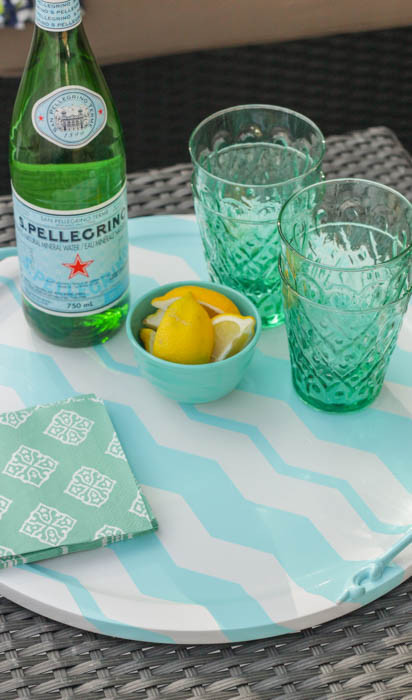
This DIY painted outdoor serving tray is more than just a craft project; it’s an opportunity to add a personal touch to your outdoor space and enhance your outdoor living experience. It’s a simple yet impactful way to bring convenience and style to your patio, deck, or garden. So gather your supplies, unleash your creativity, and craft an outdoor serving tray that you’ll be proud to use and display all season long!
 a quick and easy way to add some color to your outdoor decor with this quick and easy DIY painted outdoor Serving Tray at thehappyhousie.com
 Satori Design for Living Outdoor Extravaganza 2015
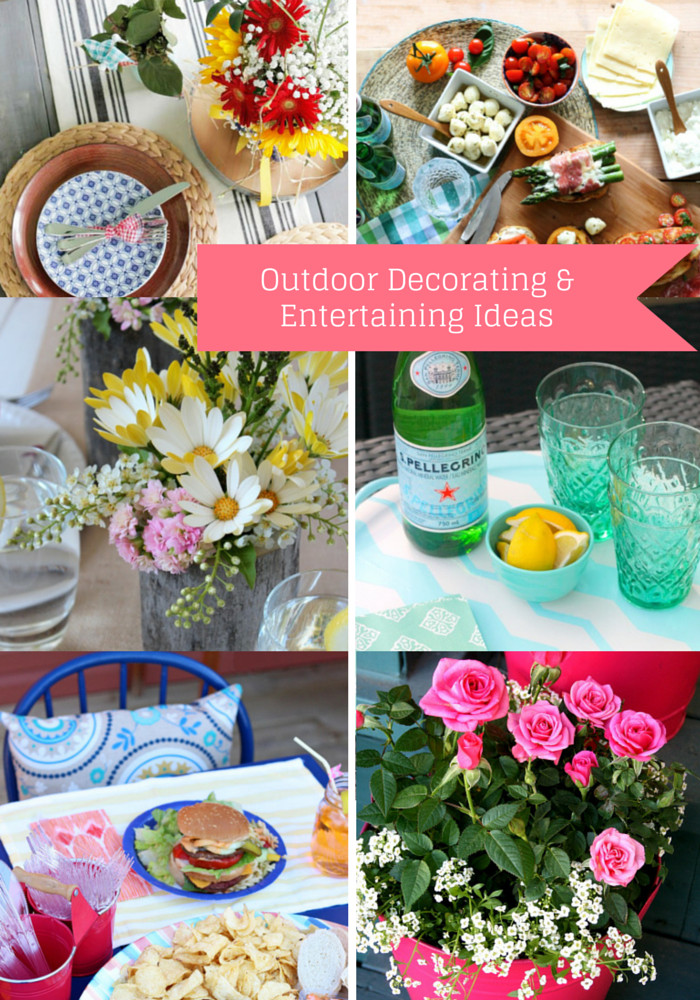 Outdoor Decorating and Entertaining Ideas