
Creating a personal Minecraft server opens up exciting possibilities, allowing you to craft your own digital world. However, by default, this world is only accessible on your local network, limiting the fun to just yourself. Port forwarding changes the game, enabling friends from anywhere to join your Minecraft adventure.
This guide provides a detailed walkthrough on how to port forward your Minecraft server across Windows, macOS, and Linux operating systems. We’ll cover essential configurations to make your server publicly accessible and ready for your friends to join.
 Linux commands cheat sheet for server management and networking
Understanding Port Forwarding for Minecraft Servers
When you run a game server on your home network, it uses a private IP address, like 192.168.0.1. This address is only visible within your local network. If your friends try to connect using this address, their computers won’t be able to find your server because it’s not exposed to the public internet.
Port forwarding acts as a bridge, allowing external connections from the internet to reach your local network and your Minecraft server. It achieves this by directing network traffic from a specific public port on your router to the private IP address and port of your server. Most modern routers offer port forwarding capabilities accessible through their settings interface.
Steps to Port Forward Your Minecraft Server
Making your Minecraft server accessible to the wider internet involves a few key steps: identifying the server port, ensuring it’s allowed through your firewall, and configuring your router to forward traffic to your server.
Important: Ensure you have already set up your Minecraft server before proceeding with port forwarding.
Step 1 – Configuring the Minecraft Server Port
First, you need to verify and potentially configure the port your Minecraft server uses for communication. Minecraft uses default ports, but you can customize this. Here are the standard ports:
- 25565 – Default port for Minecraft: Java Edition.
- 19132-19133 – Default TCP and UDP port range for Minecraft: Bedrock Edition.
To check or change the port for a Java Edition server on Windows:
-
Navigate to your Minecraft server directory and find the
server.propertiesfile. -
Open
server.propertieswith a text editor like Notepad. -
Locate the line
server-port=25565.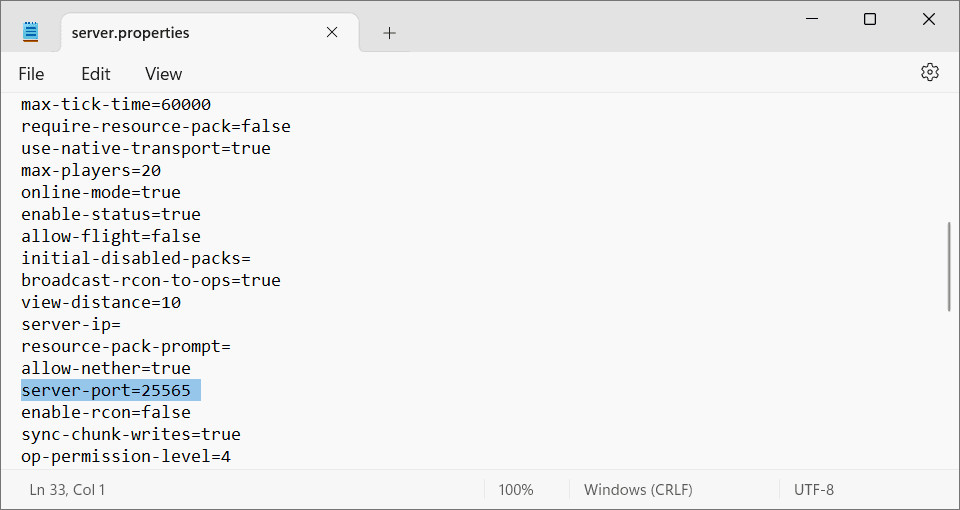 Server properties file showing the server-port configuration line
 -
Change the
server-portvalue if desired. You can use any port number between 1 and 65535, but sticking with the default 25565 is generally recommended unless you have a specific reason to change it. -
Save the changes to
server.propertiesand close the file. -
Restart your Minecraft server for the new port setting to take effect.
Step 2 – Allowing the Port Through Your Firewall
The next step is to configure your operating system’s firewall to allow incoming connections to your Minecraft server port. This ensures that the firewall doesn’t block legitimate traffic to your server.
Below are instructions for Windows, macOS, and general guidance for Linux.
Windows Firewall Configuration
-
Open Windows Defender Firewall with Advanced Security by searching for it in the Start Menu.
-
Click on Inbound Rules in the left panel, then select New Rule… in the right panel.
-
In the “Rule Type” window, choose Port and click Next.
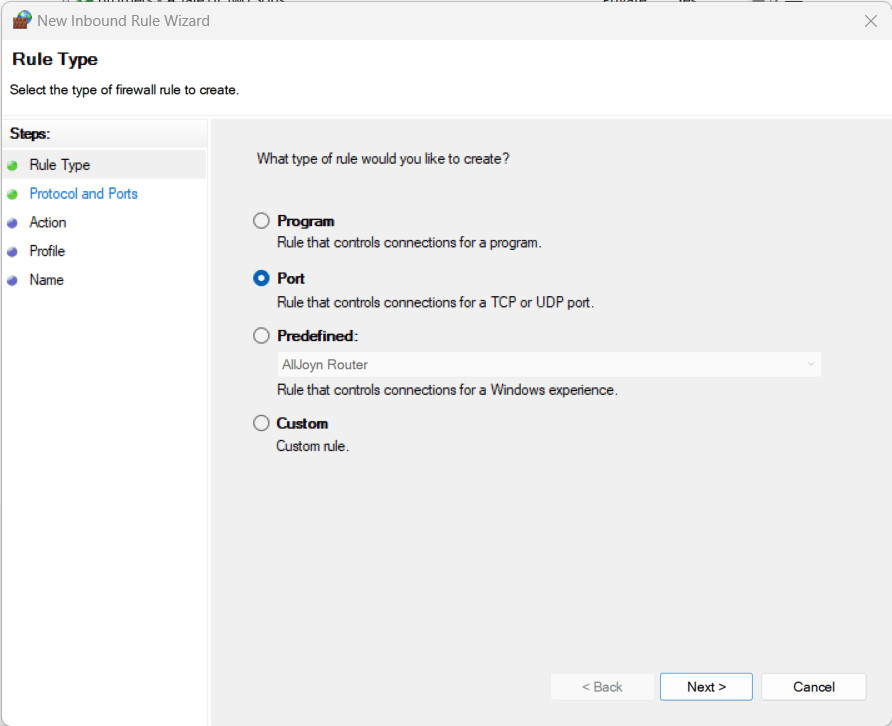 New Inbound Rule wizard with Port selected as the rule type
 -
On the “Protocol and Ports” screen, select TCP. In the “Specific local ports” field, enter your Minecraft server port, typically 25565. Click Next.
-
In the “Action” window, choose Allow the connection and click Next through the remaining screens until you reach the “Name” step.
-
Give your rule a descriptive name, such as “Minecraft Server TCP,” and click Finish.
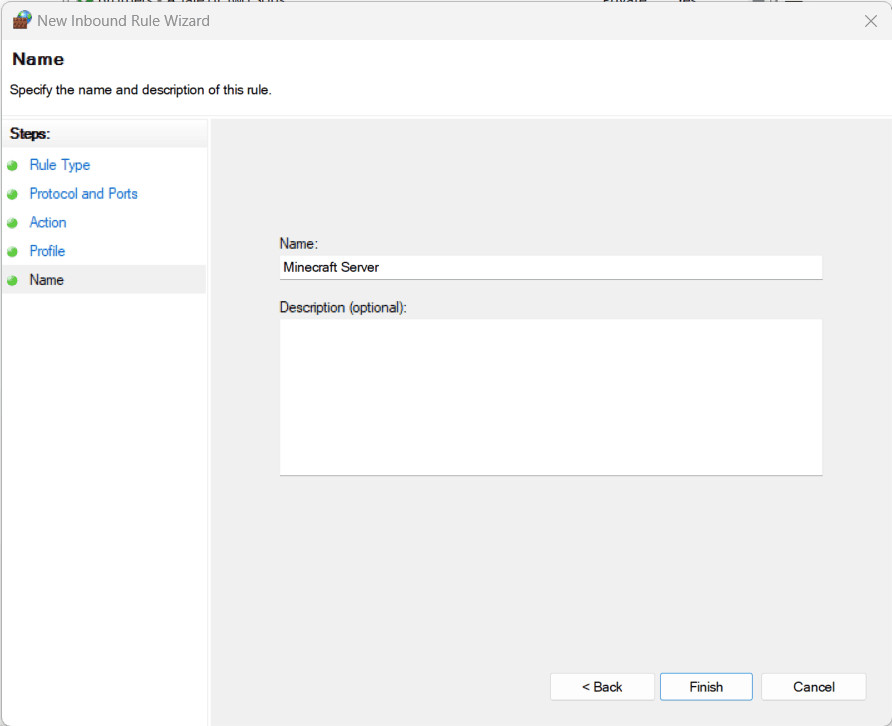 Naming the new firewall rule for incoming Minecraft traffic
 -
Repeat steps 2-6, but this time select UDP in step 4 and name the rule “Minecraft Server UDP.” Minecraft uses both TCP and UDP protocols, so allowing both is crucial.
macOS Firewall Configuration
- Go to System Settings (or System Preferences) from the Apple menu and select Network.
- Choose Firewall from the left-hand menu and click Options.
- Click the + (Add) button to add an application exception.
- Find and select the Java application that Minecraft uses to run. Confirm your selection.
- Ensure that the “Allow incoming connections” option is selected for Java. Click OK.
Linux Firewall Configuration (using UFW – Uncomplicated Firewall)
Linux distributions often come with powerful firewall solutions. A common and user-friendly firewall utility is UFW (Uncomplicated Firewall). If UFW is installed (common on Ubuntu and Debian), you can allow the Minecraft port with simple commands. For more detailed guidance, refer to a tutorial on how to configure your Ubuntu firewall.
Using UFW, you can allow the default Minecraft port using these commands in the terminal:
sudo ufw allow 25565/tcp comment 'Minecraft Server TCP'
sudo ufw allow 25565/udp comment 'Minecraft Server UDP'
sudo ufw enable
These commands open port 25565 for both TCP and UDP protocols and enable the firewall if it’s not already active.
Step 3 – Setting Up Router Port Forwarding
The final and most crucial step is configuring port forwarding on your router. The router acts as the gateway between your local network and the internet. While router interfaces vary, the general process is similar across most devices.
-
Find Your Router’s IP Address (Default Gateway):
-
Windows: Open Command Prompt (search for
cmdin the Start Menu) and typeipconfig. Look for the “Default Gateway” address.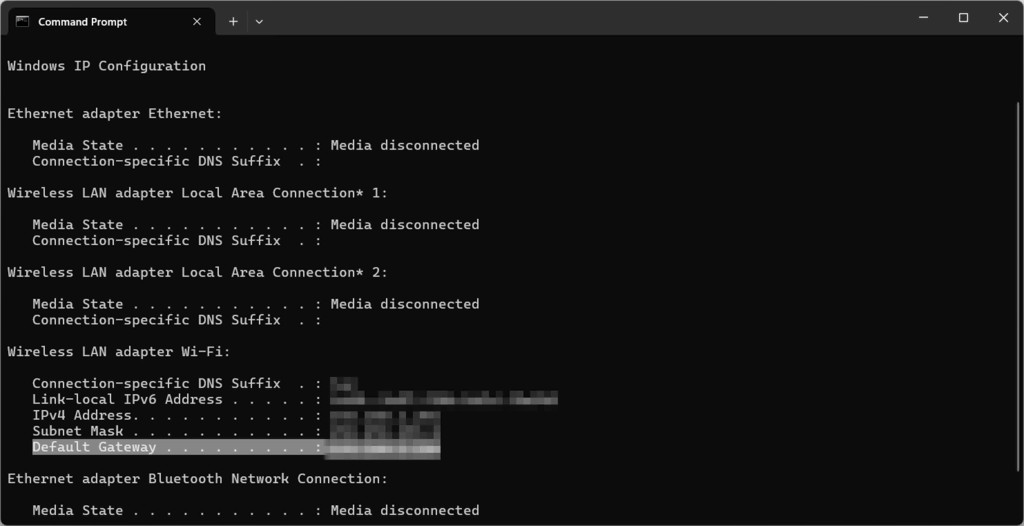 Command Prompt showing the Default Gateway IP address using ipconfig
 -
macOS: Go to System Settings -> Network, select your active network connection, click Details, and then go to the TCP/IP tab. The “Router” address is your router’s IP. Alternatively, open Terminal and run
netstat -nr|grep default. -
Linux: Open Terminal and run
route -n | grep "^0.0.0.0" | cut -d ' ' -f 10.
-
-
Set a Static IP Address for Your Server Computer (Recommended): This ensures your server’s local IP address doesn’t change, which is important for port forwarding to remain consistent.
-
Windows: Open Network Connections (run
ncpa.cpl). Right-click your network adapter -> Properties -> Internet Protocol Version 4 (TCP/IPv4) -> Properties. Select “Use the following IP address” and enter a static IP in your network range (e.g.,192.168.1.100), subnet mask (usually255.255.255.0), and your Default Gateway IP as the default gateway.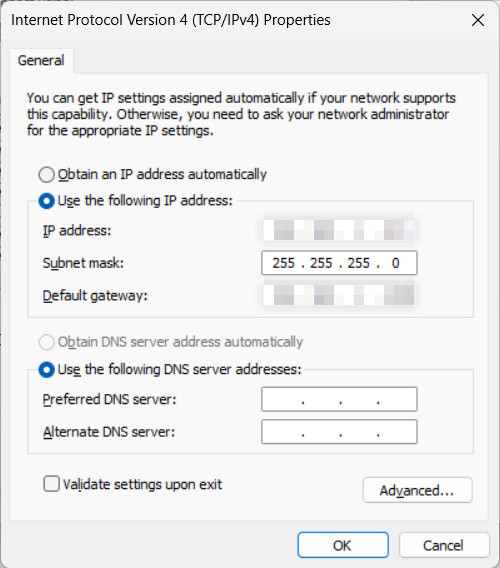 TCP/IPv4 Properties window to set a static IP address
 -
macOS: Go to System Settings -> Network, select your network, click Details, and go to the TCP/IP tab. Configure IPv4 to “Using DHCP with manual address” and enter your desired static IP address.
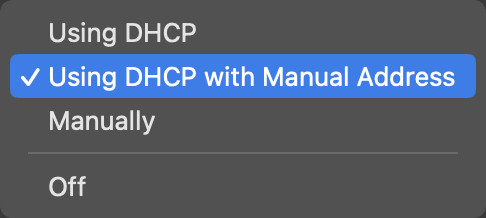 Network settings on macOS for setting a static IP address
 -
Linux: Edit your network configuration file. For example, on Ubuntu 22.04, use
sudo nano /etc/netplan/01-netcfg.yaml. An example configuration is shown below, adjust IP addresses and gateway accordingly.network: version: 2 renderer: networkd ethernets: ens33: # Your network interface name (may vary) dhcp4: no dhcp6: no addresses: [192.168.2.10/24] # Your desired static IP gateway4: 192.168.2.1 # Your router's IP nameservers: addresses: [1.1.1.1,1.0.0.1] # Public DNS serversAfter editing, apply the changes with
sudo netplan apply.
-
-
Access Your Router’s Configuration Page: Open a web browser and enter your router’s IP address (Default Gateway) in the address bar. Press Enter. You will likely be prompted for a username and password. These are often found on a sticker on the bottom of your router. If you can’t find them, search online for “[your router model] default login”.
 Router login prompt in a web browser
Expert Tip: If your router still uses default login credentials, change them immediately for security reasons. Default credentials are a major security vulnerability.
Router login prompt in a web browserEgidijus N., Head of Cyber Security
-
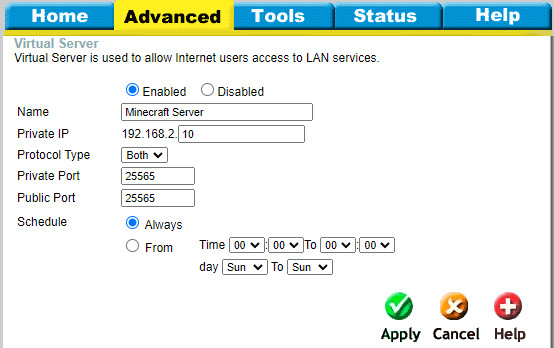
Find Port Forwarding Settings: Once logged into your router’s interface, look for sections labeled “Port Forwarding,” “Virtual Servers,” “NAT Forwarding,” or similar. The exact location varies by router manufacturer.
-
Create a New Port Forwarding Rule:
- Service Name/Description: Enter a name for the rule, e.g., “Minecraft Server.”
- Protocol: Select TCP and UDP (or “Both” if available). You may need to create separate rules for TCP and UDP.
- Port Range/External Port/Public Port: Enter your Minecraft server port (e.g., 25565). If there are separate fields for “Start Port” and “End Port,” enter the same port in both.
- Internal Port/Private Port: Enter the same Minecraft server port (25565).
- Internal IP Address/Private IP Address/Server IP: Enter the static IP address you assigned to your computer running the Minecraft server.
- Enable/Status: Ensure the rule is enabled or active.
Router login prompt in a web browser -
Save and Apply Settings: Save the port forwarding rule and apply the changes to your router configuration. The router may need to restart for the changes to take effect.
Pro Tip: If you are unsure how to find port forwarding settings on your router, consult your router’s manual or search online for “[your router model] port forwarding”.
Step 4 – Restart Server and Share Your Public IP
After configuring port forwarding, restart your Minecraft server. To allow your friends to connect, you need to provide them with your public IP address.
-
Restart Minecraft Server: In the server console, type
/stopand then restart the server application. -
Find Your Public IP Address: Search “what’s my ip” on Google or use a website like
whatismyipaddress.com. This will display your public IP address.Router login prompt in a web browserExpert Tip: Be cautious about sharing your public IP address online as it can reveal your approximate location and potentially expose you to security risks. Only share it with trusted friends who you want to join your server.
Router login prompt in a web browserEgidijus N., Head of Cyber Security
-
Connect to Your Server: Your friends can now join your Minecraft server using your public IP address. If you changed the default port (25565), they will need to use the format
your_public_ip:port(e.g.,192.168.1.100:25566). If you used the default port, they can just use your public IP.Router login prompt in a web browser
Conclusion
Port forwarding your Minecraft server unlocks the ability to play with friends remotely, enhancing your Minecraft experience. By following these steps to configure your server port, firewall, and router, you can successfully make your Minecraft world accessible to others. Remember to prioritize security by using strong router passwords and sharing your public IP address cautiously.
Enjoy building and exploring your Minecraft world with friends!
 Minecraft hosting banner advertisement
Author: Ignas R.
Ignas enjoys simplifying complex technical topics and creating easy-to-understand guides. He’s passionate about gaming and home improvement projects.
More from Ignas R.
Co-author: Paulius Zunda
Paulius is a Content Editor with expertise in technology content and a keen eye for detail. He has a background in crafting engaging YouTube content and enjoys board games.
More from Paulius Zunda