
In the realm of server management, a static IP address is often indispensable. Unlike dynamic IP addresses assigned by DHCP servers which can change over time, a static IP address remains constant. This stability is crucial for servers hosting websites, databases, FTP services, or any application requiring consistent accessibility and addressability.
This guide provides a detailed walkthrough on how to set a static IP address on your Ubuntu server. We will cover two popular methods: using the command line, which is efficient and scriptable, and using the graphical user interface (GUI), which is more intuitive for those less comfortable with the command line.
Whether you are setting up a web server, configuring port forwarding, or simply need a reliable address for your server, this article will equip you with the knowledge to configure a static IP address on Ubuntu.
Prerequisites
Before we begin, ensure you have the following:
- An Ubuntu server installation, preferably with desktop GUI for the GUI method.
sudoprivileges to execute administrative commands and modify system configuration files.- Basic understanding of network settings like IP address, subnet mask, gateway, and DNS.
Method 1: Setting a Static IP Using the Command Line
The command line interface (CLI) offers a powerful and direct way to configure your network settings. In Ubuntu, network configuration is primarily managed by Netplan, a network configuration abstraction renderer. Let’s dive into the steps to set a static IP using the command line.
Step 1: Access the Terminal
Open your terminal application. You can usually do this by using the keyboard shortcut Ctrl + Alt + T.
Step 2: Gather Current Network Information
Before making changes, it’s essential to know your current network configuration. This information will be used to configure the static IP correctly. We need to identify:
- Network Interface Name: The name of your network adapter (e.g.,
eth0,enp0s3). - Current IP Address: The IP address currently assigned to your server (if any).
- Subnet Mask: Defines the network size.
- Gateway: The IP address of your router, which connects your network to the internet.
- DNS Servers: Domain Name System servers that translate domain names to IP addresses.
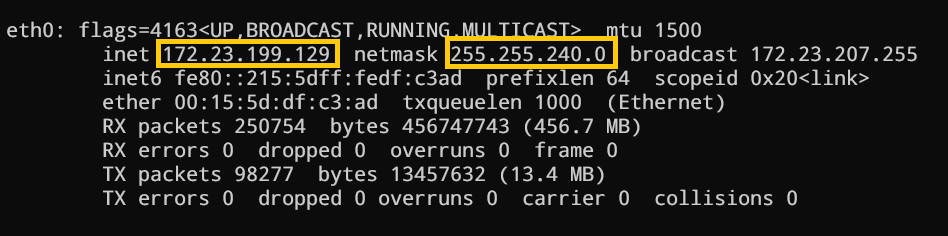
Use the ip a command to display network interface information:
ip aThe output will list all network interfaces. Look for the interface that is connected to your network and has an IP address assigned. It might look something like this:
2: eth0: <BROADCAST,MULTICAST,UP,LOWER_UP> mtu 1500 qdisc fq_codel state UP group default qlen 1000
    link/ether 08:00:27:b2:4a:5a brd ff:ff:ff:ff:ff:ff
    inet 192.168.1.100/24 brd 192.168.1.255 scope global dynamic eth0
       valid_lft 85581sec preferred_lft 85581sec
    inet6 fe80::a00:27ff:feb2:4a5a/64 scope link
       valid_lft forever preferred_lft forever
In this example, eth0 is the network interface name, and the current dynamic IP address is 192.168.1.100 with a /24 subnet mask (which is equivalent to 255.255.255.0).
To get more detailed information, including the subnet mask and gateway, you can use the route -n command or ip route:
route -nor
ip routeThe output will show your gateway IP address, usually listed under the default route.
 Output of route -n command showing gateway and network interface
Step 3: Configure Netplan for Static IP
Netplan configuration files are located in the /etc/netplan/ directory and are written in YAML format.
-
Navigate to the Netplan directory:
cd /etc/netplan/ -
List files: List the files in this directory to identify the existing Netplan configuration file. It usually has a name like
01-netcfg.yamlor50-cloud-init.yaml.ls -
Edit the Netplan configuration file: Use a text editor like
nanoorvimto edit the YAML file. Important: Be very careful with spacing and indentation in YAML files, as they are crucial for the syntax.sudo nano <your_netplan_file_name.yaml>Replace
<your_netplan_file_name.yaml>with the actual name of your Netplan file. -
Modify the configuration: The default configuration might use DHCP. You need to modify it to set a static IP. Here’s an example configuration assuming your interface is
eth0, you want to set the static IP to192.168.1.150, your gateway is192.168.1.1, and your DNS servers are Google’s public DNS servers (8.8.8.8and8.8.4.4). Adjust these values to match your network information gathered in Step 2.network: version: 2 renderer: networkd ethernets: eth0: dhcp4: no addresses: [192.168.1.150/24] gateway4: 192.168.1.1 nameservers: addresses: [8.8.8.8,8.8.4.4]Explanation of the configuration:
network:: The top-level element.version: 2: Specifies the Netplan configuration version.renderer: networkd: Specifies the network renderer to be used.networkdis the recommended renderer for server environments.ethernets:: Configures Ethernet interfaces.eth0:: Specifies the configuration for the interface namedeth0. Replace with your interface name if it’s different.dhcp4: no: Disables DHCP for IPv4 on this interface, indicating you want to set a static IP.addresses: [192.168.1.150/24]: Sets the static IP address to192.168.1.150with a/24subnet mask. Replace192.168.1.150/24with your desired static IP and subnet in CIDR notation.gateway4: 192.168.1.1: Sets the default gateway for IPv4. Replace192.168.1.1with your gateway IP address.nameservers:: Configures DNS server settings.addresses: [8.8.8.8,8.8.4.4]: Specifies the DNS server IP addresses. You can use other DNS servers if preferred.
-
Save the file: If you are using
nano, pressCtrl + X, thenYto save, and thenEnter.
Step 4: Apply and Verify the Netplan Configuration
-
Apply the configuration: Use the
netplan applycommand to apply the new settings.sudo netplan applyIf there are syntax errors in your YAML file,
netplan applywill report them. Carefully review the error messages and correct your configuration file. -
Verify the changes: Use the
ip acommand again to verify that the static IP address has been successfully applied to your network interface.ip aCheck the output for your network interface (e.g.,
eth0). It should now show the static IP address you configured.
You can also test network connectivity using ping:
ping google.comIf you get replies, your static IP configuration is working correctly and your server is connected to the internet.
Method 2: Setting a Static IP Using the GUI
For users who prefer a graphical interface, Ubuntu Desktop provides a user-friendly way to configure network settings.
-
Open System Settings: Click on the system menu (usually at the top right corner) and select “Settings”.
-
Navigate to Network Settings: In the Settings window, find and click on “Network” (or “Wi-Fi” if you are configuring a wireless connection).
-
Select the Network Interface: Identify the network interface you want to configure (e.g., Wired or Wi-Fi) from the left sidebar and click on the gear icon next to the connected interface name to open its settings.
 Network settings in Ubuntu GUI
 -
Configure IPv4 Settings: Go to the “IPv4” tab. By default, it is set to “Automatic (DHCP)”. Change this to “Manual”.
-
Enter Static IP Details: Enter the following information in the respective fields:
- Address: Enter your desired static IP address (e.g.,
192.168.1.150). - Netmask: Select the appropriate netmask from the dropdown menu (usually
255.255.255.0or24). - Gateway: Enter your gateway IP address (e.g.,
192.168.1.1). - DNS Servers: In the “DNS” section, enter your preferred DNS server IP addresses, separated by commas. For example,
8.8.8.8, 8.8.4.4for Google Public DNS.
- Address: Enter your desired static IP address (e.g.,
-
Apply Changes: Click the “Apply” button at the top right to save the changes. You might need to restart the network connection for the changes to take effect. You can usually do this by toggling the network connection off and on from the Network settings panel or by restarting your server.
-
Verify the Static IP: After applying the settings, you can verify the static IP configuration using the
ip acommand in the terminal, as described in Method 1, or by reopening the Network settings in the GUI and checking the IPv4 tab.
Conclusion
Setting a static IP address on your Ubuntu server is a fundamental task for server administration. This guide has demonstrated two straightforward methods: the command line approach using Netplan and the graphical method using Ubuntu Desktop’s settings interface.
The command line method is efficient and preferred for server environments, especially when managing multiple servers or automating configurations. The GUI method provides an easier and more visual approach, particularly useful for desktop users or those less familiar with the command line.
Choosing the right method depends on your comfort level and the specific environment you are working in. Regardless of the method you choose, having a static IP address ensures consistent accessibility and reliable network connectivity for your Ubuntu server, essential for hosting services and maintaining stable network infrastructure.