
Encountering the “DNS Server Not Responding” error on your Windows 10 machine can be frustrating, abruptly halting your internet browsing. This message indicates that your computer is unable to communicate with a DNS server, which acts as the internet’s phonebook, translating website names into numerical IP addresses that computers understand. Without a functioning DNS, accessing websites becomes impossible, even if your internet connection seems to be working.
Think of it like this: you know the name of a restaurant (website name), but you can’t find its address (IP address) in your phonebook (DNS server). Luckily, this error is often easily fixable, and this guide will walk you through comprehensive troubleshooting steps to resolve the “DNS Server Not Responding” error on Windows 10 and get you back online.
Understanding the “DNS Server Not Responding” Error
Before diving into solutions, it’s helpful to understand why this error occurs. The “DNS Server Not Responding” message essentially means there’s a breakdown in communication between your computer and the DNS server. This interruption can stem from various sources, often related to your network configuration, internet connection, or even temporary glitches.
Here are common culprits behind the “DNS Server Not Responding” error:
- Internet Connection Issues: A dropped or unstable internet connection is the most frequent cause. No internet access naturally means no DNS resolution.
- DNS Server Overload or Outage: The DNS server provided by your Internet Service Provider (ISP) or your router might be experiencing temporary issues like high traffic or server downtime.
- Router or Modem Problems: Your router or modem, crucial components of your home network, might be malfunctioning or require a restart.
- Network Configuration Errors: Incorrect network settings on your Windows 10 computer, including IP address or DNS server configurations, can lead to this error.
- Overzealous Security Software: Sometimes, antivirus software or firewalls can mistakenly block DNS requests, leading to the error.
- Faulty Network Hardware: Problems with network cables, adapters, or other hardware components can disrupt network communication and DNS resolution.
15 Proven Methods to Fix DNS Server Not Responding on Windows 10
Here are 15 effective methods, ranging from simple checks to more advanced configurations, to troubleshoot and resolve the “DNS Server Not Responding” error on your Windows 10 system.
1. Try a Different Web Browser
The issue might be isolated to your current web browser. Before digging deeper, try opening a different browser to see if the error persists.
How to Switch Browsers:
Simply launch an alternative browser installed on your Windows 10 machine, such as Firefox, Microsoft Edge, or Opera, if you typically use Chrome. If the error disappears in the new browser, the problem might be with your primary browser. Try updating your usual browser to the latest version, or consider reinstalling it if updating doesn’t resolve the issue. If the “DNS Server Not Responding” error remains across different browsers, the problem lies elsewhere.
2. Test with Another Device
To isolate whether the problem is with your Windows 10 computer or your network, try accessing the internet using a different device connected to the same network.
How to Test with Another Device:
Use another computer, smartphone, or tablet connected to your Wi-Fi or wired network. Attempt to browse websites on this device.
- If the error appears on other devices as well: This suggests a network-wide issue, possibly with your router, modem, or ISP.
- If the error is only on your Windows 10 computer: The problem is likely specific to your machine’s configuration or software.
If using your phone, try turning off Wi-Fi and using mobile data to access websites. If websites load correctly on mobile data, it further indicates a problem within your local network.
3. Restart Your Router, Modem, and Windows 10 PC
Restarting your network equipment and computer is a fundamental troubleshooting step that often resolves temporary glitches and connection issues, including DNS errors.
How to Restart Your Router and Modem:
- Locate the power buttons on your router and modem.
- Press the power buttons to turn them off. If there are no power buttons, unplug them from the power outlet.
- Wait for approximately one minute. This allows the devices to fully power down and clear their temporary memory.
- Power on your modem first. Plug it back into the power outlet or press the power button. Wait for it to fully boot up and establish an internet connection (check for indicator lights).
- Power on your router next. Plug it back in or press the power button. Allow it to restart and reconnect to the internet.
- Restart your Windows 10 computer. This ensures a fresh start for your system to reconnect to the network.
After restarting all devices, check if the “DNS Server Not Responding” error is resolved. For a more thorough reset, consider unplugging both the router and modem from the power outlet for at least 30 seconds before plugging them back in.
4. Check Ethernet Cable Connection (for Wired Connections)
If your Windows 10 computer connects to the network via an Ethernet cable, ensure the cable is securely plugged into both your computer and the router or wall port. Inspect the cable for any visible damage, kinks, or frays.
How to Check Your Ethernet Connection:
- Visually inspect the Ethernet cable for any signs of damage.
- Ensure the cable is firmly plugged into the Ethernet port on your Windows 10 computer and the router or network switch.
- Try a different Ethernet port on your router or network switch, if available.
- If possible, test with a different Ethernet cable to rule out a faulty cable.
If you have a laptop, you can use it to test the Ethernet connection point on your router or wall. If the laptop connects successfully with the same cable and port, the issue might be specific to the Ethernet port on your desktop PC.
5. Run the Windows Network Troubleshooter
Windows 10 includes a built-in Network Troubleshooter that can automatically diagnose and fix common network problems, including DNS-related issues.
How to Run the Network Troubleshooter:
- Press the Windows key, type “Settings,” and press Enter.
- Click on “Update & Security”.
- Select “Troubleshoot” from the left-hand menu.
- Click on “Additional troubleshooters”.
- Choose “Internet Connections” and click “Run the troubleshooter”.
Follow the on-screen prompts provided by the troubleshooter. It will attempt to identify and automatically fix any network problems it detects, including potential DNS configuration errors.
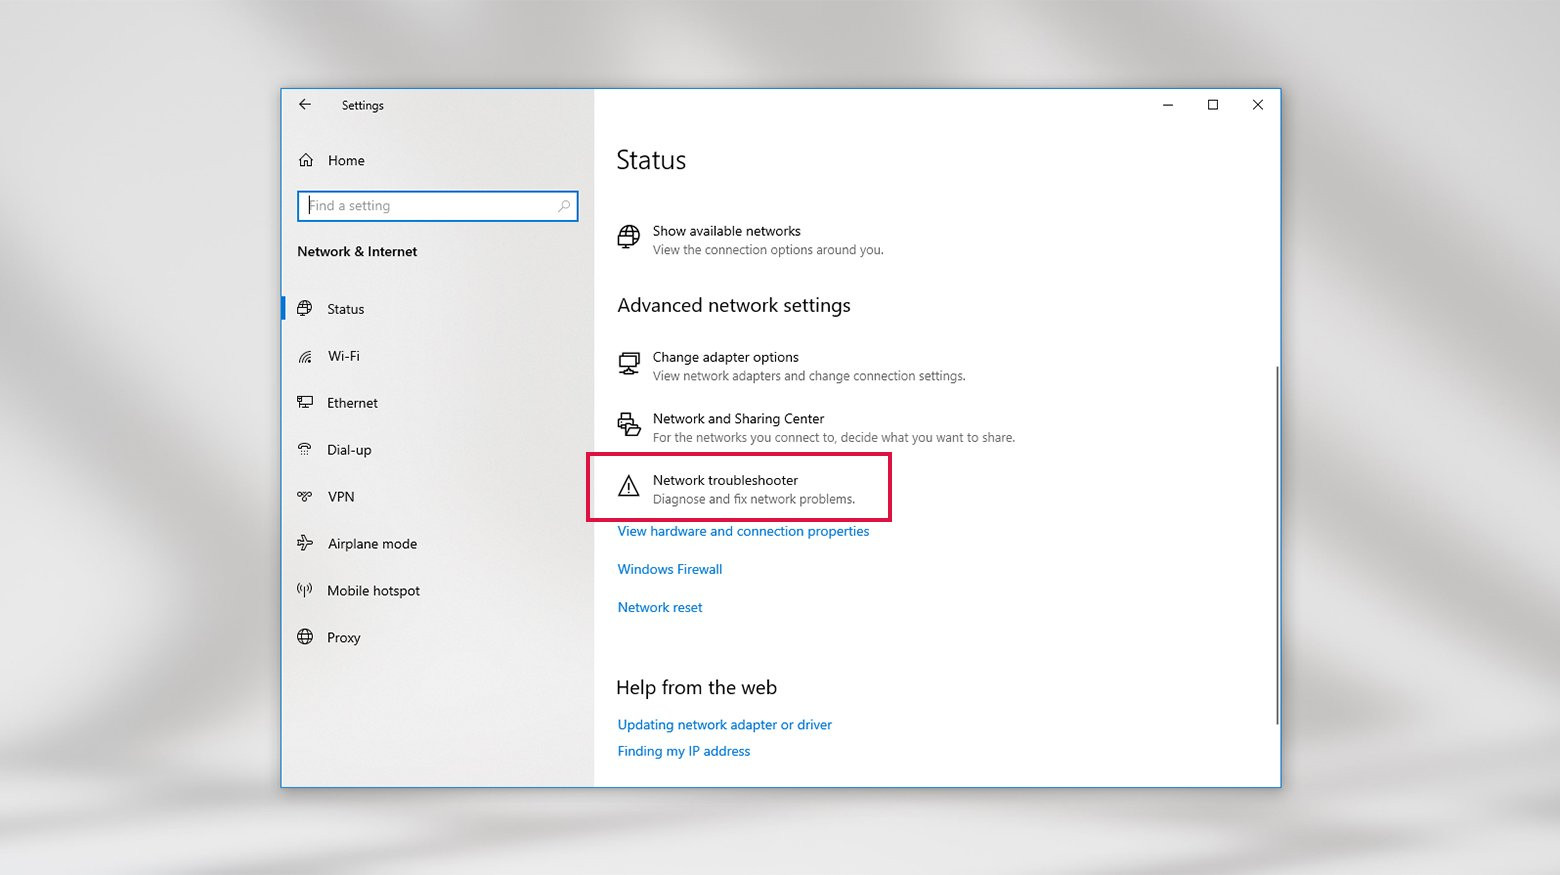 Running the network troubleshooting tool in network and internet settings.
6. Flush the DNS Cache on Windows 10
Your Windows 10 computer stores a local DNS cache, which contains records of previously visited websites to speed up browsing. Sometimes, this cache can become corrupted or outdated, leading to DNS resolution problems. Flushing the DNS cache forces your computer to retrieve fresh DNS information.
How to Flush DNS Cache:
- Press the Windows key, type “cmd,” and right-click on “Command Prompt”. Select “Run as administrator”.
- In the Command Prompt window, type the following command and press Enter:
ipconfig /flushdns
This command clears the DNS resolver cache. - Next, run these commands one by one, pressing Enter after each:
ipconfig /registerdns(Registers your computer with the DNS server)
ipconfig /release(Releases your current IP address)
ipconfig /renew(Renews your IP address from the DHCP server) - Restart your Windows 10 computer.
After restarting, check if the “DNS Server Not Responding” error is resolved. Flushing the DNS cache is a common fix for DNS-related connectivity problems.
7. Change Your DNS Server Addresses on Windows 10
By default, your Windows 10 computer likely uses the DNS servers provided by your ISP. Switching to public DNS servers, such as Google Public DNS or Cloudflare DNS, can bypass potential issues with your ISP’s DNS servers and sometimes improve browsing speed and reliability.
How to Change DNS Server Addresses:
- Press the Windows key, type “Network connections,” and select “View network connections”.
- Right-click on your active network adapter (usually “Wi-Fi” for wireless or “Ethernet” for wired connection) and select “Properties”.
- Scroll down and select “Internet Protocol Version 4 (TCP/IPv4)” and click “Properties”.
- In the “Internet Protocol Version 4 (TCP/IPv4) Properties” window, select “Use the following DNS server addresses”.
- Enter the following DNS server addresses:
- Preferred DNS server:
8.8.8.8(Google Public DNS) - Alternate DNS server:
8.8.4.4(Google Public DNS) - Alternatively, you can use Cloudflare DNS:
- Preferred DNS server:
1.1.1.1(Cloudflare DNS) - Alternate DNS server:
1.0.0.1(Cloudflare DNS)
You can also consider other public DNS providers like OpenDNS or AdGuard DNS.
- Preferred DNS server:
- Click “OK” in both “Internet Protocol Version 4 (TCP/IPv4) Properties” and network adapter properties windows.
- Restart your web browser or your Windows 10 computer for the changes to take full effect.
Changing DNS servers is a frequently recommended solution for “DNS Server Not Responding” errors, particularly if the problem lies with your ISP’s DNS infrastructure.
 Switching dns servers on a mac.
8. Reset Your Network Adapter in Windows 10
Resetting your network adapter effectively restarts the connection between your Windows 10 computer and the network. This can resolve configuration issues or temporary glitches affecting network communication, including DNS resolution.
How to Reset Network Adapter:
- Press the Windows key, type “Settings,” and press Enter.
- Click on “Network & Internet”.
- In the “Status” tab, scroll down and click on “Network reset” under “Advanced network settings”.
- Click the “Reset now” button.
- Confirm the reset by clicking “Yes”.
- Your computer will restart automatically.
After the restart, your network adapter will be reset to its default configuration. You may need to reconnect to your Wi-Fi network by entering your password. Check if the “DNS Server Not Responding” error is resolved after the network reset.
9. Update Your Network Adapter Driver in Windows 10
Outdated or corrupted network adapter drivers can sometimes lead to network connectivity problems, including DNS errors. Updating to the latest driver version can resolve compatibility issues and improve network performance.
How to Update Network Adapter Driver:
- Press the Windows key, type “Device Manager,” and press Enter.
- Expand the “Network adapters” category.
- Right-click on your network adapter (usually labeled with your Wi-Fi adapter name or Ethernet adapter) and select “Update driver”.
- Choose “Search automatically for updated drivers”. Windows will search for and install the latest driver software if available.
- If Windows doesn’t find a newer driver, you can also try “Browse my computer for drivers” and manually install a driver you’ve downloaded from the adapter manufacturer’s website.
You can also check for optional updates in Windows Update, as sometimes driver updates are listed there. After updating the driver, restart your Windows 10 computer and check if the DNS error is resolved.
 Checking for updates in Window
10. Temporarily Disable Antivirus Software and Firewalls
Antivirus software and firewalls are crucial for security, but they can sometimes mistakenly block legitimate network traffic, including DNS requests, leading to the “DNS Server Not Responding” error. Temporarily disabling them can help determine if they are the cause.
How to Temporarily Disable Antivirus and Firewall:
For Windows Security (Windows built-in antivirus and firewall):
- Press the Windows key, type “Windows Security,” and press Enter.
- Click on “Virus & threat protection”.
- Under “Virus & threat protection settings,” click “Manage settings”.
- Toggle “Real-time protection” to “Off”.
- Go back to “Windows Security” home and click on “Firewall & network protection”.
- Click on your active network profile (Domain, Private, or Public network).
- Toggle “Microsoft Defender Firewall” to “Off”.
For Third-Party Antivirus/Firewall:
- Locate the icon for your antivirus software in the system tray (bottom-right corner of your screen).
- Right-click on the icon and look for options to “Disable protection,” “Turn off firewall,” or similar. The exact steps vary depending on your antivirus software.
Important: Remember to re-enable your antivirus and firewall protection immediately after troubleshooting to keep your system secure. If disabling them resolves the DNS error, you may need to configure exceptions in your antivirus or firewall settings to allow DNS traffic.
 Turning off virus and threat protection to troubleshoot dns server not responding errors.
11. Disable Secondary Network Connections
If you have multiple network connections enabled on your Windows 10 computer (e.g., both Wi-Fi and Ethernet, or VPN connections), conflicts can sometimes arise and cause DNS issues. Disabling unused or secondary network connections can simplify your network configuration and potentially resolve the error.
How to Disable Unused Connections:
- Press the Windows key, type “Network connections,” and select “View network connections”.
- You’ll see a list of your network adapters. Disabled connections will usually be grayed out or have a red “X” icon.
- Right-click on any network connections that you are not currently using (e.g., if you are using Wi-Fi, disable the Ethernet adapter if it’s enabled, or disable VPN connections if not in use).
- Select “Disable”.
After disabling unnecessary connections, restart your web browser and check if the “DNS Server Not Responding” error is gone.
 Disable unused connections to fix dns server not responding errors.
12. Disable Peer-to-Peer Updates in Windows 10
Windows 10’s Delivery Optimization feature uses peer-to-peer sharing to distribute Windows updates. While designed to save bandwidth, it can sometimes interfere with network settings and potentially contribute to DNS errors. Disabling this feature can sometimes resolve the “DNS Server Not Responding” issue.
How to Disable Peer-to-Peer Updates:
- Press the Windows key, type “Settings,” and press Enter.
- Click on “Update & Security”.
- Select “Delivery Optimization” from the left-hand menu.
- Toggle “Allow downloads from other PCs” to “Off”.
After disabling Delivery Optimization, restart your Windows 10 computer and check if the DNS error persists.
 Turning off deliver optimization for windows updates can help fix dns server not responding errors.
13. Disable IPv6 on Windows 10
IPv6 is the latest version of the Internet Protocol, but sometimes compatibility issues or misconfigurations with IPv6 can lead to DNS resolution problems, particularly on older networks or with certain hardware. Disabling IPv6 can force your computer to use IPv4, which is more widely supported and may resolve the error.
How to Disable IPv6:
- Press the Windows key, type “Network Connections,” and press Enter.
- Go to “Network Connections”, right-click on your active network connection, and select “Properties”.
- In the “Networking” tab, uncheck the box next to “Internet Protocol Version 6 (TCP/IPv6)”.
- Click “OK” and close the network connection properties window.
- Restart your Windows 10 computer.
After restarting, check if disabling IPv6 has resolved the “DNS Server Not Responding” error. If it does, you can keep IPv6 disabled, though it’s generally recommended to re-enable it in the future as IPv6 adoption increases.
 Turning off IPv6 in Wi-Fi properties.
14. Start Windows 10 in Safe Mode with Networking
Starting Windows 10 in Safe Mode with Networking boots your system with minimal drivers and startup programs, but still enables network access. This can help determine if third-party software or driver conflicts are causing the DNS error. If the error disappears in Safe Mode, it suggests a software conflict is the culprit.
How to Boot into Safe Mode with Networking:
- Press the Windows key, click the Power icon, and then Restart while holding down the Shift key.
- In the “Choose an option” screen, select “Troubleshoot”.
- Go to “Advanced options” > “Startup Settings” and click “Restart”.
- After restarting, you’ll see a list of startup options. Press “5” or “F5” to select “Safe Mode with Networking”.
Once Windows 10 boots into Safe Mode with Networking, test your internet connection and see if the “DNS Server Not Responding” error persists. If the error is gone in Safe Mode, you can try to identify the conflicting software by performing a clean boot or selectively disabling startup programs and services in normal mode.
15. Contact Your Internet Service Provider (ISP)
If you’ve exhausted all the troubleshooting steps on your end and the “DNS Server Not Responding” error continues, the problem might be with your ISP’s network or DNS servers. Contacting your ISP’s technical support is the next logical step.
When to Contact Your ISP:
- If the error also occurs on other devices connected to your network.
- If you suspect a wider internet outage in your area.
- If none of the troubleshooting steps above have resolved the issue.
Your ISP can investigate for network outages, DNS server problems on their end, or other issues that might be causing the DNS error. They can also provide further guidance specific to your connection and service.
Conclusion
The “DNS Server Not Responding” error on Windows 10, while disruptive, is often solvable with systematic troubleshooting. By working through these 15 methods, from basic checks to more advanced configurations, you can effectively diagnose and resolve the issue.
Let’s recap the key fixes:
- Network Diagnostics: Utilize the built-in Windows Network Troubleshooter.
- Router/Modem Reset: Power cycle your network hardware.
- Disable Security Software (Temporarily): Rule out antivirus or firewall interference.
- Flush DNS Cache: Clear outdated DNS records.
- Change DNS Servers: Switch to public DNS providers like Google or Cloudflare.
If you’re still facing difficulties, remember to explore troubleshooting tips for related errors like nxdomain errors for potentially overlapping solutions.
We encourage you to share your experiences and insights in the comments below. Did any of these steps work for you? Do you have other tips to add? Your contributions can be valuable to others in the community facing the same “DNS Server Not Responding” challenge on Windows 10.