Tired of relying on public servers or paying for Realms to play Minecraft with your friends? Setting up your own Minecraft Java server gives you complete control over your gaming experience, allowing you to customize worlds, manage players, and ensure the server is online whenever you and your friends want to play. This guide will walk you through the steps to create your own Minecraft Java server, focusing on simplicity and ease of use, perfect for beginners and seasoned players alike.
What You’ll Need to Create Your Minecraft Java Server
Before diving into the server creation process, let’s gather the essentials. You don’t need extensive technical knowledge, but having these components ready will streamline the setup.
- A Computer to Host the Server: This can be your desktop PC, an old laptop, or even a dedicated server machine for optimal performance. For a basic server for a few friends, a moderately powered computer will suffice. For more demanding servers with many players or complex worlds, consider a more robust setup.
- Stable Internet Connection: A reliable and reasonably fast internet connection is crucial for hosting a server. The quality of your internet will directly impact the server’s responsiveness and prevent lag for players.
- Java Development Kit (JDK): Minecraft Java Edition, as the name suggests, runs on Java. You’ll need the JDK installed on your server machine to run the Minecraft server software.
- Minecraft Server Software: This is the official server software provided by Mojang, the creators of Minecraft. It’s free to download from the official Minecraft website.
 Minecraft on Raspberry Pi
Step-by-Step Guide to Setting Up Your Minecraft Java Server
Let’s break down the server creation process into manageable steps. Follow these instructions carefully, and you’ll have your Minecraft Java server up and running in no time.
1. Install Java Development Kit (JDK)
First, ensure you have the Java Development Kit (JDK) installed on your server machine. If you don’t have it already, follow these steps:
- Visit the Oracle Java website or an OpenJDK distribution website to download the JDK suitable for your operating system.
- Download the appropriate installer for your operating system (Windows, macOS, Linux).
- Run the installer and follow the on-screen instructions to complete the installation.
- Verify the installation by opening your command prompt or terminal and typing
java -version. You should see the installed Java version information.
2. Download the Minecraft Server Software
Next, you’ll need to download the Minecraft server software from the official Minecraft website:
- Go to the official Minecraft server download page: https://www.minecraft.net/en-us/download/server
- Locate the “Minecraft Java Edition server” download link. It will be a file named
server.jar. - Download the
server.jarfile to a location on your server machine where you want to store your server files. A dedicated folder like “MinecraftServer” in your home directory is recommended for organization.
3. Create and Run the Server
Now it’s time to initialize your Minecraft server:
-
Create a new folder named “MinecraftServer” (or any name you prefer) in your desired location.
-
Move the downloaded
server.jarfile into this newly created folder. -
Open a command prompt or terminal and navigate to the “MinecraftServer” folder using the
cdcommand (e.g.,cd MinecraftServer). -
Run the server for the first time using the following Java command:
java -jar server.jarThis command will start the server initialization process. You’ll likely encounter an error message about the EULA (End User License Agreement). This is expected for the first run.
4. Accept the Minecraft EULA
The first time you run the server, it will generate a file named eula.txt in your server folder. You need to accept the Minecraft End User License Agreement to proceed:
- Open the
eula.txtfile using a text editor. - Change the line
eula=falsetoeula=true. - Save the
eula.txtfile.
5. Run the Server Again
With the EULA accepted, you can now run the server again:
-
In your command prompt or terminal, navigate to the “MinecraftServer” folder if you’re not already there.
-
Run the server command again:
java -jar server.jar noguiAdding
noguiat the end runs the server in a command-line interface, which is generally more efficient for server hosting. If you prefer a graphical user interface, you can omitnogui.The server will now start loading, generating the world, and preparing for players to join. This process might take a few minutes depending on your computer’s resources.
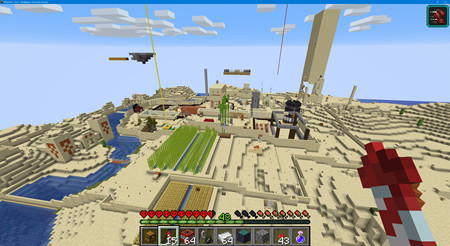
 Minecraft Server Running
6. Configure Your Server (Optional but Recommended)
Once your server is running, you can customize various settings by editing the server.properties file located in your “MinecraftServer” folder. This file controls aspects like:
- Server name (motd): The message displayed in the Minecraft server list.
- Game mode: Survival, Creative, Adventure, Spectator.
- Difficulty: Peaceful, Easy, Normal, Hard.
- Maximum players: The number of players allowed on the server.
- World generation settings: Seed, level type, etc.
Open server.properties with a text editor to adjust these settings to your preferences. Remember to restart your server after making changes to server.properties for them to take effect.
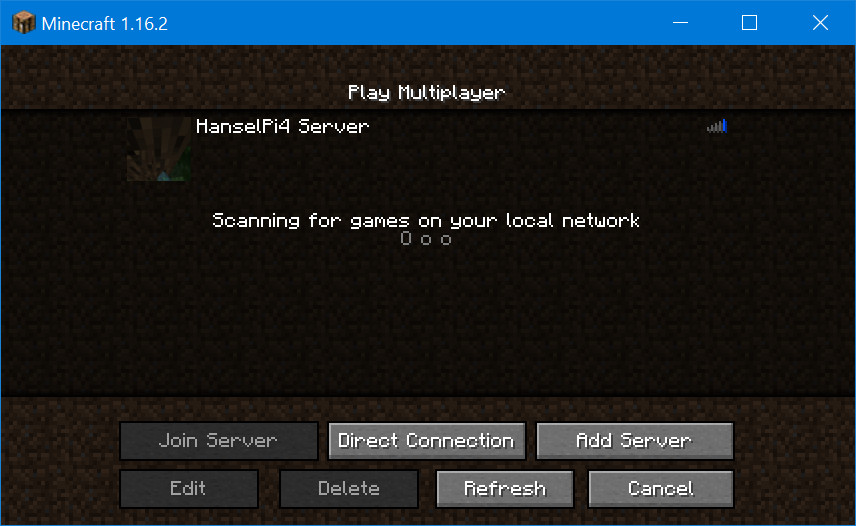
7. Connect to Your Minecraft Server
Your Minecraft Java server is now live! To connect to it, you’ll need your server’s IP address:
- Find your server’s IP address. If you are running the server on your home network and connecting from the same network, you can use your computer’s local IP address. You can find this by typing
ipconfig(Windows) orifconfig(macOS/Linux) in the command prompt/terminal. Look for your network adapter and the “IPv4 Address”. - Launch Minecraft Java Edition and go to “Multiplayer”.
- Click “Add Server”.
- Enter a server name (anything you like).
- Enter your server’s IP address in the “Server Address” field.
- Click “Done” and then select your newly added server from the list and click “Join Server”.
If you want friends outside your local network to join, you’ll need to configure port forwarding on your router to forward external traffic to your server machine’s local IP address and port (default Minecraft port is 25565). This step is more technical and depends on your router model.
Optimizing Your Minecraft Java Server Performance
For a smoother multiplayer experience, especially with more players or complex worlds, consider these performance tips:
- Allocate Sufficient RAM: The command
java -jar server.jaruses default memory settings. You can allocate more RAM to your server using flags like-Xmxand-Xms. For example,java -Xmx2G -Xms2G -jar server.jar noguiallocates 2GB of RAM to the server. Adjust the amount based on your server’s needs and available RAM. - Regular Server Backups: Back up your server world and configuration files regularly to prevent data loss in case of crashes or issues.
- Monitor Server Performance: Keep an eye on your server’s CPU and RAM usage. If your server is consistently overloaded, you may need to reduce the number of players, simplify your world, or upgrade your server hardware.
Enjoy Your Own Minecraft Java Server
Congratulations! You’ve successfully created your own Minecraft Java server. Now you can invite your friends, customize your world, and enjoy the freedom and control of your private Minecraft experience. Experiment with server settings, explore plugins and mods (for advanced users), and build unforgettable adventures with your community.