Node.js has revolutionized web development by allowing developers to use JavaScript outside of the browser environment. This capability extends to server-side programming, making Node.js a powerful tool for building web servers and network applications. If you’re looking to dive into backend development with JavaScript, understanding how to run a Node Server is your crucial first step.
This guide will walk you through the process of setting up and running a basic node server. We’ll cover everything from initial setup to verifying your server is live and responding. Whether you’re a complete beginner or looking to solidify your understanding, this tutorial will provide you with a clear, step-by-step approach.
Prerequisites: Installing Node.js
Before you can run a node server, you need to have Node.js installed on your system. Node.js is readily available for Windows, macOS, and Linux.
Step 1: Download Node.js
Visit the official Node.js website (https://nodejs.org/) and download the LTS (Long-Term Support) version recommended for most users. The LTS version is stable and well-supported, making it ideal for learning and development.
Step 2: Install Node.js
Run the downloaded installer and follow the on-screen instructions. The installation process is straightforward and typically involves accepting the license agreement and choosing an installation location.
Step 3: Verify Installation
Once installed, open your command prompt (on Windows) or terminal (on macOS/Linux). Type the following command and press Enter:
node --versionIf Node.js is installed correctly, this command will display the installed Node.js version. This confirms that Node.js is accessible from your command line, which is essential for running your node server.
Setting Up Your Project
Now that Node.js is installed, let’s create a project folder and initialize it.
Step 1: Create a Project Directory
Choose a location on your computer where you want to create your project. Use the command prompt or terminal to navigate to this location. Then, create a new directory for your project using the mkdir command (make directory). For example, to create a folder named my-node-server, you would use:
mkdir my-node-serverStep 2: Navigate to Your Project Directory
Change your current directory to the newly created project folder using the cd command (change directory):
cd my-node-serverStep 3: Initialize npm
npm (Node Package Manager) comes bundled with Node.js and is essential for managing project dependencies. Initialize npm in your project directory using the following command:
npm init -yThe -y flag automatically answers “yes” to all the default configuration questions, quickly setting up a package.json file in your project. This file will track your project’s dependencies and scripts.
Creating Your Node Server File (app.js)
With your project set up, let’s create the core file for your node server.
Step 1: Create app.js
Inside your project directory, create a new file named app.js. You can use a text editor or your IDE (Integrated Development Environment) of choice.
Step 2: Add Server Code to app.js
Open app.js and paste the following code into it:
// app.js
const http = require('http');
const port = 8080;

// Create a server object:
const server = http.createServer(function(req, res) {
  // Write a response to the client
  res.write('Hello World!');
  // End the response
  res.end();
});

// Set up our server to listen on the specified port
server.listen(port, function(error) {
  // Check for errors during server startup
  if (error) {
    console.log('Something went wrong', error);
  }
  // Server started successfully
  else {
    console.log('Server is listening on port ' + port);
  }
});
Understanding the Code:
require('http'): This line imports the built-inhttpmodule in Node.js. This module provides the functionality to create HTTP servers.const port = 8080;: This line defines the port number on which your node server will listen for incoming requests. Port 8080 is a common port for development servers.http.createServer(function(req, res) { ... });: This is the core of your server. It creates a new HTTP server instance. The function passed tocreateServeris executed for every incoming request to your server.req: Represents the incoming request from the client (e.g., a web browser).res: Represents the response that your server will send back to the client.res.write('Hello World!');: This line writes the text “Hello World!” to the response body. This is the content that will be sent back to the client.res.end();: This line signals the end of the response. It’s crucial to callres.end()to tell the server that you’ve finished sending the response.
server.listen(port, function(error) { ... });: This line starts the server and makes it listen for incoming requests on the specifiedport(8080 in this case). The function provided as the second argument is a callback that gets executed once the server has started listening.- Error Handling: The callback function checks for potential errors during server startup. If there’s an error, it logs “Something went wrong” along with the error details to the console.
- Success Message: If the server starts successfully, it logs “Server is listening on port 8080” to the console, confirming that your node server is running.
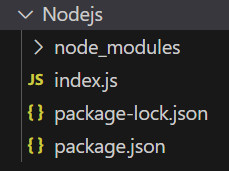 Project Structure
Running Your Node Server
Now for the exciting part – running your node server!
Step 1: Execute app.js
In your command prompt or terminal, make sure you are still in your project directory (my-node-server). Run the following command:
node app.jsThis command instructs Node.js to execute the code in your app.js file.
Step 2: Observe the Output
If everything is set up correctly, you should see the following message in your console:
Server is listening on port 8080This message, logged by your server.listen() callback function, confirms that your node server is now running and listening for requests on port 8080.
Verifying Your Server in a Browser
To see your node server in action, open your web browser (like Chrome, Firefox, Safari, or Edge) and navigate to the following address:
http://localhost:8080/Expected Output:
You should see the text “Hello World!” displayed in your browser window.
Congratulations! You have successfully created and run your first node server! This simple example demonstrates the fundamental steps involved in setting up a Node.js server to handle HTTP requests and send back responses.
Next Steps
This is just the beginning! From here, you can expand your node server to:
- Serve HTML files and web pages.
- Create APIs to handle data and interact with databases.
- Build complex web applications and backend systems.
Explore more Node.js modules and frameworks like Express.js to streamline server development and build more sophisticated applications. The world of node server development is vast and exciting – keep learning and building!