Frustrated with the ever-changing landscape of streaming services and the limitations of licensed digital media? The idea of having your own personal media hub, accessible anytime and anywhere within your home, might be more attainable than you think. Imagine a home media server acting as your private Netflix, where you control the content and viewing experience. This concept sparked my journey into creating a Media Server For Home, ensuring my favorite shows and movies are always available without fear of them disappearing from a streaming platform.
Physical media, like Blu-rays, offers a degree of control and often superior video and audio quality compared to compressed streaming formats. However, the space required for a physical media collection can quickly become a significant drawback. For households that enjoy background entertainment or re-watching beloved series like 30 Rock, The Office, or Brooklyn Nine-Nine, a media server presents an elegant solution. The removal of 30 Rock from Netflix served as the catalyst for me to explore building my own home media server. While it demands a bit more technical understanding than simply subscribing to a streaming service, the benefits of a personalized media ecosystem are substantial.
My personal experience in setting up a home media server has been rewarding, and I’m excited to share the process with you. This guide will walk you through each step, from initial research to hardware selection and software setup, empowering you to build your own media server for home and reclaim control over your media library.
Step 1. Thorough Research is Key
Entering the world of Network Attached Storage (NAS) and home media servers can initially feel overwhelming. Online forums and communities are filled with opinions, often making it difficult to discern the best path forward. Many tech enthusiasts advocate for building a server PC with dedicated hard drive bays and utilizing devices like the Nvidia Shield or a NUC (Next Unit of Computing) paired with media server software such as Plex. These DIY advocates often criticize pre-built NAS solutions from brands like QNAP and Synology, particularly concerning their transcoding capabilities.
While building a PC-based server offers flexibility and potentially more processing power, my primary goal was simplicity and ease of use. I wanted a plug-and-play solution, minimizing the technical complexities. For me, a pre-built NAS combined with user-friendly media server software appeared to be the ideal approach for creating a media server for home.
It’s worth noting that if you lack a smart TV, a device like the Nvidia Shield might be necessary to stream media from your NAS to your television. However, with a smart TV like my Sony Bravia, which supports apps like Plex, direct streaming from the NAS became straightforward.
Despite aiming for a simple setup, my journey revealed that even a “plug and play” approach requires more time and effort than initially anticipated. Careful planning and research are crucial for a smooth setup of your media server for home.
Step 2. Digitizing Your Physical Media Collection
Once you’ve completed your initial research, the next significant step is organizing your content library. Starting with around 500 DVDs and Blu-rays, encompassing both movies and TV shows, I faced the task of converting my physical collection into digital files for my media server for home. My primary computer, an HP Omen gaming laptop, was only equipped with a basic DVD drive. To handle Blu-ray ripping, I invested in an LG Slim Portable Blu-ray/DVD Writer, which proved to be an efficient tool for the job.
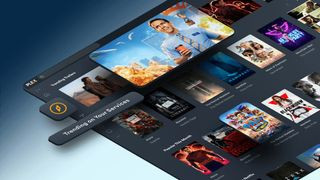 The new Plex Discovery section
(Image credit: Plex)
To extract the content from the discs and preserve the quality, software is essential. MakeMKV, an open-source program currently in beta, was highly recommended. MakeMKV simplified the Blu-ray ripping process, allowing me to choose whether to include special features or just the main movie files. Generally, I opted for only the movie files, although for certain films like Alien, I chose to include both the theatrical and director’s cuts.
Blu-ray file sizes typically range from 15GB to 30GB, with 4K Blu-rays escalating to 66GB or even 100GB. This means approximately 20 to 40 Blu-ray movies can be stored per terabyte of storage. Considering the increasing cost of hard drives, compressing files to conserve space might be a worthwhile strategy, or opting for cost-effective, high-capacity HDDs like the WD Blue series.
For compression, Handbrake, another open-source video transcoder, is a popular choice. However, be aware that video compression can be time-consuming, especially on less powerful computers. My laptop struggled with the encoding times, leading me to decide against compression and retain the original Blu-ray quality. DVD rips, typically around 5GB, were left uncompressed due to their relatively smaller size.
Ripping my disc collection became an evening routine, done while relaxing with my partner. It was a gradual process, taking three to five months to digitize my entire library. Occasionally, I encountered discs that MakeMKV couldn’t handle directly, requiring me to seek assistance from online communities for workarounds – particularly with certain titles.
Unless you have a very small physical media collection, digitizing your discs will likely be the most time-intensive aspect of building your media server for home. The subsequent step, properly naming and organizing your digital movie and TV show files, also demands significant attention to detail.
Step 3. Selecting Your Media Player Software
When setting up a media server for home, choosing the right media player software is crucial for user experience. During my research, Plex and Kodi consistently emerged as leading platforms. While pre-built NAS devices from QNAP and Synology often include basic media players, I sought a more visually appealing, Netflix-style interface for ease of use by my entire family.
Plex stands out as a dominant force in the media streaming landscape. The base service is free and feature-rich, with optional premium subscriptions offering advanced functionalities. Plex provides a user-friendly experience, though recent updates have incorporated features like rental movies, links to paid streaming services, and Live TV, which can clutter the interface if you primarily want to access your personal media. These extra features can be hidden, but their presence can be a minor annoyance for users focused solely on their local content for their media server for home.
Despite these added features, I initially chose Plex for my media server for home due to its robust features and wide compatibility. However, excellent alternatives are available that may better suit specific needs.
Kodi (formerly XBMC) offers a highly customizable, PlayStation-like interface. I’m currently considering switching to Kodi because I appreciate the XBMC-style layout and its focus on local media management, which aligns well with the purpose of a media server for home.
Other noteworthy media server options include Emby and Jellyfin. Jellyfin is an open-source derivative of Emby, which transitioned to closed-source in 2018. Many online communities recommend Jellyfin for its open nature and community support. However, research suggests that Jellyfin can be more complex to configure and may require more technical troubleshooting. Emby remains similar to Jellyfin in many aspects but is generally considered slightly easier to set up and use for a home media server.
Step 4. Choosing the Right Hardware for Your Media Server
In the realm of home servers, QNAP and Synology are the leading brands. When selecting hardware for my media server for home, I narrowed my choices to the QNAP TS-251+ and the Synology DS220+. The DIY server building community often argues against pre-built NAS solutions due to cost considerations, emphasizing that you pay a premium for convenience compared to building a custom PC. Indeed, NAS systems can be a significant investment, with even basic two-bay models ranging from $250 to $400 and upwards.
However, for my needs, the convenience and streamlined setup of a pre-built NAS were worth the investment. I was pleased with my decision to go with a pre-built solution for my media server for home.
Regarding the choice between Synology and QNAP, Synology is generally recognized for its more intuitive, user-friendly interface, making it a good entry point for NAS beginners. QNAP’s operating system, while functional, can be less intuitive and sometimes opaque for users unfamiliar with NAS systems.
Both brands offer reliable options, but ultimately, I chose a QNAP TS-251+ paired with two 4TB Western Digital Red hard drives for my media server for home. My rationale was that the QNAP TS-251+ offered expandability through expansion units, whereas the Synology DS220+ did not. Anticipating future storage needs as my media library grows, expandability was a crucial factor in my decision. Realistically, it’s only a matter of time before storage capacity becomes a concern, so future-proofing was important.
Step 5. Prepare for Potential Setbacks
Unfortunately, a couple of years ago, QNAP NAS devices were vulnerable to a ransomware attack that encrypted files on affected servers. Unaware of this vulnerability, my QNAP TS-251+ was infected, and all my video files were locked. This was a significant setback in my journey to set up a reliable media server for home.
Through offline troubleshooting and research, I eventually resolved the issue by wiping the server and resetting it to factory defaults. I continue to use the TS-251+, and QNAP has since released numerous security updates to enhance the system’s resilience against future attacks. However, the ransomware incident eroded some of my trust in the NAS’s long-term security.
Fortunately, due to my general data paranoia, I maintain backups of all my video files across multiple external hard drives and retain my physical discs in binders. This ensured I didn’t have to repeat the time-consuming ripping process. However, it did raise questions about the future hardware choices for my media server for home and the importance of robust data backup strategies.
Unlike streaming services, managing a personal digital library on a media server for home requires ongoing maintenance and occasional hardware upgrades. Every few years, you should consider upgrading your NAS hardware or potentially switching to a better media player software if superior alternatives emerge.
Despite these challenges, I am ultimately satisfied with my decision to build a media server for home and transition away from Netflix subscriptions. While it’s not a solution for everyone, those willing to invest the time and effort will gain a personalized digital media library with minimal ongoing subscription costs and complete control over their content.