
Parallels Tools is a vital suite of utilities designed to significantly enhance the performance, integration, and overall user experience of virtual machines running on Parallels Desktop. For Ubuntu Server virtual machines, installing Parallels Tools unlocks seamless operation and optimized functionality, bridging the gap between your macOS host and your virtualized server environment. This guide provides a detailed, step-by-step walkthrough on how to install Parallels Tools on an Ubuntu Server virtual machine, ensuring a smooth and efficient process.
By installing Parallels Tools, you’ll gain access to a range of benefits, including improved graphics performance, shared clipboard capabilities, seamless file sharing between the host macOS and the Ubuntu Server VM, and enhanced mouse and keyboard integration. These improvements are crucial for anyone looking to effectively utilize Ubuntu Server for development, testing, or server administration within Parallels Desktop.
There are two primary methods to install Parallels Tools on your Ubuntu Server: using the graphical user interface (GUI) and via the command line using Terminal. Both methods are straightforward, and this guide will cover both to cater to different user preferences and server configurations.
Method 1: Installing Parallels Tools via GUI
This method is ideal for users who prefer a visual approach and have a desktop environment installed on their Ubuntu Server virtual machine.
-
Launch Parallels Desktop and Start Your Ubuntu Server VM: Begin by opening Parallels Desktop on your Mac and starting the Ubuntu Server virtual machine where you intend to install Parallels Tools. Ensure the virtual machine is fully booted and ready.
-
Connect the Parallels Tools Image: Navigate to the Parallels Desktop menu bar at the top of your screen. Click on Devices, then hover over CD/DVD, and finally select Connect Image… This action will prompt a file selection dialog to appear.
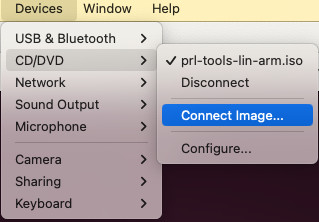 Connect image in Parallels Desktop menu
 -
Locate the Parallels Tools ISO Image: In the file dialog, you need to browse to the location of the Parallels Tools image file. This file is located within the Parallels Desktop application bundle. Navigate to Applications > Parallels Desktop.app > Contents > Resources > Tools.
- If you are using a Mac with Apple silicon (M1, M2, etc.), select prl-tools-lin-arm.iso.
- If your Mac has an Intel processor, choose prl-tools-lin.iso.
Select the appropriate ISO image and click Open. This will mount the Parallels Tools ISO as a virtual CD/DVD drive within your Ubuntu Server virtual machine.
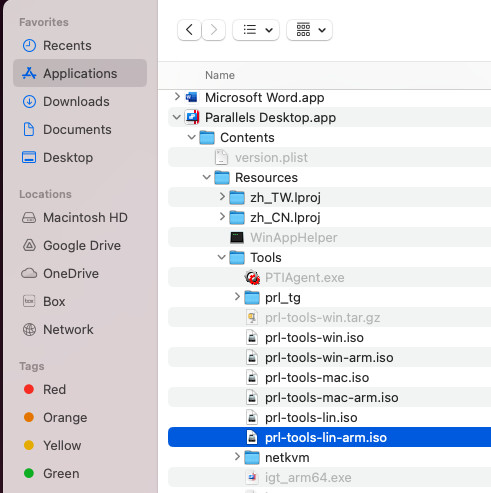 Parallels Tools Image Location in Finder
 -
Run the Installer: Within your Ubuntu Server virtual machine, you should now see a mounted CD/DVD drive labeled “Parallels Tools”. Open this drive and locate the Install-gui file. Double-click on Install-gui to launch the graphical installer.
You might be prompted to enter your Ubuntu user password to authorize the installation. Enter your password when requested and proceed.
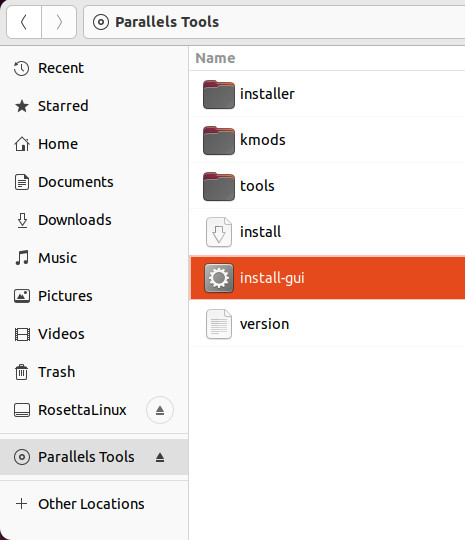 Install-gui application in mounted Parallels Tools CD/DVD
 -
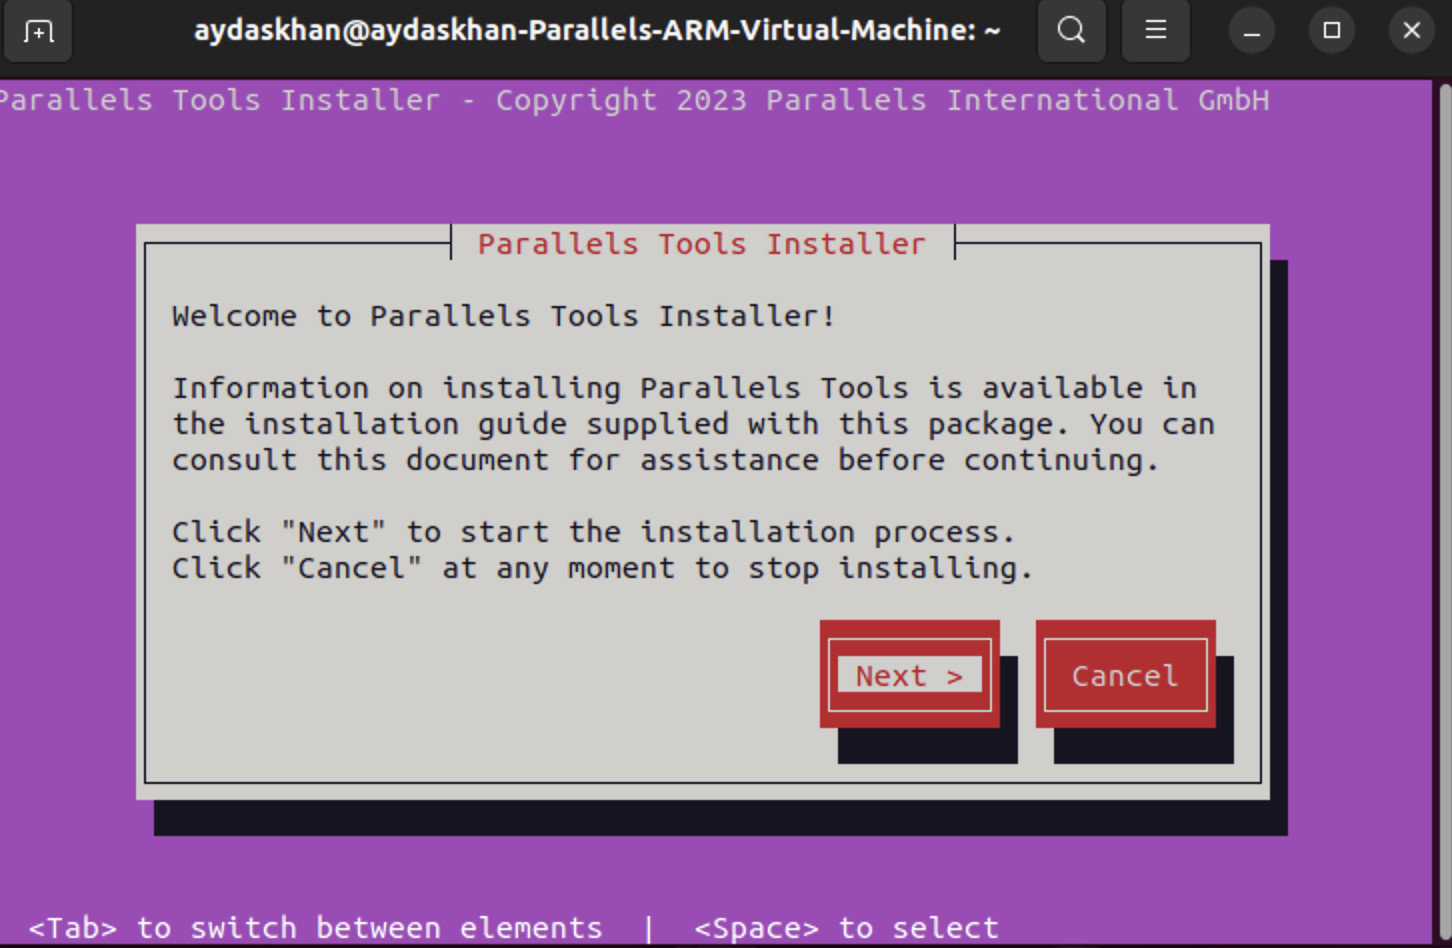
Follow the Parallels Tools Installation Wizard: Once launched, the Parallels Tools Installation wizard will guide you through the remaining steps. The wizard is typically straightforward; follow the on-screen prompts to complete the installation.
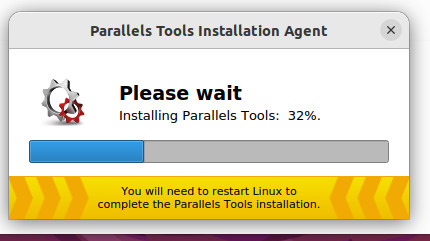 Parallels Tools Installation Wizard Welcome Screen
 -
Restart Your Ubuntu Server VM: After the installation process is complete, the wizard will prompt you to restart your virtual machine. Click Restart to reboot Ubuntu Server. This restart is essential to load the newly installed Parallels Tools and activate all the enhancements.
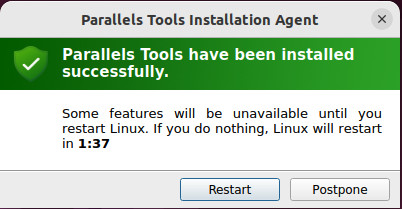 Restart VM prompt after Parallels Tools installation
Method 2: Installing Parallels Tools via Terminal
For users who prefer the command line or are running Ubuntu Server without a GUI, the Terminal method is the way to go. This method is efficient and script-based, making it ideal for server environments.
Note: It’s recommended to open this guide directly within your Ubuntu Server virtual machine’s web browser to easily copy and paste the commands into the Terminal.
-
Eject Existing CD/DVD Images (if any): Open the Terminal application in your Ubuntu Server VM. To ensure a clean mount, execute the following command to eject any existing virtual CD/DVD images that might be connected:
for dev in /dev/sr0 /dev/cdrom /dev/dvd; do sudo eject $dev; done 2>/dev/nullPress Enter to run the command. You will be asked to enter your Ubuntu user password for
sudoprivileges. Type your password (note that no characters will be displayed on the screen for security reasons) and press Enter. -
Mount the Parallels Tools Image on the Mac Host: Switch to your macOS host machine. Open the Terminal application on macOS and execute the following command. Important: Ensure that the Ubuntu Server virtual machine you are working with is the only virtual machine running in Parallels Desktop at this moment.
VM_ID=$(prlctl list -a | grep running | awk '{print $1}' | head -n 1) && ISO_PATH=$(if [[ $(uname -m) == "x86_64" ]]; then echo "/Applications/Parallels Desktop.app/Contents/Resources/Tools/prl-tools-lin.iso"; elif [[ $(uname -m) == "arm64" ]]; then echo "/Applications/Parallels Desktop.app/Contents/Resources/Tools/prl-tools-lin-arm.iso"; fi) && prlctl set $VM_ID --device-set cdrom0 --image "$ISO_PATH" --connectCopy and paste this entire command into the macOS Terminal and press Enter. This command automatically detects the running VM ID and mounts the correct Parallels Tools ISO image (based on your Mac’s processor architecture) to the virtual machine.
 Terminal command to mount Parallels Tools image
Upon successful execution, you should see the message: “The VM has been successfully configured” in the macOS Terminal. Simultaneously, within your Ubuntu Server virtual machine, the Parallels Tools should now be mounted as a virtual CD/DVD drive.
-
Install Parallels Tools in Ubuntu Server: Return to the Terminal within your Ubuntu Server virtual machine. Execute the following comprehensive command to update package lists, install necessary dependencies, mount the Parallels Tools image within the VM, navigate to the mounted directory, and finally, run the Parallels Tools installation script:
sudo mkdir -p /media/cdrom0; if [[ -f /etc/fedora-release ]]; then sudo dnf install -y gcc kernel-devel-$(uname -r) kernel-headers-$(uname -r) make checkpolicy selinux-policy-devel; sudo mount -o exec /dev/sr0 /media/cdrom0; cd /media/cdrom0; sudo ./install; elif [[ -f /etc/debian_version ]] || [[ -f /etc/kali_version ]] || [[ -f /etc/os-release && $(grep -Ei "NAME="Debian|NAME="Ubuntu" /etc/os-release) ]]; then sudo apt-get install -y dkms libelf-dev linux-headers-$(uname -r) build-essential; sudo mount -o exec /dev/sr0 /media/cdrom0; cd /media/cdrom0; sudo ./install; fiThis command is designed to work across various Debian and Fedora-based Linux distributions, including Ubuntu Server. It intelligently installs prerequisites like
dkms,gcc, kernel headers, and build tools which are essential for compiling kernel modules required by Parallels Tools.Press Enter to execute the command. You may be prompted for your Ubuntu user password again. Enter it and press Enter.
-
Complete the Installation and Reboot: After running the command, the Parallels Tools installer window may appear (depending on your Ubuntu Server configuration). Follow any on-screen prompts to proceed with the installation.
 Parallels Tools Installer window during Terminal installation
Once the installation is finished, you will be prompted to Reboot your Ubuntu Server virtual machine. It is crucial to reboot to finalize the installation and enable all Parallels Tools features. Click Reboot or manually restart your VM using the command
sudo rebootin the Terminal.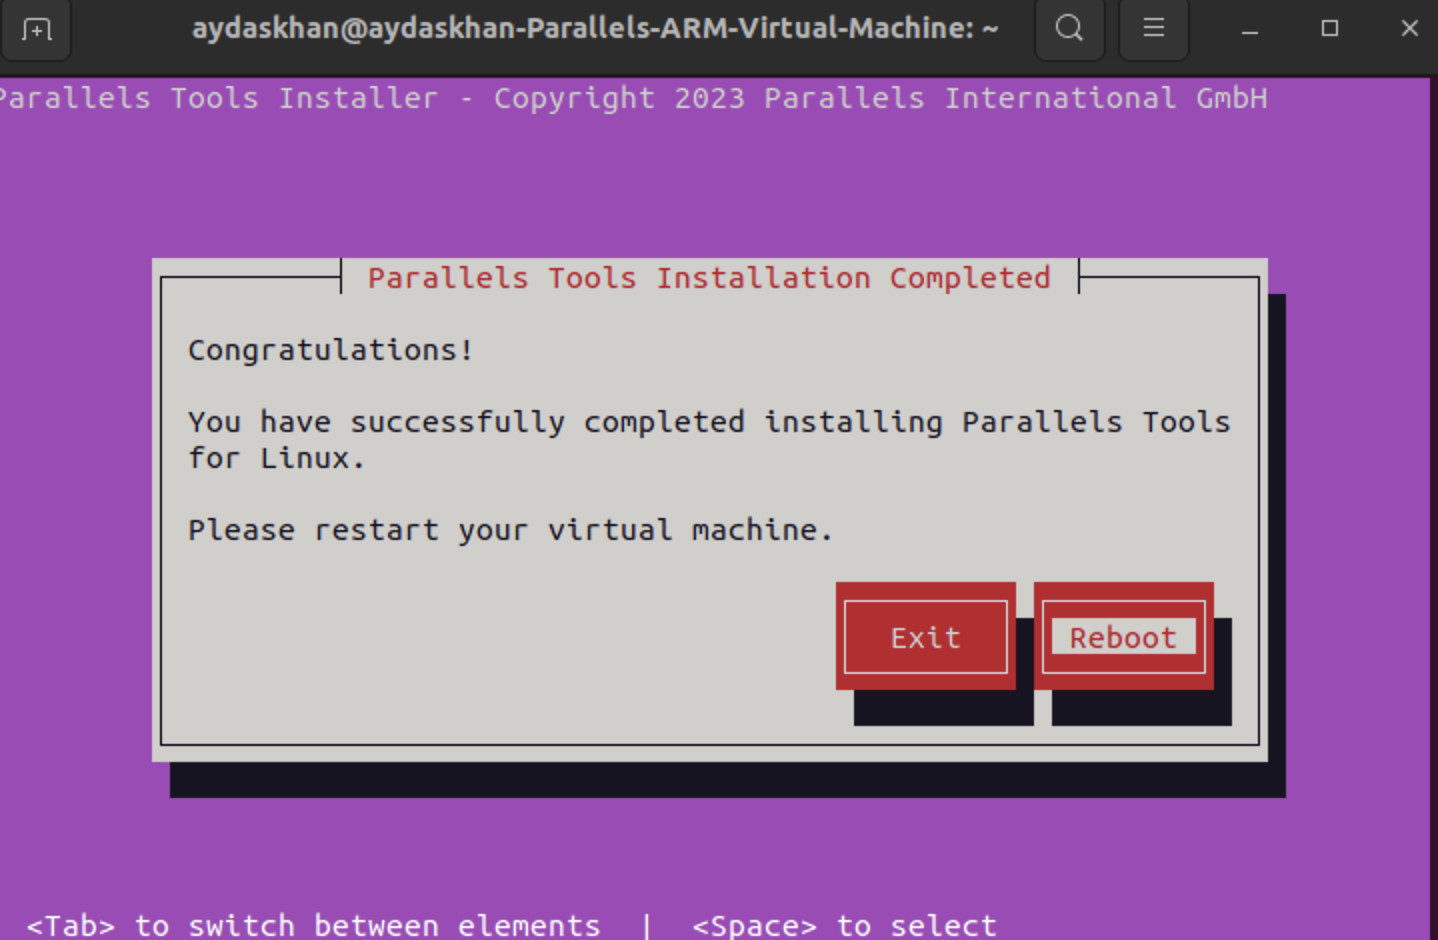 Reboot prompt after Terminal installation of Parallels Tools
Once your Ubuntu Server VM restarts, Parallels Tools will be fully installed and active. You can now enjoy enhanced integration features, improved performance, and a more seamless experience when using Ubuntu Server within Parallels Desktop. Verify the installation by checking for features like shared clipboard, dynamic resolution, and seamless mouse integration.