Minecraft, the globally acclaimed sandbox game, continues to captivate millions with its boundless creativity and immersive virtual worlds. Its enduring appeal stems from the freedom it offers players to build, explore, and interact within procedurally generated landscapes. While solo adventures hold their charm, the true Minecraft experience often blossoms in multiplayer mode, where collaboration, competition, and shared experiences take center stage.
At the heart of Minecraft’s multiplayer functionality lies the concept of a server, a central hub that connects players in a shared virtual environment. To join this shared world, you’ll need a key piece of information: the Minecraft server address. This address acts as the unique identifier, enabling your game client to locate and connect to the specific server hosting the multiplayer experience.
This article will delve into the essential aspects of Minecraft server addresses, guiding you through the process of finding this crucial information. We’ll explore what a Minecraft server address is, why it’s necessary, and provide step-by-step instructions on how to find your Minecraft server IP address. Whether you’re looking to join friends on their server or set up your own, understanding the server address is the first step to unlocking the full potential of Minecraft multiplayer.
Understanding the Minecraft Server Address
The Minecraft server address, often referred to as the Minecraft IP address, is essentially the digital location of a Minecraft server on the internet. Think of it as a street address for a website, but instead of leading you to a webpage, it directs your Minecraft game to a specific server hosting a multiplayer game world.
This address is vital for joining multiplayer games because it tells your Minecraft client where to connect. Without the correct server address, you won’t be able to access the desired server and play with others. Each Minecraft server has a unique address, ensuring that players connect to the intended virtual world.
Minecraft server addresses typically come in two main forms:
- IP Address (Numerical): This is the most fundamental form, consisting of a series of numbers separated by periods (e.g., 192.168.1.100 or 203.0.113.45). This is the raw address of the server on the internet or local network.
- Domain Name (Text-based): For easier memorization and sharing, many servers use domain names (e.g., server.example.com or play.myserver.net). These domain names are linked to IP addresses through the Domain Name System (DNS), making it simpler for players to connect.
Regardless of the format, the Minecraft server address serves the same purpose: to guide your game client to the correct server for multiplayer action.
How to Find Your Minecraft Server Address (Minecraft Server IP Lookup)
If you’re looking to join a friend’s Minecraft server or a public server, you’ll need to obtain the Minecraft server address from the server administrator or the server listing. This is usually provided directly.
However, if you are hosting your own Minecraft server, you might need to find your server’s IP address. Here’s how to do it on a Windows system:
Step-by-Step Guide to Find Your Minecraft Server IP Address
These steps will guide you through using the command prompt to find your server’s IP address, which is crucial for allowing others to connect to your hosted Minecraft world.
Step 1: Open Command Prompt
The Command Prompt is a powerful built-in Windows tool that allows you to interact with your operating system using text commands. To open it, the quickest way is to use the Windows search bar.
- Click on the Windows Start Menu (the Windows icon in the bottom-left corner of your screen).
- Type “cmd” (without quotes) in the search bar.
- Click on “Command Prompt” in the search results. A black window with white text will appear – this is the Command Prompt.
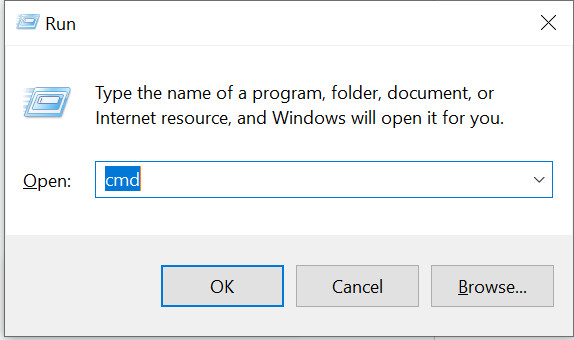 Open Command Prompt to find Minecraft server address
Step 2: Execute the ipconfig /all Command
Once the Command Prompt is open, you need to enter a specific command to display your network configuration details, including your IP address.
- Type
ipconfig /all(make sure there is a space betweenipconfigand/all). - Press Enter. The Command Prompt will execute the command and display a wealth of network information.
Step 3: Locate Your IPv4 Address
The ipconfig /all command provides a lot of information, so you’ll need to find the specific line that contains your IPv4 Address.
- Scroll through the output in the Command Prompt window.
- Look for the section that corresponds to your network connection. If you are connected to the internet via Wi-Fi, look for “Wireless LAN adapter Wi-Fi”. If you are connected via Ethernet cable, look for “Ethernet adapter Ethernet”.
- Find the line labeled “IPv4 Address” within the relevant section. The numbers to the right of “IPv4 Address” are your computer’s IP address on the network. This is your Minecraft server address if you are hosting the server on your current network.
 Find IPv4 Address for Minecraft server IP
Important Note: This IP address is your local IP address. If you want friends outside your home network to join your server, you’ll need to provide them with your public IP address and configure port forwarding on your router. Your public IP address is the address your internet service provider (ISP) assigns to your modem, and you can find it by searching “what is my IP” on Google.
Setting Up Your Own Minecraft Server on Windows
Hosting your own Minecraft server provides complete control over your gaming environment. Here’s a guide to setting up a basic Minecraft server on Windows:
Prerequisites for Minecraft Server Setup
Before you begin, ensure your system meets these minimum requirements:
- Operating System: Windows 10 or newer (Windows Server is also suitable for more robust setups).
- RAM: At least 4GB of RAM dedicated to the server (more is recommended for larger player counts and complex worlds).
- Internet Connection: A stable internet connection with sufficient upload bandwidth. Wired connections (Ethernet) are generally more reliable than Wi-Fi for server hosting.
- Java: The latest version of Java installed on your system. Minecraft servers run on Java.
Step-by-Step Minecraft Server Installation on Windows
Follow these steps to get your Minecraft server up and running:
Step 1: Install Java
Minecraft servers require Java to function. If you don’t have Java installed or need to update, follow these steps:
- Visit the official Java website: Go to https://www.java.com/en/download/ in your web browser.
- Download Java: Click on the “Java Download” button to download the latest version of Java for Windows.
- Install Java: Run the downloaded
.exefile and follow the on-screen instructions to install Java. Restart your computer after installation to ensure changes take effect.
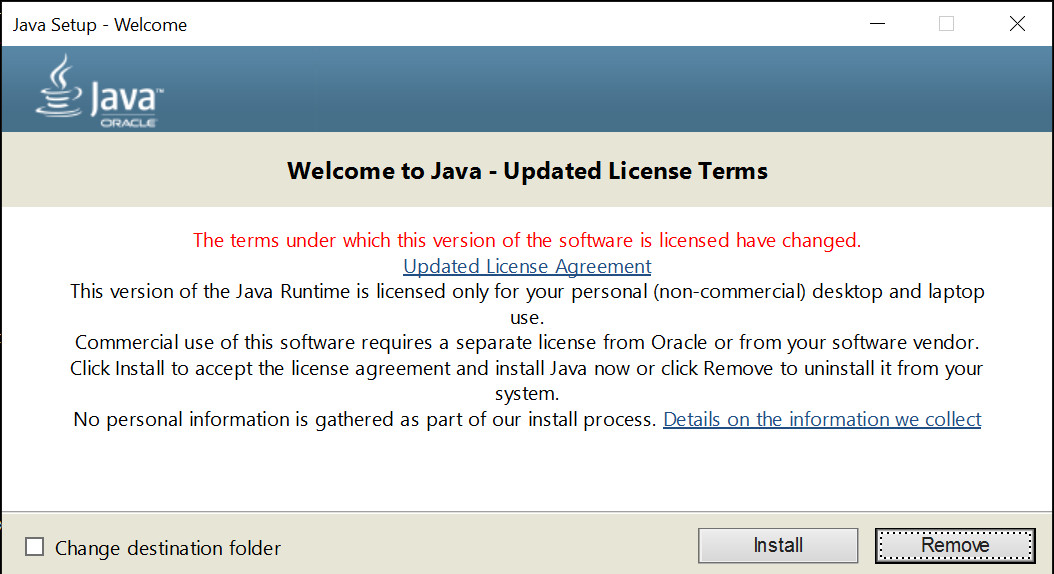 Download and Install Java for Minecraft server
Step 2: Download the Minecraft Server Software
Next, you need to download the Minecraft server software from the official Minecraft website:
- Go to the Minecraft server download page: Navigate to https://www.minecraft.net/en-us/download/server.
- Download the
.jarfile: Click on the “minecraft_server.jar” link to download the server software. It’s recommended to download the latest version for the best experience. - Create a server folder: Create a new folder on your computer and name it “Minecraft Server” (or any name you prefer). Move the downloaded
.jarfile into this folder.
Step 3: Run the Server .jar File and Configure EULA
Running the .jar file for the first time will generate essential server files, including the End User License Agreement (EULA):
- Double-click the
minecraft_server.jarfile inside your “Minecraft Server” folder. - Wait for files to extract: The server will attempt to start but will fail and create several new files in the folder, including
eula.txt. - Open
eula.txt: Open theeula.txtfile with a text editor (like Notepad). - Change
eula=falsetoeula=true: Read the EULA, and if you agree to the terms, change the lineeula=falsetoeula=true. - Save and close
eula.txt.
Step 4: Configure server.properties
The server.properties file controls various server settings, including game mode, difficulty, and server port.
- Open
server.properties: Locate and open theserver.propertiesfile in your “Minecraft Server” folder with a text editor. - Customize settings: Modify the settings according to your preferences. Key settings include:
gamemode: Set the default game mode (survival, creative, adventure, spectator).difficulty: Set the game difficulty (peaceful, easy, normal, hard).server-port: The default port is25565. You usually don’t need to change this unless you have multiple servers running.max-players: Set the maximum number of players allowed on the server.motd: The “Message of the Day” that appears in the Minecraft server list.
- Save and close
server.properties.
Step 5: Run the Server Again
Now that you’ve accepted the EULA and configured server properties, you can start the Minecraft server:
- Double-click
minecraft_server.jaragain. - Allow access through Windows Firewall: Windows Firewall might prompt you to allow Java to access the network. Click “Allow access” for both private and public networks. This is crucial for players to connect to your server.
- Server starts: The server will start up. A Command Prompt window will appear, displaying server logs and information. Keep this window open while your server is running.
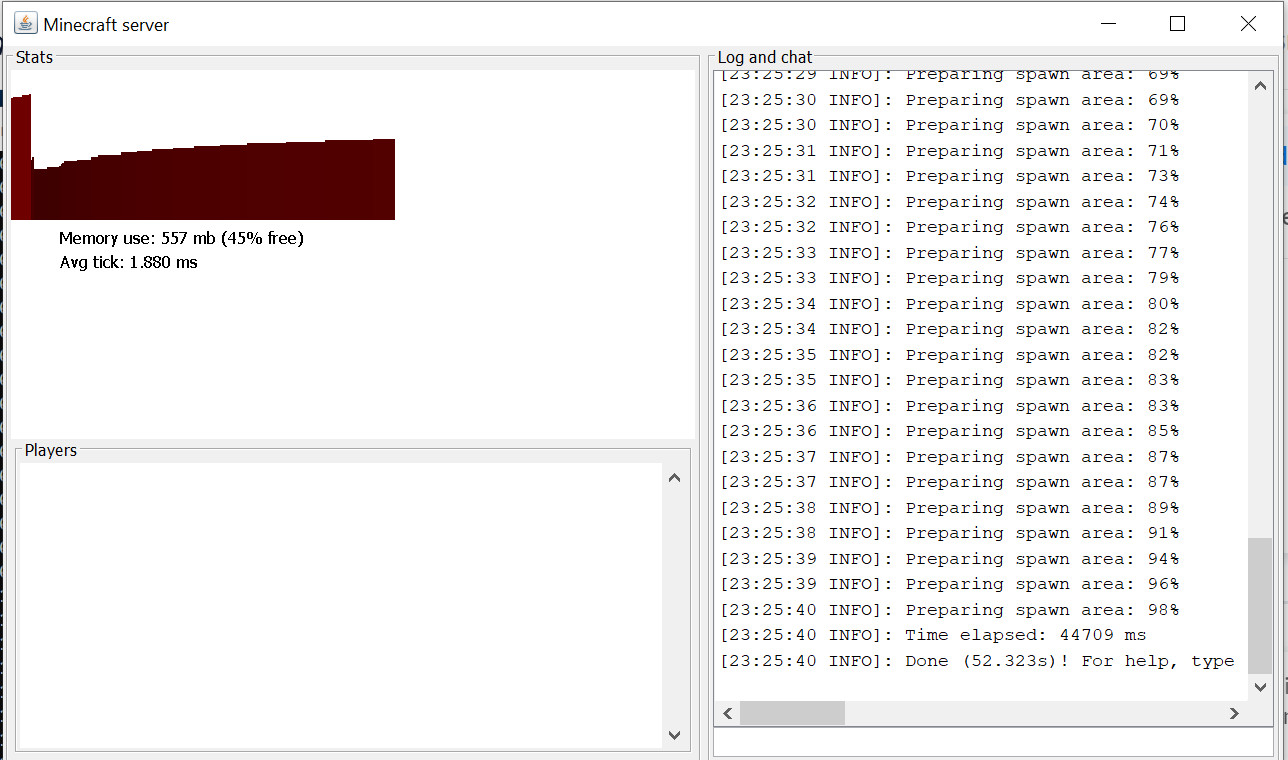 Minecraft server console running on Windows
Running the Server via Command Line (Optional)
For more control and potentially better performance, you can run the server directly from the Command Prompt:
-
Open Command Prompt (as described earlier).
-
Navigate to your server folder: Use the
cdcommand to change the directory to your “Minecraft Server” folder. For example, if your folder is on your Desktop, you might typecd DesktopMinecraft Serverand press Enter. -
Run the server command: Type the following command and press Enter:
java -Xmx1024M -Xms1024M -jar minecraft_server.jar nogui-Xmx1024Mand-Xms1024Mallocate 1GB of RAM to the server. Adjust these values (e.g.,-Xmx2048Mfor 2GB) based on your server’s RAM availability and player count.minecraft_server.jarshould be replaced with the exact name of your server.jarfile if it’s different.noguistarts the server without the graphical user interface, which can save resources.
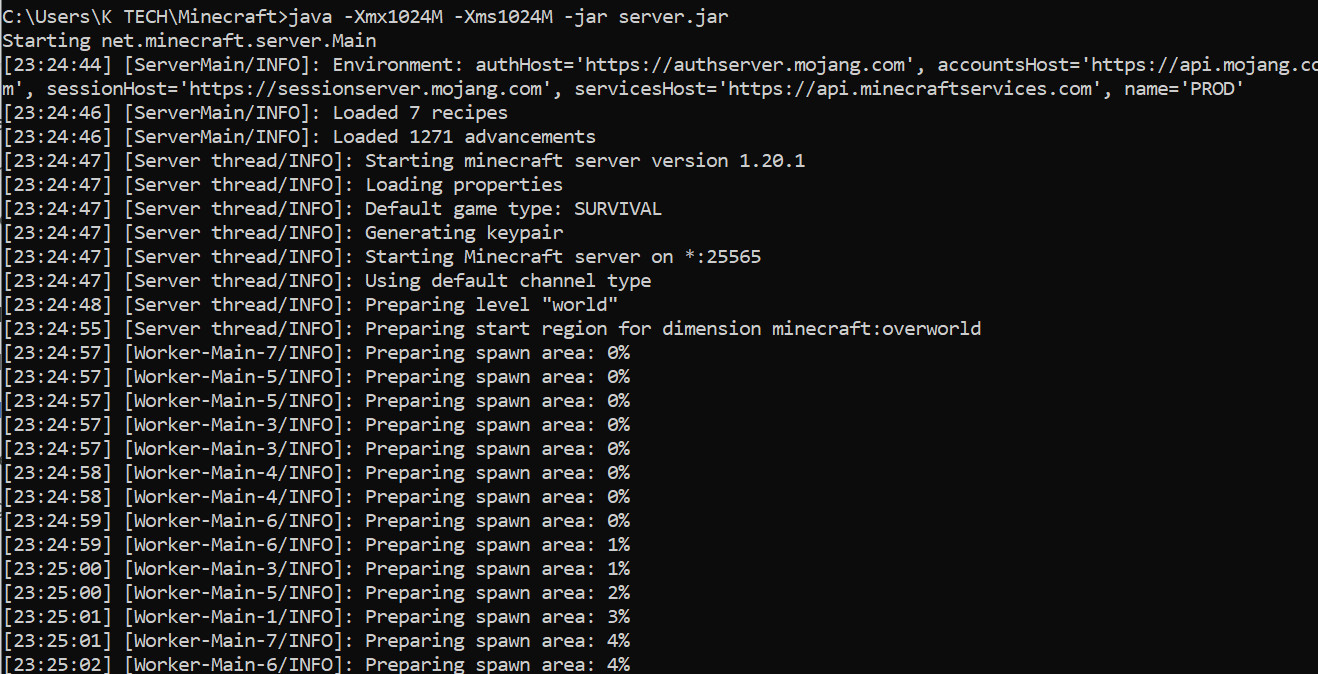 Running Minecraft server via command line
Connecting to Your Minecraft Server and Playing Multiplayer
Once your server is running, you and your friends can connect using the Minecraft server address.
Joining Your Server in Minecraft
- Launch Minecraft: Open the Minecraft game client.
- Click “Multiplayer”: On the main menu, select “Multiplayer”.
- Click “Direct Connect”: Click the “Direct Connect” button.
- Enter Server Address: In the “Server Address” field, type in your Minecraft server address (your IPv4 address if on the same network, or your public IP address/domain name if connecting over the internet).
- Click “Join Server”: Click the “Join Server” button. Minecraft will attempt to connect to your server.
If you’ve followed all the steps correctly, you should now be able to join your Minecraft server and play with others!
Key Considerations When Choosing a Minecraft Server
If you prefer to rent a Minecraft server instead of hosting your own, here are crucial factors to consider when selecting a server hosting provider:
- Uptime: Aim for providers guaranteeing high uptime (99.9% or better) to minimize server downtime and ensure consistent gameplay.
- Player Slots: Choose a plan that accommodates your desired player capacity. Consider your current needs and potential future growth.
- Pricing and Plans: Compare hosting plans and pricing structures. Look for transparent pricing without hidden fees and plans that fit your budget.
- Customer Support: Reliable and responsive customer support is essential. Opt for providers offering 24/7 support via multiple channels (e.g., live chat, email, tickets).
- Server Location: Choose a server location geographically close to your player base to reduce latency (lag) and improve ping times. Many providers offer servers in multiple regions worldwide.
- Hardware and Performance: Inquire about the server hardware specifications (CPU, RAM, storage). Powerful hardware contributes to smoother gameplay, faster loading times, and reduced lag.
- Community and Reviews: Research the provider’s reputation and read reviews from other Minecraft server owners. A strong community and positive reviews are good indicators of a reliable provider.
By carefully evaluating these factors, you can choose a Minecraft server hosting provider that meets your needs and provides an optimal multiplayer gaming experience.
Conclusion
Understanding your Minecraft server address is fundamental to enjoying multiplayer Minecraft. Whether you’re finding your server’s IP to share with friends or connecting to an existing server, this guide has provided you with the necessary knowledge and steps. From locating your IP address using the command prompt to setting up a basic server on Windows, you’re now equipped to dive into the world of Minecraft multiplayer. Remember to explore server hosting options if you desire a more robust and readily available server environment for you and your community. Happy crafting and gaming!