When embarking on Angular application development, a smooth and efficient development environment is paramount. The Angular CLI (Command Line Interface) is indispensable, offering a suite of commands to streamline the development journey. Among these, Ng Serve stands out as a frequently used command. It empowers you to build and serve your Angular application locally, making real-time development and testing seamless.
This article provides an in-depth exploration of the ng serve command, covering its functionalities, options, and best practices to enhance your Angular development workflow.
Understanding ng serve and its Role in Angular CLI
ng serve is a core component of the Angular CLI, a powerful toolkit designed to simplify Angular development. Angular CLI automates repetitive tasks, allowing developers to focus on building features. The ng serve command plays a pivotal role by launching a local development server. This server compiles your Angular application in memory, providing a rapid development cycle for testing and iterative improvements without the need for full production builds.
How ng serve Compiles and Serves Your Angular Application Locally
Upon executing ng serve, the Angular CLI performs the following actions:
- Compilation: It compiles your Angular application’s TypeScript code, HTML templates, and CSS styles. This compilation process transforms these source files into JavaScript, HTML, and CSS that browsers can understand.
- Local Server Launch: It starts a lightweight development server, typically based on Webpack Dev Server.
- Serving Application: The server hosts your compiled application, making it accessible through a web browser, usually at
http://localhost:4200. - Live Reloading:
ng serveincorporates a live-reloading feature. This means that whenever you save changes to your application code, the server automatically recompiles the necessary modules and refreshes your browser, reflecting the updates instantly. This live feedback loop significantly accelerates development.
ng serve vs. ng build: Key Differences
While both ng serve and ng build are Angular CLI commands for building your application, they serve distinct purposes:
- ng serve: Designed for development. It compiles and serves your application from memory with optimizations geared towards development speed and ease of debugging. It does not generate production-ready output files on disk.
- ng build: Used to prepare your application for deployment. It compiles your application and outputs optimized, production-ready files to the
/distdirectory within your project.ng buildoffers various flags to customize the build process for different deployment scenarios.
To illustrate ng serve in action, let’s first create a new Angular application:
ng new my-angular-app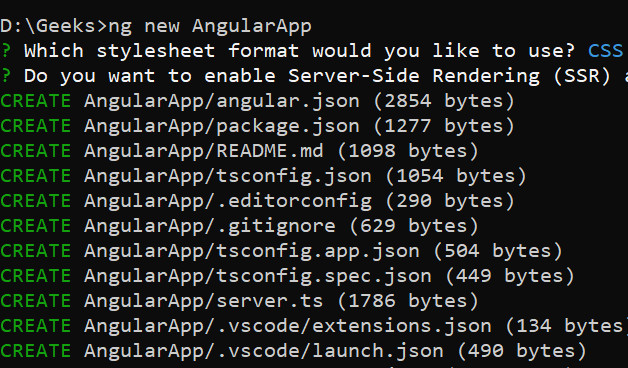 Creating a new Angular project using ng new command in the terminal
This command sets up a basic Angular project structure with all necessary configurations and dependencies.
Basic Usage of ng serve
The most fundamental way to start your Angular application using ng serve is by simply running the command in your project’s root directory:
ng serveThis command initiates the development server with default settings:
- Host:
localhost - Port:
4200 - Live reloading: Enabled
You can then access your application in your web browser by navigating to http://localhost:4200.
 Terminal output demonstrating ng serve command with successful compilation and local server start
Customizing ng serve Options
ng serve offers a range of options, also known as flags, to tailor its behavior to your specific development needs. Here are some of the most commonly used options:
Specifying a Port Number
To run your application on a different port than the default 4200, use the --port flag:
ng serve --port 8080This command will start the server on port 8080, and you can access your application at http://localhost:8080.
Terminal output demonstrating ng serve command with specified port 4201
Specifying a Host Name
To change the host name, use the --host flag. For instance, to make your application accessible from other devices on your local network, you can use 0.0.0.0 as the host:
ng serve --host 0.0.0.0This binds the server to all network interfaces, making it accessible via your machine’s IP address on the specified port.
Terminal output demonstrating ng serve command with host 0.0.0.0
Specifying an Environment Configuration
Angular CLI allows you to define different environment configurations (e.g., development, production, staging). To serve your application using a specific configuration, use the --configuration flag:
ng serve --configuration=productionThis command would use the configurations defined in your angular.json file under the production configuration. Typically, the production configuration applies optimizations like minification and ahead-of-time (AOT) compilation.
Automatically Opening the Browser
For convenience, you can instruct ng serve to automatically open your application in your default web browser when the server starts using the --open flag (or -o for short):
ng serve --openTerminal output showing ng serve command with the –open flag, automatically launching the browser
Disabling Live Reload
In certain scenarios, you might want to disable the live-reloading feature. You can do this with the --live-reload flag set to false:
ng serve --live-reload=falseWith live reload disabled, you will need to manually refresh your browser to see changes after code modifications.
Terminal output showing ng serve command with live reload disabled
Ahead-of-Time (AOT) Compilation
Ahead-of-Time (AOT) compilation compiles your Angular application during the build process, before the browser downloads and runs it. AOT compilation can improve application performance. To use AOT compilation with ng serve, use the --aot flag:
ng serve --aotWhile AOT is primarily beneficial for production builds, using it during development can help you catch potential compilation errors earlier.
Serving a Specific Application in a Multi-App Workspace
If you are working within an Angular workspace that contains multiple applications, you need to specify which application to serve. You can do this by providing the project name as an argument to the ng serve command:
ng serve my-app-nameReplace my-app-name with the actual name of your Angular application as defined in your angular.json file.
Terminal output showing ng serve command with a specific project name in a multi-app workspace
Understanding the Default Development Server
The development server provided by ng serve is configured for an optimal development experience:
- Default Host and Port: It runs on
localhostand listens on port4200by default. - Live Reloading: It automatically refreshes the browser whenever code changes are detected, providing instant feedback.
- Development Mode: It serves the application in development mode. This enables features like detailed error messages in the browser console and source maps, which simplify debugging.
Advanced Options and Flags
ng serve includes additional flags for more advanced control:
-
--open(or-o): As discussed, opens the application in the default web browser.ng serve --open -
--watch: Enables or disables file watching. File watching is enabled by default, allowing live reloading. To disable it:ng serve --watch=false -
--prod: Serves the application using the production configuration. This is similar to--configuration=productionbut also implies other production-related defaults. It’s generally recommended to use--configuration=productionfor clarity.ng serve --prod
Optimizing ng serve for Development
While ng serve is already optimized for development, you can further enhance your development workflow:
-
Hot Module Replacement (HMR): HMR significantly speeds up development by replacing only the modules that have changed without requiring a full page reload. This preserves the application state and provides a near-instantaneous update experience. Enable HMR with:
ng serve --hmr -
Build Caching: Angular CLI leverages build caching to improve rebuild times. Ensure build caching is enabled in your
angular.jsonconfiguration for faster development iterations. -
File Watching Customization: For very large applications, you might explore options to customize file watching settings if you encounter performance bottlenecks. However, for most projects, the default settings are sufficient.
Best Practices for Using ng serve
- Utilize ng serve for Local Development:
ng serveis your primary tool for local Angular development. Leverage its live reloading and development-optimized environment for rapid iteration. - Use ng build for Deployment Builds: When you need to create a deployable version of your application, use
ng buildorng build --configuration=production. These commands generate optimized, production-ready output. - Integrate with Development Workflows and IDEs:
ng serveworks seamlessly with popular IDEs and development workflows. Many IDEs offer integrations that automatically detect and runng servetasks, further streamlining your development process.
By mastering ng serve and its options, you can establish a highly efficient Angular development environment, accelerating your development cycles and improving your overall productivity.