Are you tired of endless group chats that are impossible to follow? Does your friend group have so many side conversations it feels like you need a separate chat for each topic? Or perhaps you’re just looking for a better way to connect with your community online? If any of this sounds familiar, then you need a Discord server! Discord servers offer a fantastic way to organize conversations, build communities, and connect with friends, all in one place. This guide will walk you through exactly How To Start A Discord Server, even if you’ve never used Discord before.
What Exactly is a Discord Server?
You might have heard the term “Discord server” thrown around, but what does it really mean? In simple terms, a Discord server is a dedicated space within the Discord platform where groups of people can communicate. Think of it as your own private online clubhouse.
Imagine this: a Discord server is like inviting all your friends to your home for a hangout. In different rooms of your house, different conversations are happening. Some friends might be in the living room discussing the latest movie releases, while others are in the kitchen sharing recipes and cooking tips.
 Friends happily chatting and laughing together in a cozy living room, representing the feeling of community in a Discord server.
That’s essentially how a Discord server works. People from anywhere in the world can join your server and connect with each other based on shared interests, friendships, or community goals. It’s a place to chat, share, and build relationships, all within a structured and organized environment.
So, are you ready to create your own digital home for your friends or community? Let’s dive into the steps on how to start your very own Discord server!
Step-by-Step Guide: Creating Your First Discord Server
Starting a Discord server is surprisingly easy and takes just a few minutes. Here’s a step-by-step guide to get you up and running:
Downloading and Accessing Discord
First things first, you’ll need to access Discord. You have a few options:
- Download the Discord App: For the best experience, download the desktop or mobile app. You can find the download links at discord.com/download. The app offers the most features and a seamless user interface.
- Use Discord in Your Web Browser: If you prefer not to download anything, you can access Discord directly in your web browser at discord.com/login. This is a convenient option for quick access or if you’re on a shared computer.
Once you’ve chosen your access method, you’ll need to create a Discord account or log in if you already have one.
Initiating Server Creation
Once you’re logged into Discord, look to the left-hand side of the application. You’ll see a vertical bar with icons, including a green “+” (Plus) button at the bottom. This is your gateway to creating a new server. Click that button to begin the server creation process.
Choosing a Server Template
Discord will then ask you “Create a server.” You’ll be presented with options to: “Create My Own” or “Choose a template”. Templates offer pre-set channels and categories based on the type of server you want to create.
For simplicity, and for a general friend group server, let’s choose “Create My Own”. On the next screen, you can choose between “For me and my friends” or “For a club or community”. Select whichever best describes your intended server.
 Animated GIF showing the process of selecting the "Create My Own" option when creating a Discord server.
For this guide, we’ll proceed with “For me and my friends”. Feel free to explore other templates if they better suit your needs.
Naming Your Server
Now comes the fun part: naming your server! Think of a name that reflects the purpose or theme of your server. Since our example is for friends who love houseplants, let’s call it “Plant Pals.”
You’ll also have the option to upload a server icon. This icon will be visible to everyone in the server and helps to visually identify your community. You can use an image related to your server’s theme or a fun group photo.
Remember, you can always change the server name and icon later if your interests evolve or you decide to rebrand.
Server Creation Confirmation
Click “Create” and just like that, your new Discord server is ready! You’ll be taken to your server’s main page, which will likely include default text and voice channels, depending on the template you chose (or if you selected “Create My Own”, you’ll have a general text and voice channel).
Congratulations! You’ve successfully started a Discord server. But a server is no fun without people, so let’s learn how to invite your friends.
Inviting Friends to Your Discord Server
With your new digital space created, it’s time to invite your friends to join the fun. Discord offers a couple of easy ways to invite people:
Using the “Invite Your Friends” Button
The most straightforward way to invite friends is by using the prominent “Invite Your Friends” button located in the middle of your server’s channel list when you first create it. Clicking this button will bring up a window where you can:
- Invite Discord Friends Directly: If you’re already friends with people on Discord, their names will appear in a list. Simply click the “Invite” button next to their names to send them a direct invitation.
- Create an Invite Link: You can also create a server invite link that you can share via text, email, social media, or any other platform. This link will allow anyone who clicks it to join your server.
Using the Server Drop-Down Menu
If you don’t see the “Invite Your Friends” button, or if you want to invite more people later, you can always access the invite option through the server drop-down menu.
- Click on your server’s name located at the top-left corner of the Discord window. This will open the server drop-down menu.
- Select “Invite People.” This will open the same invite window as the “Invite Your Friends” button.
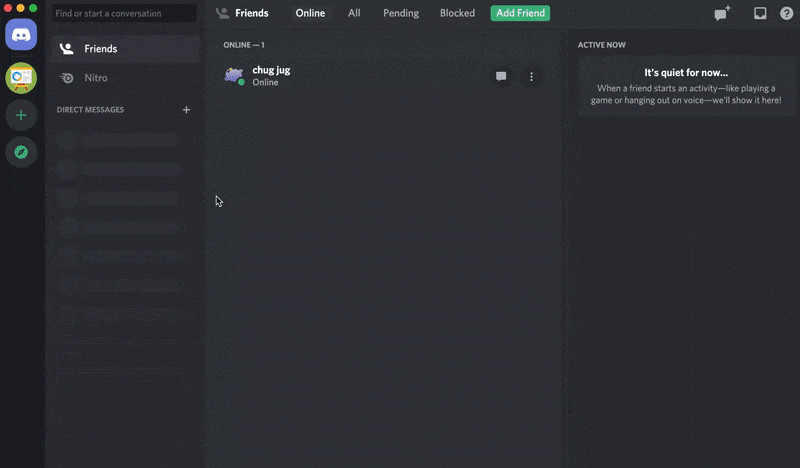
 Animated GIF demonstrating how to invite friends to a Discord server using the server drop-down menu.
Invite Link vs. Direct Invites
- Invite Links: These are great for sharing your server with a wider audience or posting on public platforms. You can set the link to expire after a certain period or number of uses for added security.
- Direct Invites: Ideal for inviting people you already know on Discord. It’s a more personal and direct way to bring friends into your server.
Once you’ve sent out your invites, get ready to welcome your friends to your new Discord home!
Understanding Text and Voice Channels
Now that you have a server and know how to invite friends, let’s explore the core components of a Discord server: Text Channels and Voice Channels. These channels are the rooms within your digital clubhouse where conversations happen.
Text Channels: Your Digital Hangout Spots
Text channels are exactly what they sound like: spaces for text-based communication. They function similarly to group chats on other platforms, but with more organization and features. In text channels, you can:
- Send messages: Chat with your friends in real-time.
- Share photos and files: Easily share images, documents, and other files directly within the channel.
- Use mentions: Directly notify specific members by typing “@” followed by their username (e.g., “@Fern”). They’ll receive a notification that they’ve been mentioned.
Each text channel has a specific name that indicates its topic or purpose. Think of channel names as conversation starters. For example:
- #general: A default channel for general chatter, announcements, and off-topic conversations.
- #plant-talk: A dedicated channel for discussing all things related to plants, sharing care tips, and showing off your latest blooms.
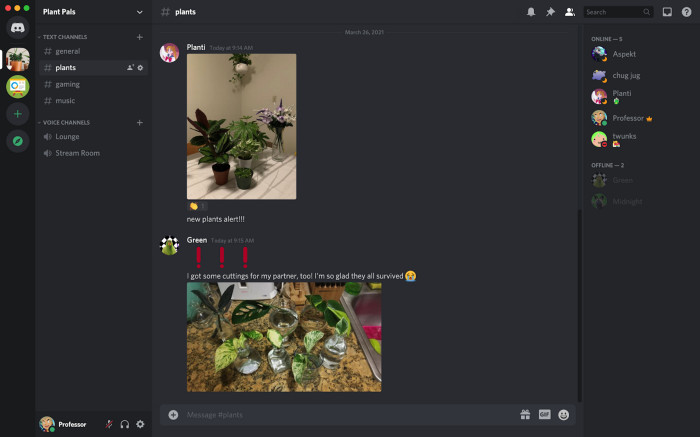 Screenshot of a Discord text channel named "#plant-talk" with messages about plants, illustrating a focused conversation topic within a Discord server.
By default, text channels are visible to everyone in the server, making it easy for everyone to participate in the conversations they’re interested in. This structured approach is a huge advantage over chaotic group DMs, where conversations can easily get lost and overwhelming.
Voice Channels: Virtual Gathering Rooms
Voice channels are a unique and powerful feature of Discord that truly brings the “server as a home” analogy to life. They enable real-time voice communication and create a sense of presence and community.
When you click on a voice channel, you instantly join a virtual room where you can talk to other people who are also in that channel using your device’s microphone. Unlike traditional phone calls or video calls, joining a voice channel doesn’t “ring” or disturb other users. It’s like walking into a room and seamlessly joining an ongoing conversation.
 Animated GIF of lemons playfully interacting, symbolizing the fun and spontaneous nature of voice conversations in Discord voice channels.
Voice channels also offer video and screen sharing capabilities:
- Video Chat: Turn on your camera to have face-to-face video conversations with friends directly within the voice channel.
- Screen Sharing: Share your screen to show friends your gameplay, presentations, or even your intricate plant watering schedule!
Discord voice channels can accommodate a large number of participants:
- Unlimited voice call participants.
- Up to 25 people in a video chat simultaneously.
- Up to 50 people can watch a screen share.
Voice channels are perfect for casual hangouts, gaming sessions, study groups, virtual meetings, and any situation where real-time audio or visual communication is beneficial.
Managing Channels: Adding, Removing, and Customizing
As your server grows and your community’s needs evolve, you’ll likely want to customize your channels. Discord makes it easy to add new channels, remove old ones, and tailor your server’s structure.
Creating New Channels
Adding a new channel is simple and can be done in a few clicks:
- Access the Server Drop-Down Menu: Click on your server’s name at the top-left corner.
- Select “Create Channel.”
- Choose Channel Type: You’ll be prompted to choose between “Text Channel” or “Voice Channel.”
- Name Your Channel: Enter a descriptive name for your new channel. For our “Plant Pals” server, let’s create a text channel called “#plants” for general plant discussions.
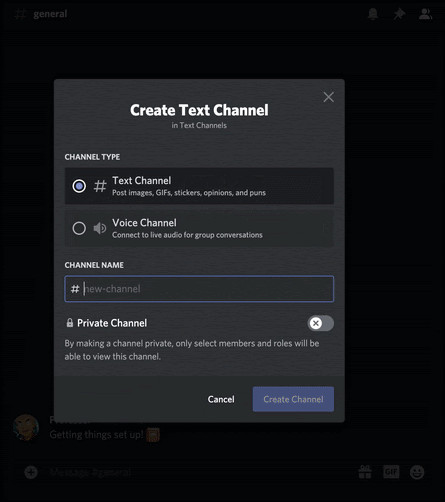 Animated GIF showing the steps to create a new text channel named "#plants" in a Discord server.
Click “Create Channel,” and your new channel will instantly appear in your server’s channel list.
Channel Naming Conventions
When naming channels, aim for clarity and conciseness. Use short, descriptive names that clearly indicate the channel’s topic. Using lowercase letters and hyphens (e.g., “#plant-care-tips”, “#general-chat”) is a common practice in Discord.
How Many Channels is Too Many?
When starting out, it’s best to keep the number of channels manageable. Overwhelming your server with too many channels right away can be confusing for new members.
Start with a few essential channels and observe how your community uses them. You can always add more channels as needed. For our “Plant Pals” example, “#plants” is a broad topic. While you could create more specific channels like “#fern-care” or “#succulent-advice,” it’s often better to start with a broader channel and see if the need for more specific ones arises organically.
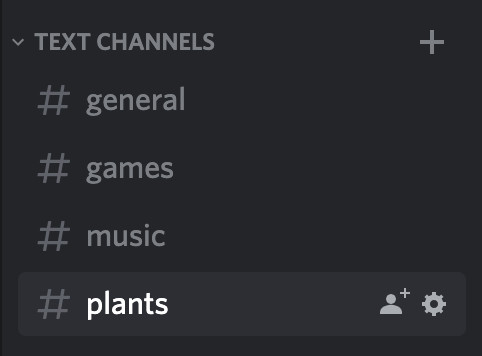 Image with text advising to start with a small number of Discord channels and expand as needed, emphasizing simplicity and avoiding channel overload.
Discord servers are flexible. You can easily add new channels at any time without needing to re-invite your members. You can also delete channels that are no longer needed. However, be cautious when deleting channels, as all messages and content within a deleted channel are permanently gone. Sometimes, keeping an inactive channel around is better than deleting it outright, just in case you need it again in the future.
Private Channels: For Exclusive Conversations
Sometimes, you might want to create channels that are only visible and accessible to specific members of your server. This is where Private Channels come in handy.
Private channels are ideal for:
- Moderator-only discussions.
- VIP or subscriber-only content.
- Small group projects or collaborations.
- Sensitive or private conversations.
Creating Private Channels
When creating a new channel, you’ll see an option to make it a “Private channel”.
- Toggle the “Private channel” option ON during channel creation.
- Select Members & Roles: After toggling private, you’ll be prompted to select the specific members or roles who should have access to the channel.
 Animated GIF demonstrating how to create a private Discord channel and select specific members to access it.
Only the members and roles you select will be able to see and participate in the private channel.
Managing Permissions for Private Channels
You can adjust the permissions for private channels at any time:
- Right-click on the private channel (or long-press on mobile).
- Select “Edit Channel.”
- Navigate to the “Permissions” tab. Here, you can add or remove members and roles, and customize their specific permissions within the channel.
Conclusion: Your Discord Server Awaits!
You’ve now learned the essentials of how to start a Discord server and how to customize it to fit your needs. From creating channels to inviting friends and understanding the power of voice communication, you’re well-equipped to build your own thriving online community.
So go ahead, create your server, invite your friends, and start connecting! Whether you’re using it for casual hangouts, gaming sessions, or building a passionate community around a shared interest, your Discord server is what you make it. Explore the features, experiment with channels, and most importantly, have fun!
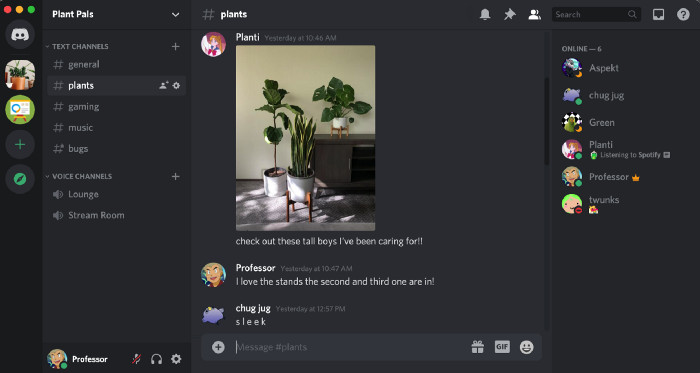 Image with text praising the sleekness of a Discord server, encouraging users to create their own and enjoy the platform.
If you found this guide helpful, share it with anyone who could benefit from learning how to start a Discord server! And if your server grows and you’re looking for more advanced tips on community building, be sure to check out resources like Best Practices for Starting a Great Community on Discord.
For further in-depth questions and troubleshooting, Discord’s official Help Center is always available. You can also reach out to the Discord team on Twitter at @discord for quick tips and support. Happy server creating!